Author: bloomingglenfarm

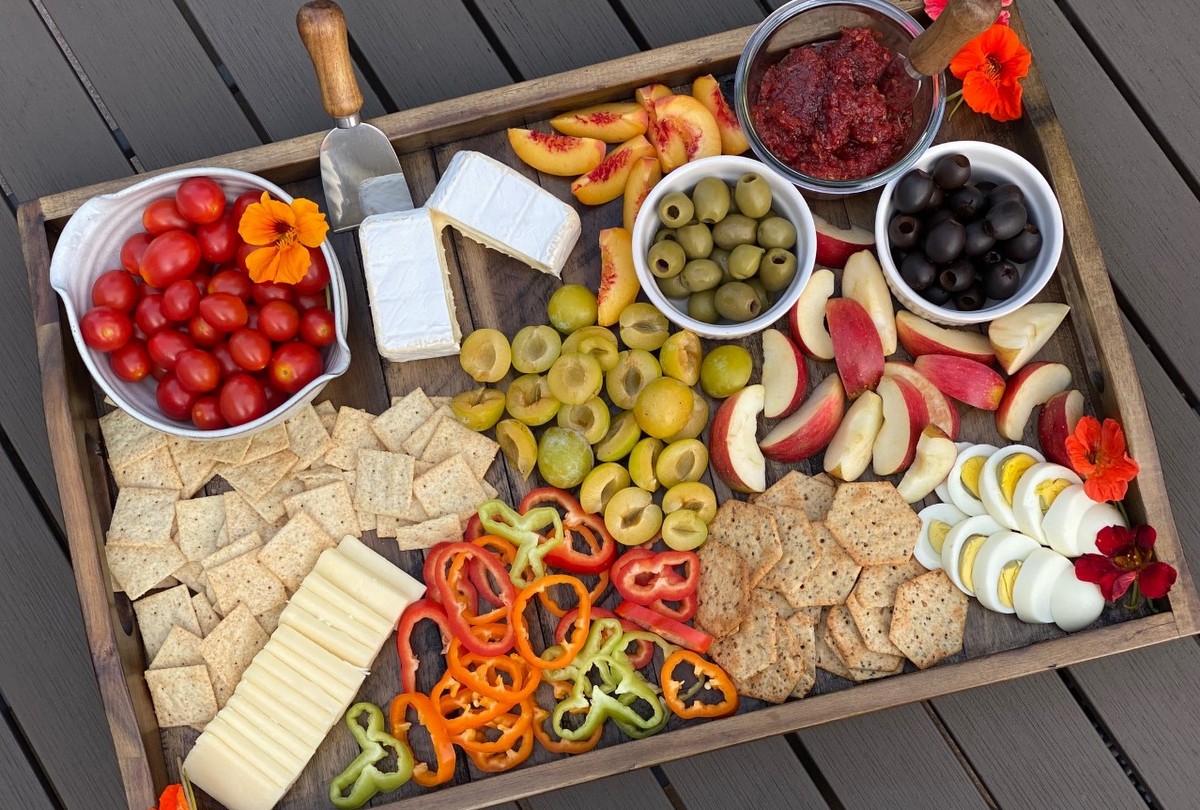
Charcuterie Board, Snack Board, Food Board, Grazing Board…. whatever you want to call it! … a board or platter filled with delicious food is great for breakfast, lunch, dinner or even just a snack or appetizer.  It works for a small family, a couple, or even a big party.  Snack boards are adjustable, easy to throw together, and appeal to all ages.  With all of the beautiful food we have available at the CSA this season, I thought it would be fun to dedicate a post to the presentation of these foods in the style of boards or platters.

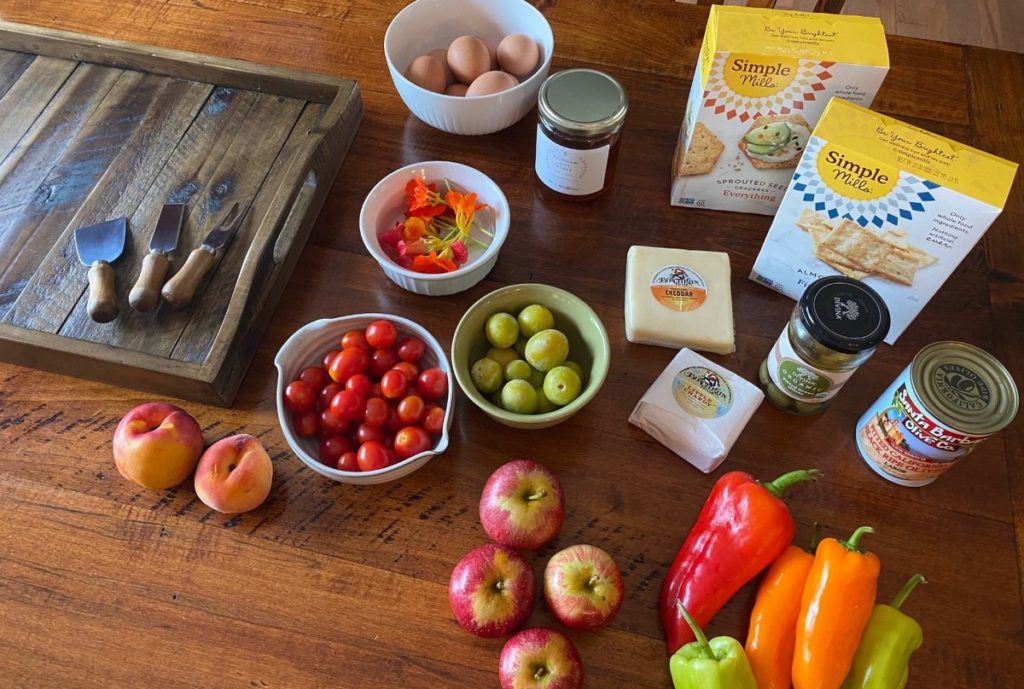
Creating a board is a very easy way to showcase the fruits and vegetables we receive each week.   Do you get the cheese share?  If so, what a perfect addition that would be.  How about the mushrooms?  Marinate or roast them and add to the platter.  What about the egg share?  Hard boil a few and slice them up to add to a board.

Here are a few ideas of ways to incorporate grazing boards…

  • Create a board for an at home date night. Pair with your favorite cocktail or glass of wine.
  • Make a snack board to serve to your children during virtual schooling.
  • Are you celebrating something special- perhaps a birthday, anniversary, award, or work achievement? Do it with a snack board.
  • Watching a sporting event on television- create a board to graze on while enjoying the game with your family.
  • Are you having a family movie night or game night? Create a board that can be snacked on throughout the evening.
  • Make a food board to celebrate a milestone in your children’s lives and pair with fresh lemonade or sun tea.


Why should you make a snack board or food platter?

  • It’s a way to share, connect, and enjoy spectacular food together.
  • It’s a fun way to liven up our pandemic era eating experience with our family!
  • Boards are fun to create and look at.
  • They can totally be a work of art, a creative way to serve food- providing different colors, textures, shapes, and flavors.
  • Boards provide lots of different choices.
  • Generally they don’t require cooking or very minimal cooking.
  • It’s a different way to serve food. Experiment and see what happens when you display food on a board instead of the usual serving dishes.
  • They can be made in advance so that you can enjoy the snack or meal together.
  • Boards offer lots of variety so that it is appealing to everyone- no matter what their choice of diet is and no matter what their age is.


Steps to creating a great board:

1. SELECT BOARD

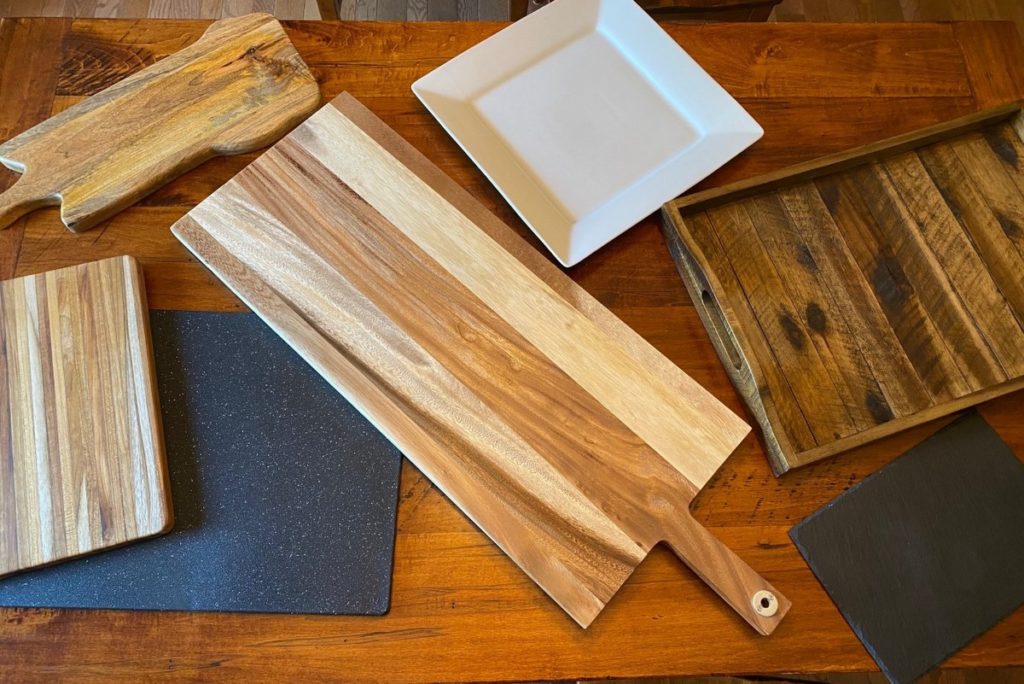
Select your board or platter.  Think about how many people you will be serving.  This will help determine the size of your board.   You can use all sorts of materials- wood, marble, slate, stone, etc.  You can use an old cutting board, a large serving dish, or an antique tray.  You don’t need anything special.  Just a flat surface that will hold everything and display it all.
2. GATHER INGREDIENTS

The great thing about this is you can use what you have on hand- in your pantry, refrigerator, or freezer- or you can shop for specific items.

  • Vegetables- fresh vegetables, marinated vegetables, fermented or pickled vegetables, roasted vegetables
  • Fruit- fresh fruit, dried fruits
  • Nuts and Seeds
  • Breads, Crackers, Pretzels, Chips
  • Cheeses- hard cheeses, soft cheeses, cheese spreads, vegan cheeses
  • Spreads, Dips, Jams/Chutneys, Honey, Nut Butters, Mustards
  • Meats- thinly sliced
  • Other options- olives, chocolate

3. ASSEMBLE BOARD

You can keep it simple or get fancy and creative. If you are using any spreads or items that need to go in a bowl, do that first.  Place those on the board and then slowly add other items.  It’s a good idea to start with your largest items first so that you can work through the space you have.  Generally try to keep items on the platter bite size.

4. ADD UTENSILS

If you are keeping cheeses whole, you will want a small knife.  For dips and jams, you will want a small spoon.  Provide a small knife/spreader for spreads.  Make sure you have a utensil for each item that will need it.  You don’t want to put out one spoon and use it for all the spreads and jams.  Provide one knife for each cheese and one spoon for each jam.

5. GARNISH

Add fresh herbs or edible flowers if you want, but this is totally optional.

6. RELAX AND ENJOY
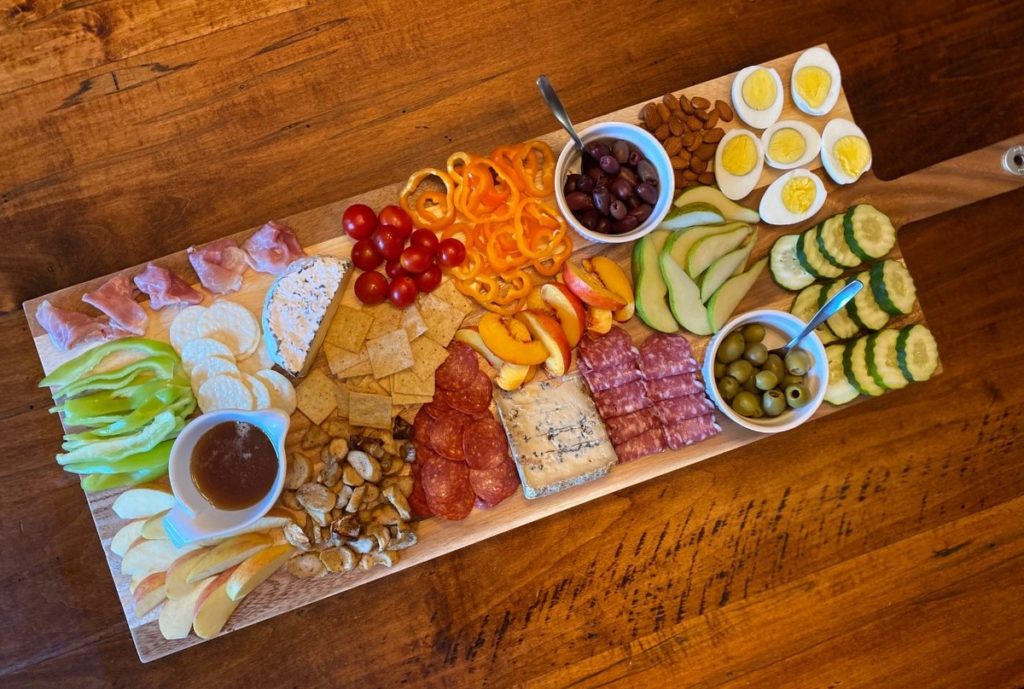
Think of a board as a blank canvas for you to display a snack or even a meal.  Take the beautiful produce we receive from Blooming Glen Farm, the fruit from North Star Orchard, the cheese from Valley Milkhouse or Birchrun Hills Farm, the eggs from Deep Roots Valley Farm, the mushrooms from Primordia Mushroom Farm, the honey from Heirloom Acres Honey and combine it all on a platter that showcases the amazing food we receive each week.  Create a grazing board, take a photo, post, and tag us (@bloomingglenfarm and @truyouessentials).  We cannot wait to see all of the platters you make!

The following past recipe posts would make a great addition to any board:

Tomato Jam- https://www.bloomingglenfarm.com/tomato-jam/

Ground Cherry Jalapeno Jam- https://www.bloomingglenfarm.com/ground-cherries-3-ways-jam-marinade-chocolate-covered/

Fresh Dill Vegetable Dip- https://www.bloomingglenfarm.com/vegetable-crudite-with-fresh-dill-dip/

Roasted Eggplant Dip- https://www.bloomingglenfarm.com/roasted-eggplant-dip/

Refrigerator Pickles- https://www.bloomingglenfarm.com/cucumber-salad-refrigerator-pickles/

Veggie Chips- https://www.bloomingglenfarm.com/veggie-chips/

Roasted Vegetable Chutney- https://www.bloomingglenfarm.com/grilled-tomatillo-salsa-and-roasted-vegetable-chutney/

Lemon Dill Hummus- https://www.bloomingglenfarm.com/fresh-herb-ideas-lemon-dill-hummus-or-basil-salt/

Butternut Squash Hummus- https://www.bloomingglenfarm.com/butternut-squash-hummus/

Fresh Chopped Salsa- https://www.bloomingglenfarm.com/fresh-chopped-salsa/

Recipe and photos by Stephanie Borzio.  Stephanie is a mom of three active boys and is an autoimmune warrior.  After battling her own health for several years, Stephanie found healing through food and lifestyle changes, including joining Blooming Glen Farm CSA of which she is a long time member.  She is a Board Certified Integrative Nutrition Health Coach who is passionate about sharing healthy living tips and real food recipes.  Instagram and Facebook: Tru You Essentials

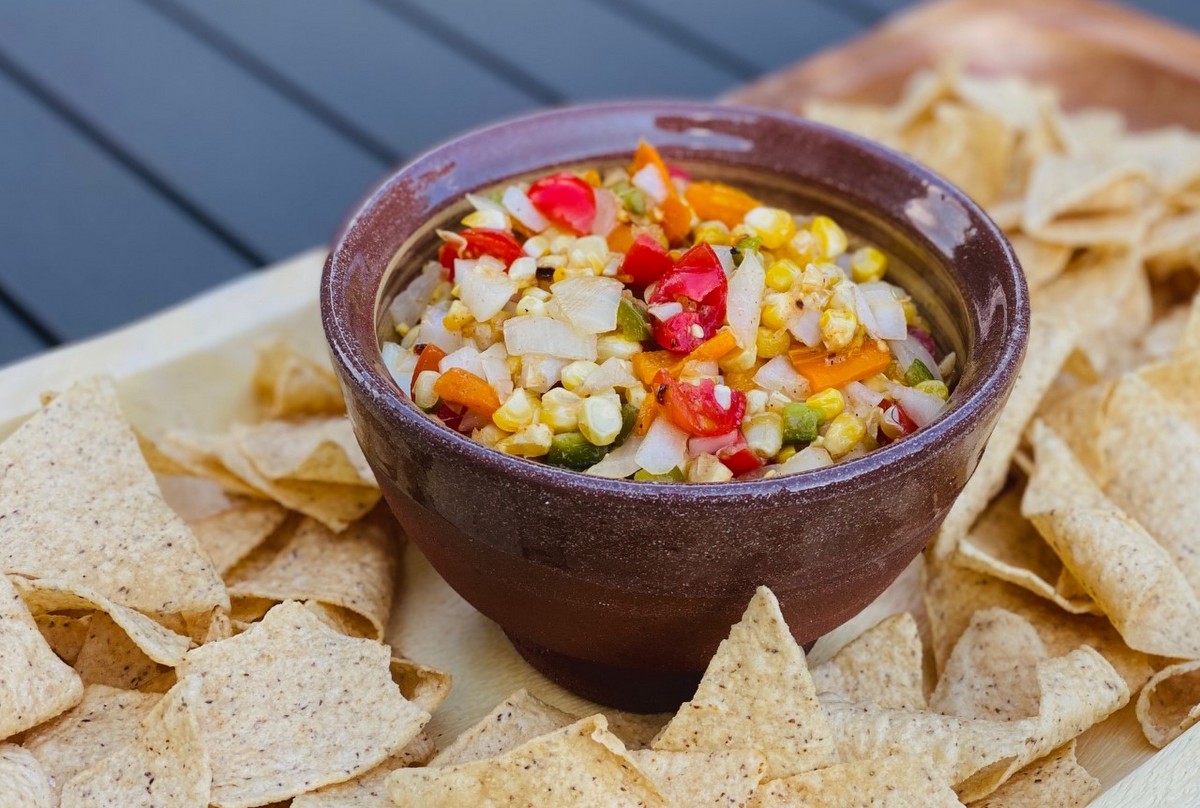
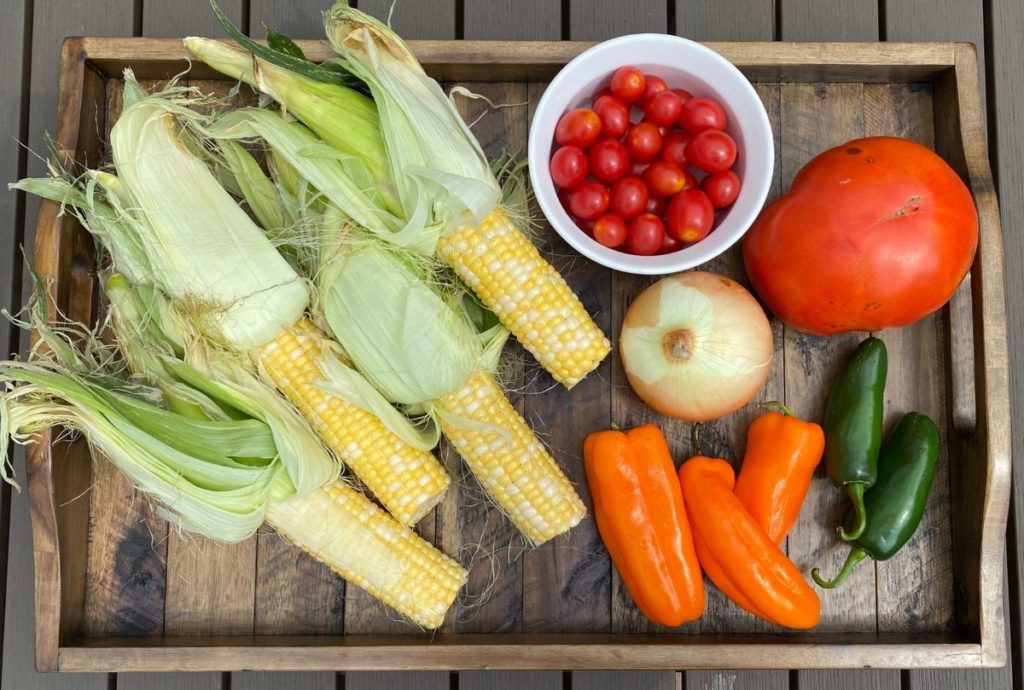
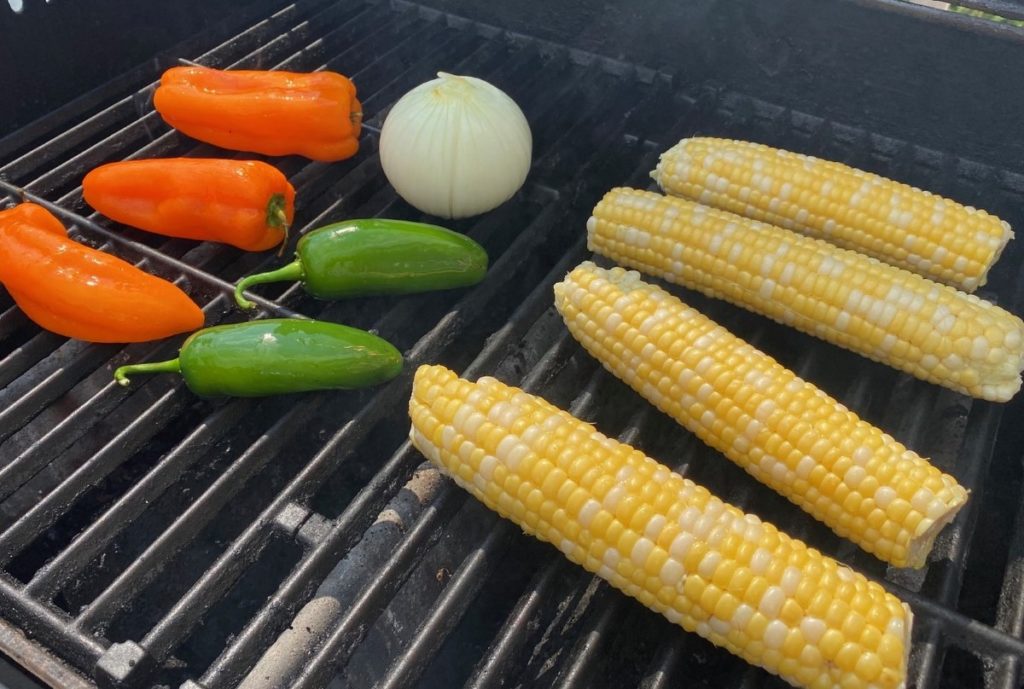
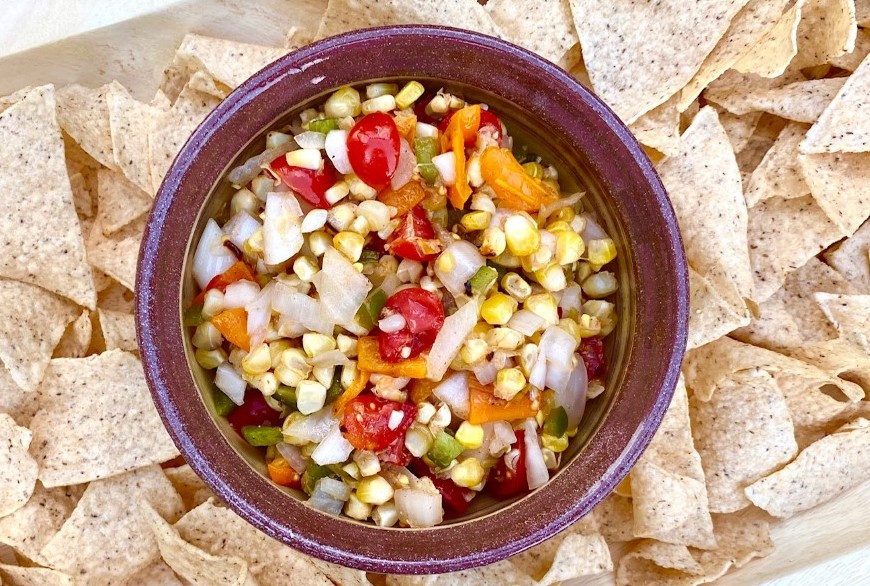
The organic sweet corn we have been receiving has been a wonderful addition to our CSA shares.  While it is fantastic just grilled or boiled and served as a side, it also makes a great addition to salsa.  Pair it with some peppers, onions, and tomatoes and it becomes a tasty appetizer or a great topping for fish or chicken.

Grilled Corn Salsa

Ingredients:
4 ears corn
1 medium onion
2 jalapeno peppers
2-3 sweet peppers


5 Tbsp olive oil, divided
1 cup tomatoes, chopped **
3 Tbsp lime juice
2 Tbsp apple cider vinegar
¼ tsp chili powder
½ tsp sea salt
¼ tsp black pepper
½ tsp garlic powder

  • Peel corn and remove silk. Remove skin from onion and cut off top and bottom.
  • Rub 2 Tbsp olive oil on corn, jalapeno peppers, sweet peppers, and onion.
  • Heat grill to 375-400°F.

  • Grill the corn, jalapeno peppers, sweet peppers, and onion. Rotate produce every few minutes.  Remove jalapeno peppers, sweet peppers, and onion after 8-9 minutes of cooking.  Remove corn after 20 minutes of cooking.
  • Let vegetables cool.
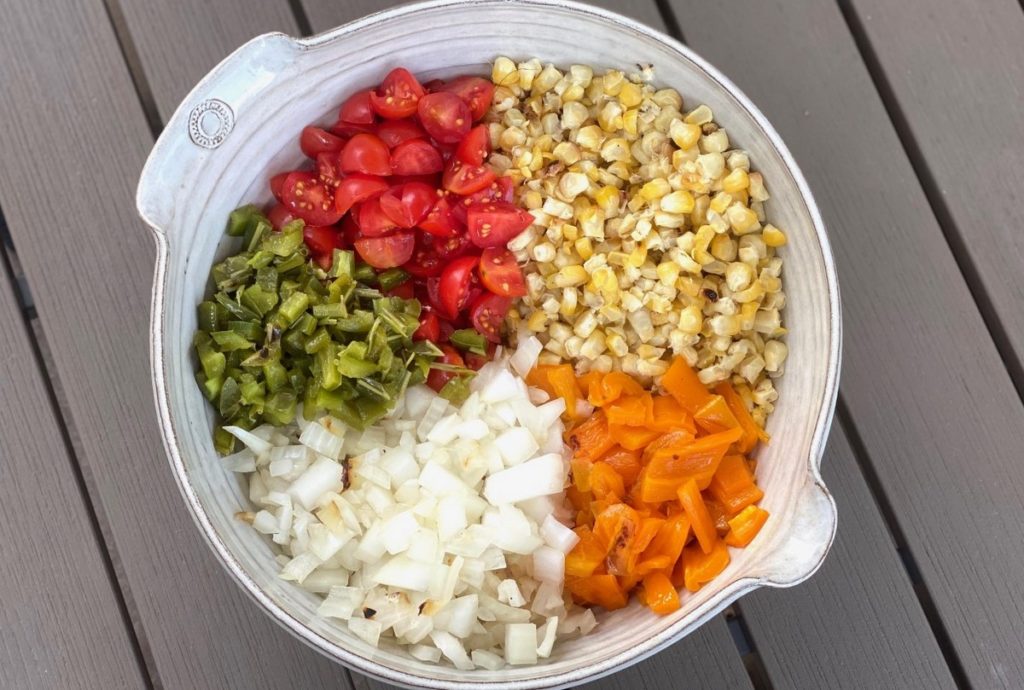
  • Remove corn kernels from husks and place in large bowl. Remove seeds and stems from sweet peppers and jalapeno peppers.  Chop peppers and place in bowl.  Dice onion and place in bowl.  Add tomatoes to bowl and mix.

  • Mix lime juice, apple cider vinegar, 3 Tbsp olive oil, and spices in small bowl. Mix well and pour over vegetables.
  • Allow to marinate at least 30 minutes before serving.
  • Store in the refrigerator for up to a week.
  • Serve with chips or pair with a chicken or fish dish.

**You can use any kind of tomato for this recipe- beefsteak, Roma, heirloom, or cherries.

Recipe and photos by Stephanie Borzio.  Stephanie is a mom of three active boys and is an autoimmune warrior.  After battling her own health for several years, Stephanie found healing through food and lifestyle changes, including joining Blooming Glen Farm CSA of which she is a long time member.  She is a Board Certified Integrative Nutrition Health Coach who is passionate about sharing healthy living tips and real food recipes.  Instagram and Facebook: Tru You Essentials

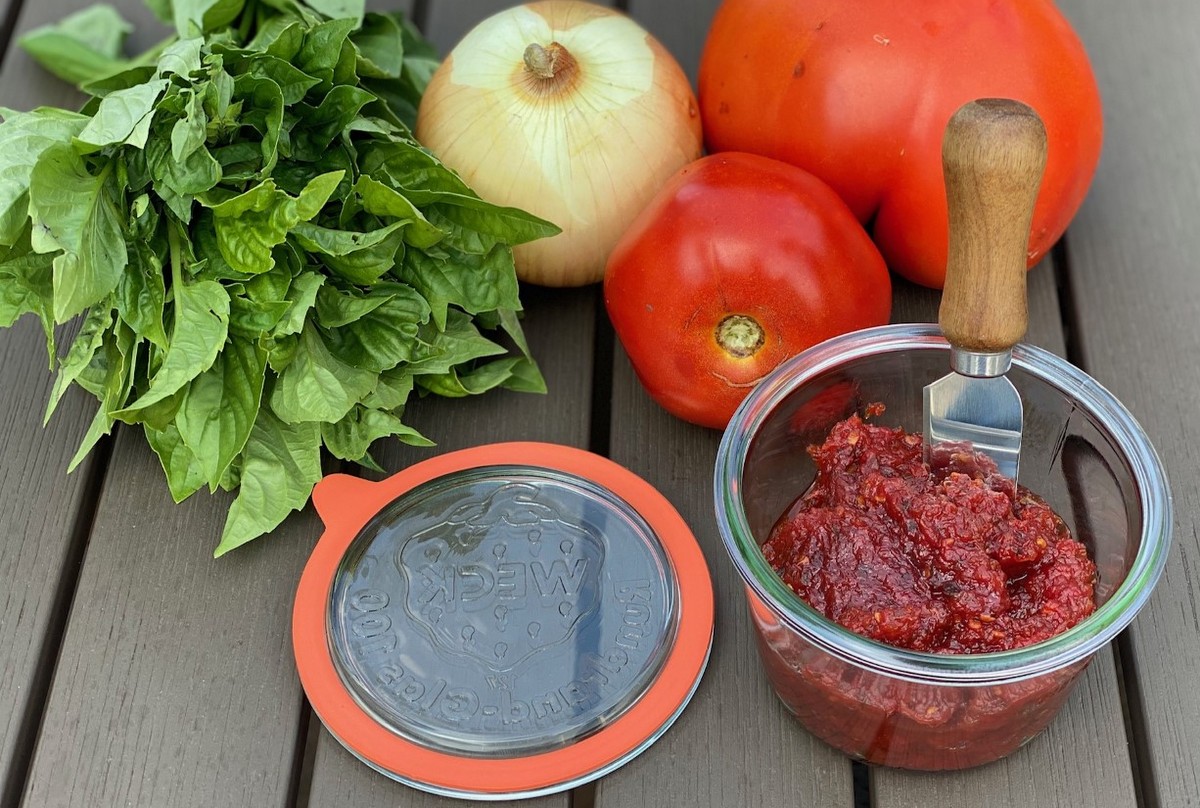
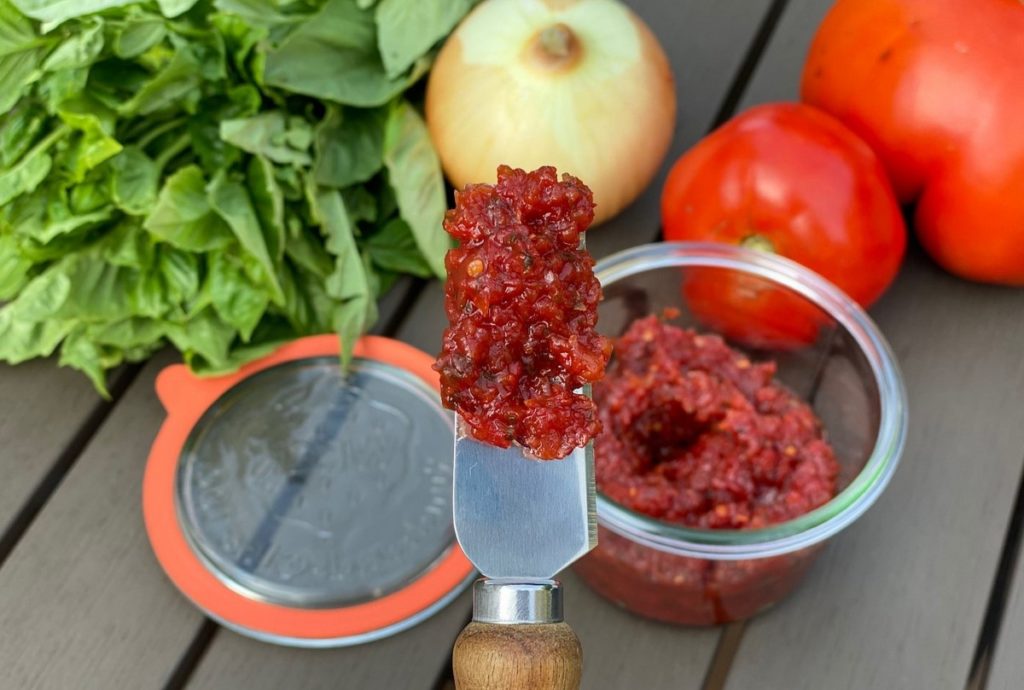
Nothing says summer like a ripe juicy tomato!  Eating a handful of cherry tomatoes is one of my favorite snacks and fresh tomato salads are always a welcome addition to our dinner table.  But I wanted to create something different that showcased the beautiful tomatoes we receive in our CSA shares.  This tomato jam was enjoyed by our whole family- even the little ones that claim they don’t like tomatoes!

Tomato Jam

Ingredients
1 ½ lbs tomatoes**
½ medium onion, chopped
1 Tbsp fresh basil, packed
¼ cup honey
2 Tbsp lemon juice
½ tsp sea salt

  • Place all ingredients in food processor. Pulse to combine and break down.
  • Transfer tomato mixture to a large saucepan.
  • Bring to a boil. Allow to boil for 8-10 minutes or until mixture reduces by half.  Be sure to stir often to prevent burning.
  • Reduce to simmer and cook for an additional 6-8 minutes until the mixture becomes the consistency of jam.
  • Let cool.
  • Store in an airtight container in the refrigerator for up to a week.
  • Use the jam with cheese and crackers, on fish or chicken, on top of a burger, or even on a sandwich or grilled cheese.

**You can use any kind of tomato for this recipe- beefsteak, Roma, heirloom, or cherries.  Cook time will vary slightly due to the moisture content of the tomatoes.

Recipe and photos by Stephanie Borzio.  Stephanie is a mom of three active boys and is an autoimmune warrior.  After battling her own health for several years, Stephanie found healing through food and lifestyle changes, including joining Blooming Glen Farm CSA of which she is a long time member.  She is a Board Certified Integrative Nutrition Health Coach who is passionate about sharing healthy living tips and real food recipes.
Instagram and Facebook: Tru You Essentials; Website: www.truyouessentials.com

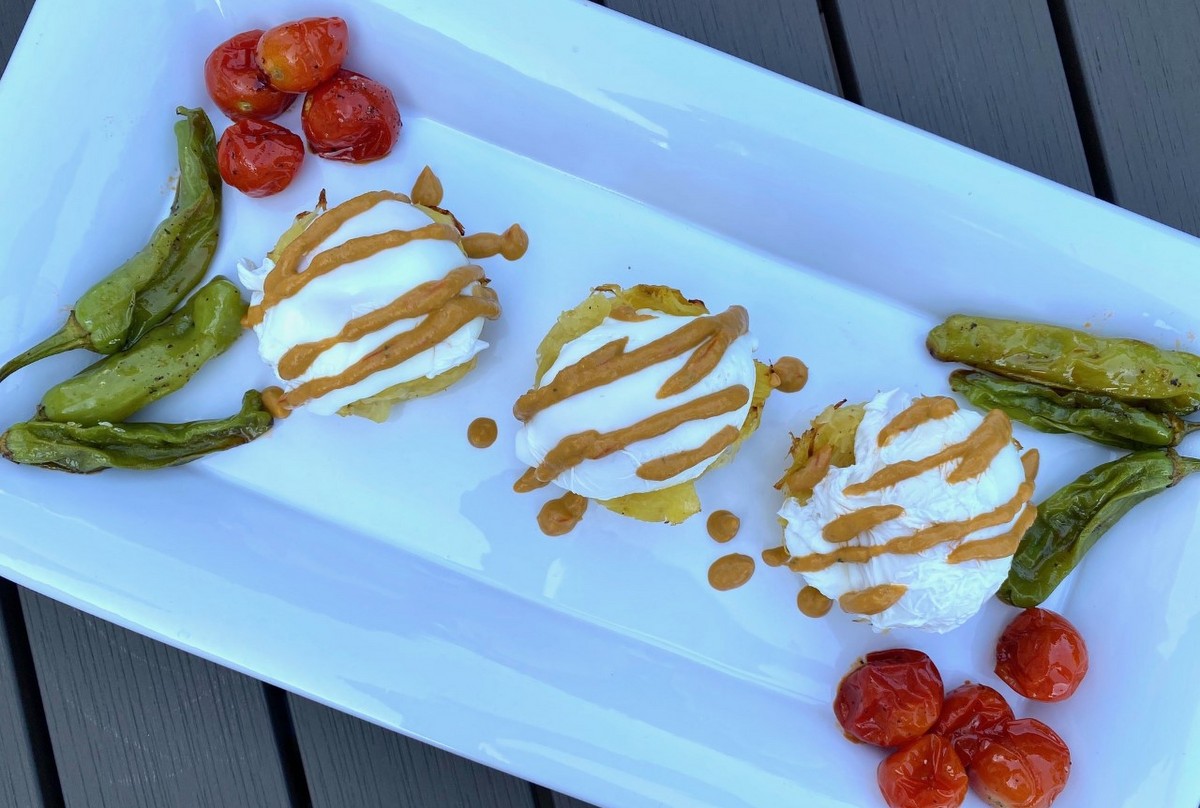
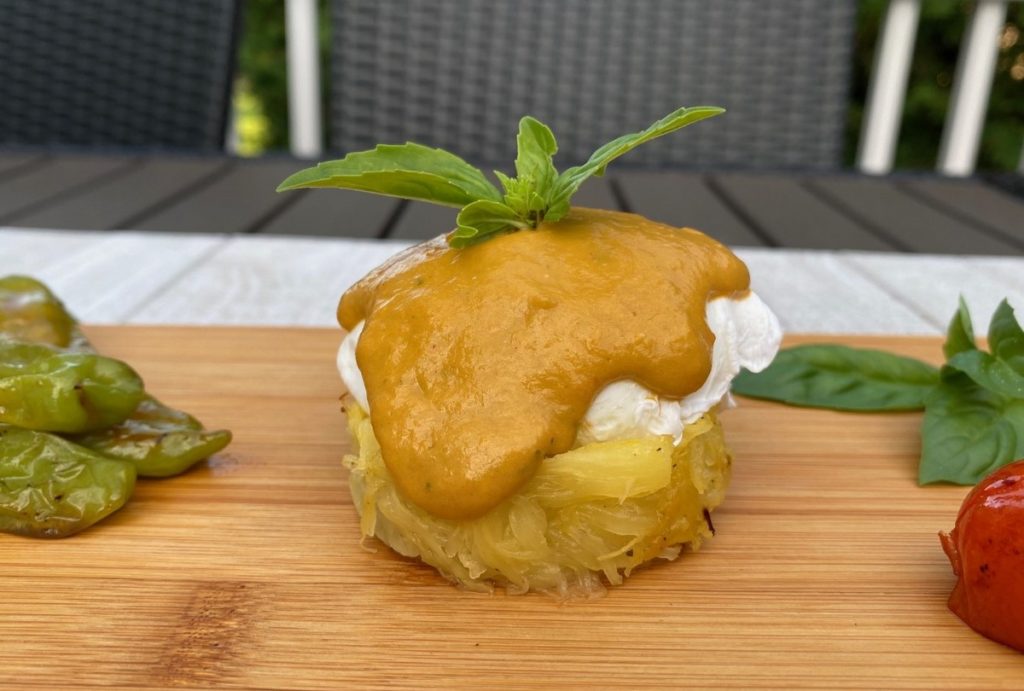
Last week we received the first spaghetti squash in our CSA shares.  Along with the squash, this recipe incorporates eggs, shishito peppers, garlic, cherry tomatoes, and basil.

Spaghetti Squash Egg Nests with Roasted Shishito and Tomato Sauce

Ingredients
1 spaghetti squash
2 Tbsp olive oil
¼ tsp sea salt
1/8 tsp black pepper
¼ tsp garlic powder
Eggs, poached
Roasted Shishito and Tomato Sauce (recipe below)
Fresh basil leaves, for garnish

  • Preheat oven to 400°F.
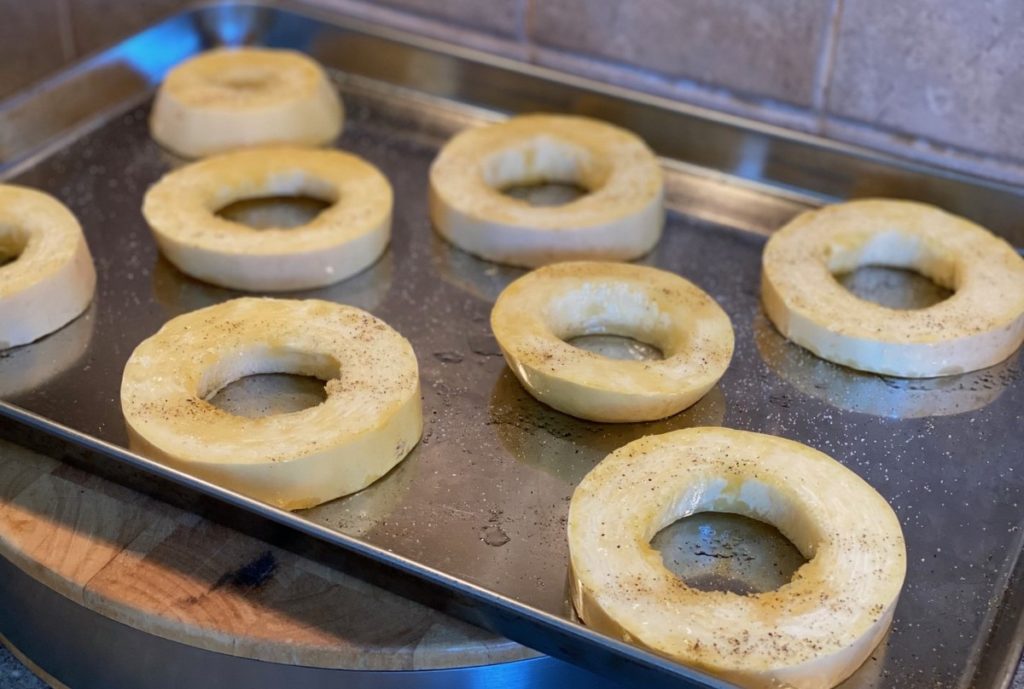
  • Cut the ends off the squash and slice into 1-inch rounds. Remove the seeds and lay on a baking sheet.

  • Brush both sides of squash with olive oil and sprinkle with salt, pepper, and garlic powder.
  • Bake for 25 minutes.
  • Remove from oven and allow to cool for a few minutes.
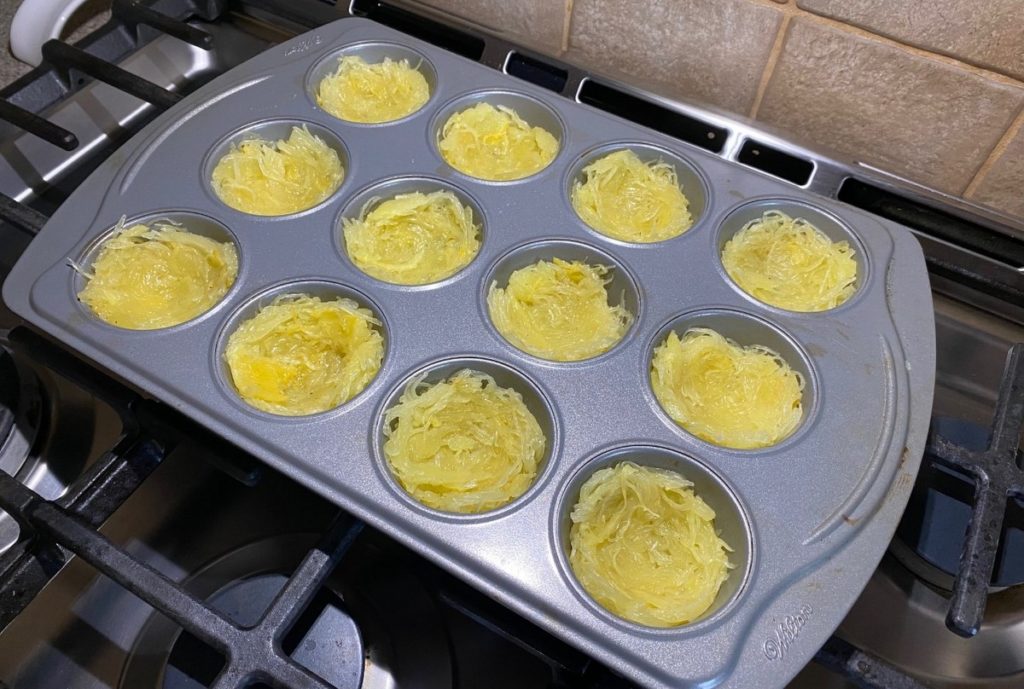
  • Remove skin of squash and shred the inside with a fork. Place in bowl.
  • Grease a muffin tin with oil or cooking spray. Divide the spaghetti squash into 12 sections of the muffin tin.  Press down the center of each “nest”.

  • Bake for 10 minutes. Then broil for 3-4 minutes or until tops are lightly browned.
  • Gently remove the spaghetti squash “nests” and place on a serving plate. Extra “nests” can be covered and refrigerated or frozen.
  • Poach eggs, drain, and place on top of each nest.

  • Drizzle or pour the Roasted Shishito and Tomato Sauce over each “nest”. **
  • Garnish with fresh basil leaves.
  • Enjoy!

**If you have extra Creamy Avocado Sauce from last week’s recipe, that would also work well on top of the poached eggs and spaghetti squash nests.

Roasted Shishito and Tomato Sauce

Ingredients
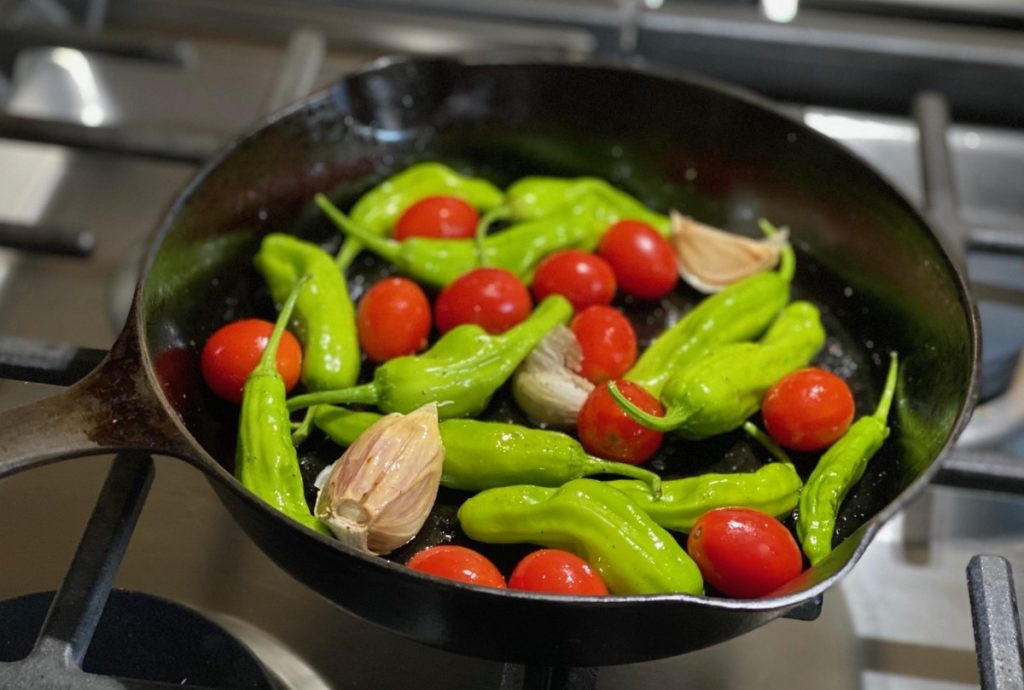
12 shishito peppers
12 cherry tomatoes
3 cloves garlic, skin on
¼ cup + 2 tsp olive oil (divided)
½ tsp sea salt (divided)
1/8 tsp black pepper
4 large basil leaves

  • Preheat oven to 400°F.
  • Put shishitos, tomatoes, and garlic in a bowl. Add 2 tsp oil, ¼ tsp salt, and pepper.  Toss to coat.
  • Place in baking dish or pan.
  • Roast for 20 minutes.
  • Remove from oven. Remove stems from shishitos and skin from garlic.
  • Blend roasted shishitos, garlic, and tomatoes with basil, ¼ cup oil, and ¼ tsp salt.
  • Store in refrigerator.


Recipe and photos by Stephanie Borzio.  Stephanie is a mom of three active boys and is an autoimmune warrior.  After battling her own health for several years, Stephanie found healing through food and lifestyle changes, including joining Blooming Glen Farm CSA of which she is a long time member.  She is a Board Certified Integrative Nutrition Health Coach who is passionate about sharing healthy living tips and real food recipes. 
Instagram and Facebook: Tru You Essentials; Website: www.truyouessentials.com

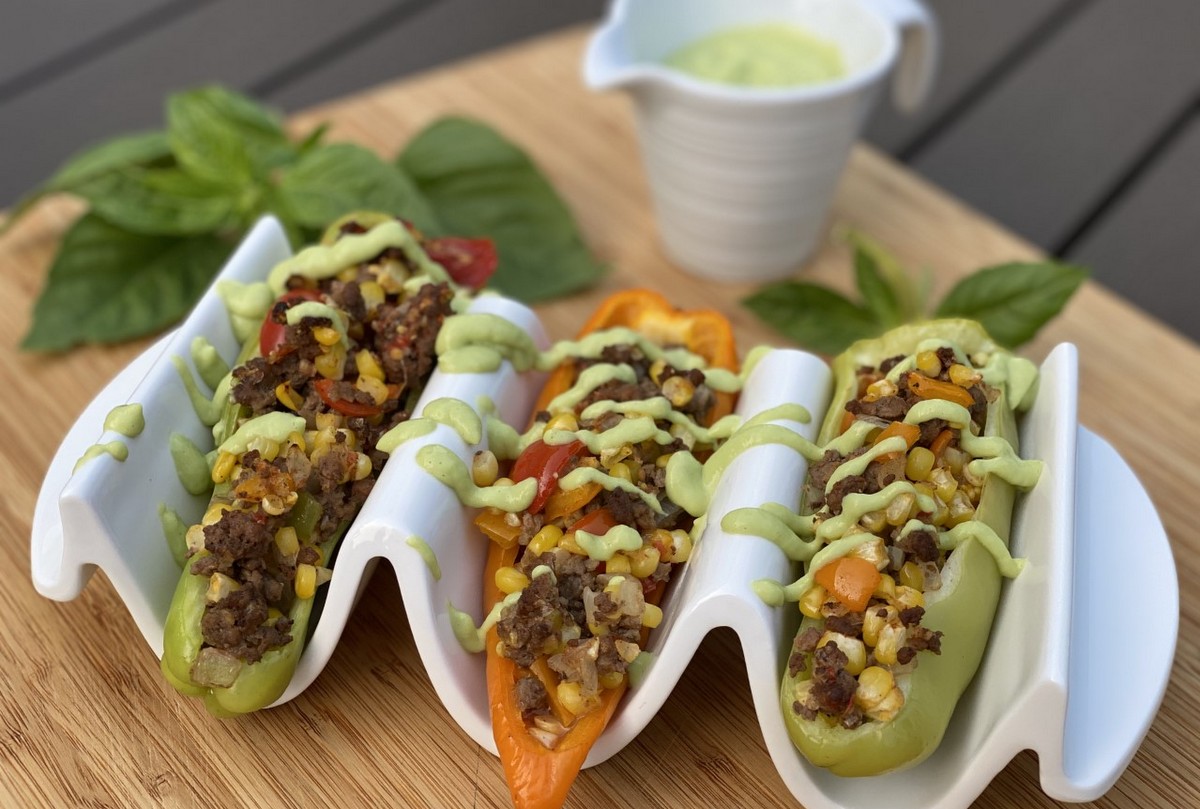
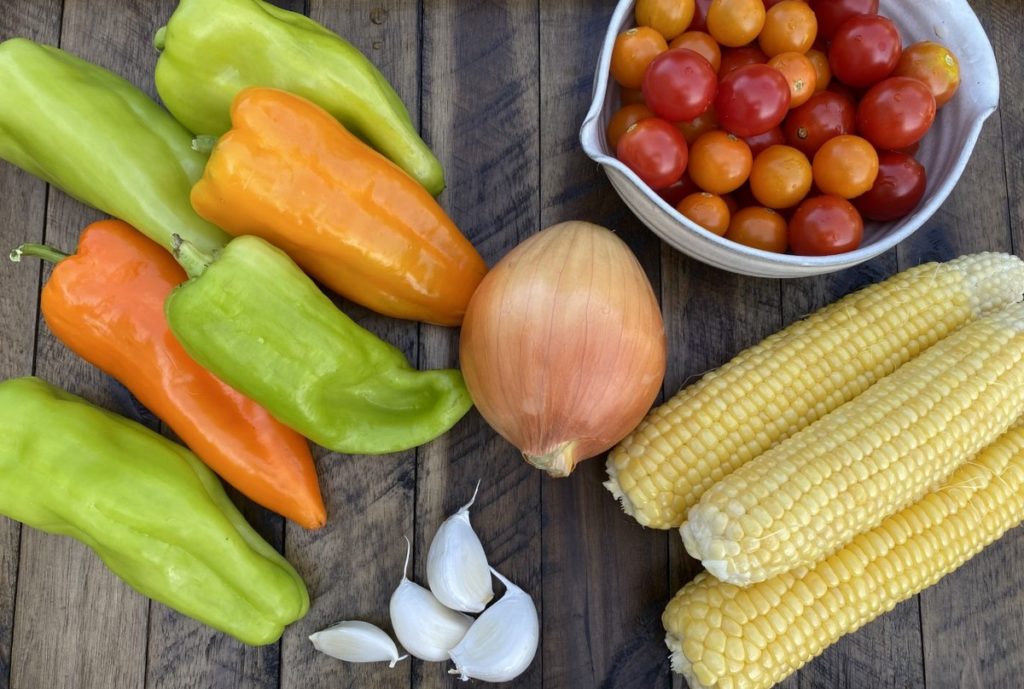
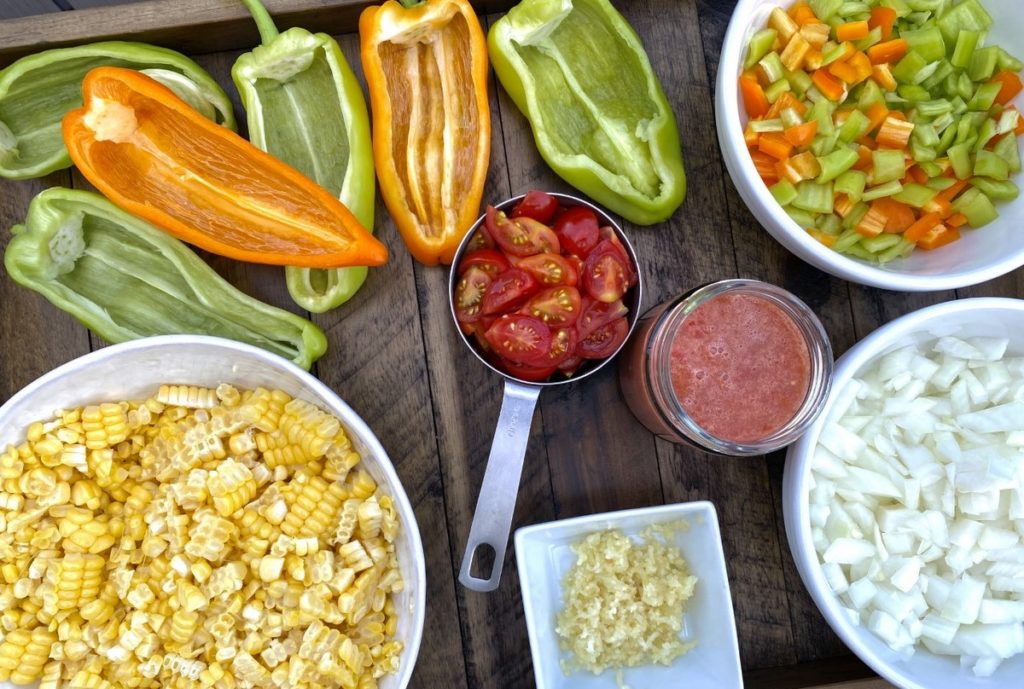
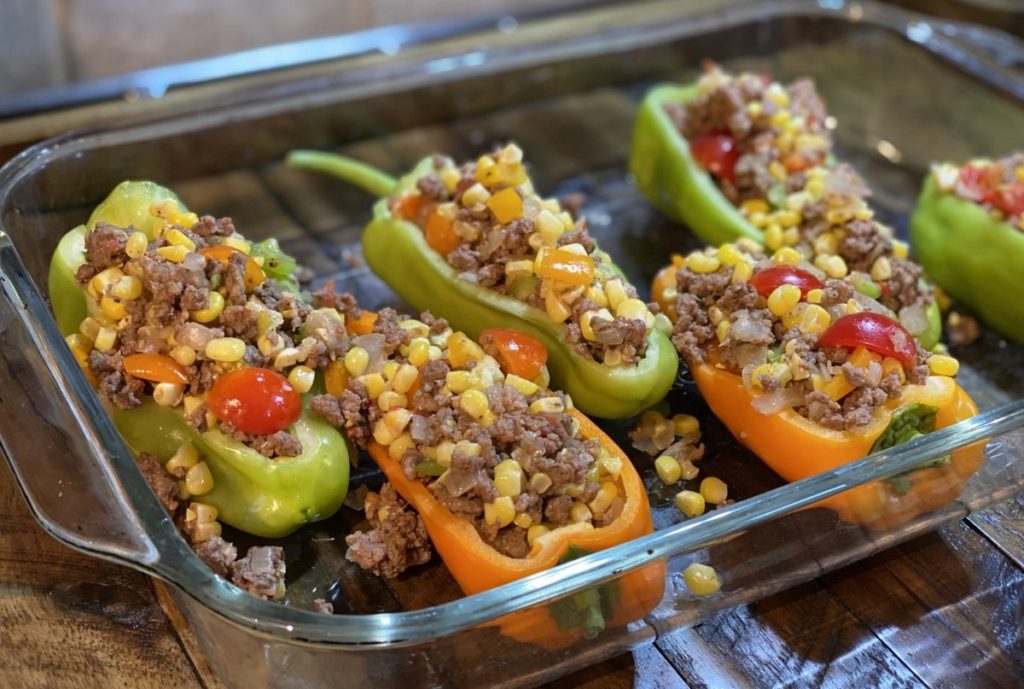
What a beautiful bounty we have this week in our CSA shares!  We certainly won’t have any trouble eating the rainbow as we incorporate all of the amazing produce from the farm.  This week’s recipe highlights the cubanelle and sweet peppers we received, but also incorporates the sweet onion, tomatoes, corn, and basil from our shares.  Enjoy!

Stuffed Peppers with Creamy Avocado Sauce

Ingredients:
6 cubanelle or sweet peppers (or add in a poblano for the heat lovers in your household)
1 Tbsp olive oil or avocado oil
½ sweet onion, chopped
2 cloves garlic, minced
1 lb ground turkey or ground beef**
1 cup chopped tomatoes (I used cherry tomatoes, but use whatever kind you have on hand)
2 ears corn
½ tsp sea salt
¼ tsp black pepper
Creamy avocado sauce (recipe below)

  • Preheat oven to 350°F.
  • Lay peppers lengthwise. Cut off the top third of the pepper and remove the seeds.  Dice the pepper pieces that you just removed and set aside.

  • Place oil in frying pan and heat. Sauté onion for 3 minutes on medium heat.  Add garlic and cook for another minute.
  • Add ground turkey or ground beef and cook through, about 6-8 minutes.
  • Remove corn kernels from the cobs.
  • When meat is cooked through, add corn and diced peppers. Cook for 2 minutes.
  • Puree half of the tomatoes.
  • Add chopped tomatoes, tomato puree, salt, and pepper to meat mixture. Mix to incorporate and remove from heat.
  • Place peppers in baking dish and fill with meat mixture.
  • Bake for 25 minutes.
  • Drizzle with creamy avocado sauce before serving.

**For a vegetarian or vegan option, eliminate ground turkey/beef and replace with 2 cups cooked quinoa.  Sauté the onions and garlic as noted above and then add the quinoa.  Then add the corn and diced peppers and follow the remainder of the steps.

Creamy Avocado Sauce

Ingredients:
1 avocado, peeled and seed removed
1 ½ Tbsp lemon juice
1 clove garlic
1 Tbsp olive oil
¼ tsp sea salt
1 Tbsp fresh basil
½ cup water
** optional- add a ¼ to ½ a jalapeno to taste for extra kick. Remove seeds and inner flesh for less heat.

  • Place all ingredients in blender. Blend until smooth.
  • If sauce is too thick, add a little bit more water.
  • Store in airtight container in the refrigerator.


Recipe and photos by Stephanie Borzio.  Stephanie is a mom of three active boys and is an autoimmune warrior.  After battling her own health for several years, Stephanie found healing through food and lifestyle changes, including joining Blooming Glen Farm CSA of which she is a long time member.  She is a Board Certified Integrative Nutrition Health Coach who is passionate about sharing healthy living tips and real food recipes. 
Instagram and Facebook: Tru You Essentials; Website: www.truyouessentials.com

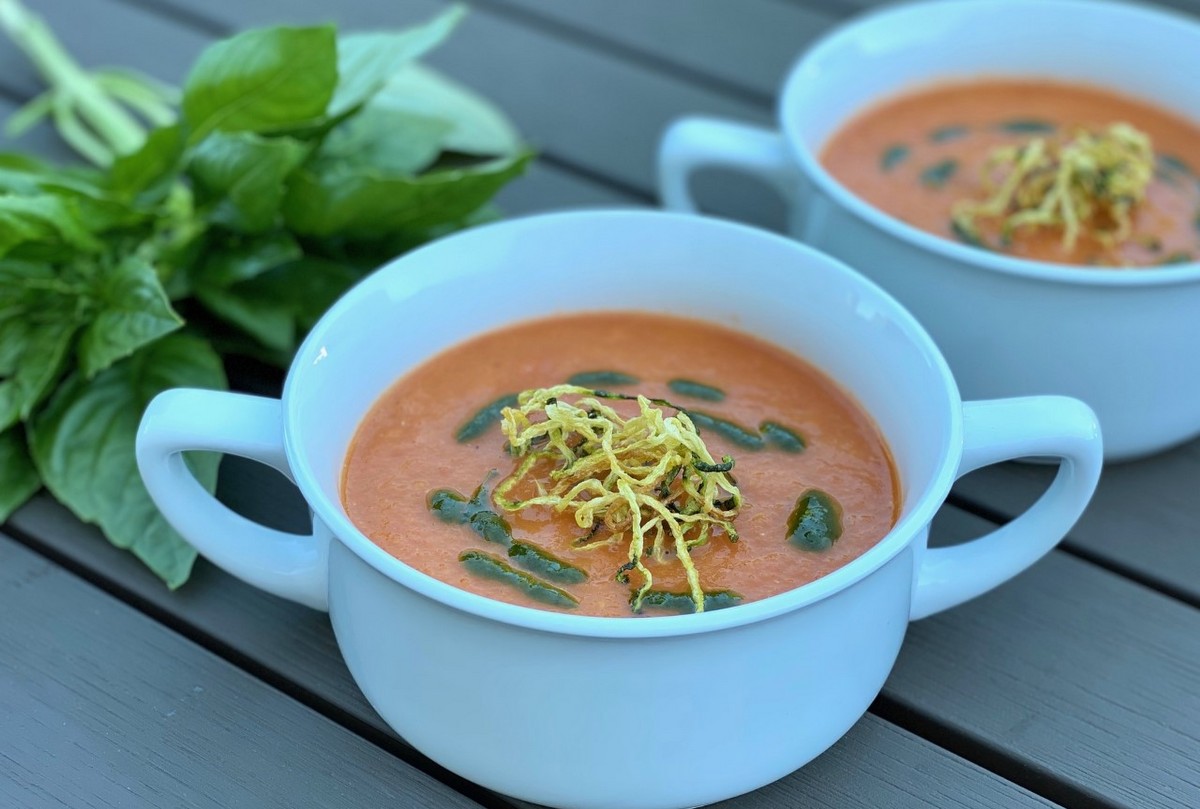
Cherry tomatoes, plum tomatoes, heirloom tomatoes, and beefsteak tomatoes… oh my!  There are so many amazing things we can do with tomatoes.  They can be the star of a meal or a delicious side.  Eat them as is, add them to salads, can them, make sauce, or create this delicious soup.

Roasted Tomato Soup with Basil Oil and Fried Zucchini Noodles

Ingredients:
3.5- 4 lbs fresh tomatoes
2 medium onions, peeled and quartered
1 pepper (green bell or sweet cubanelle), halved and seeds removed
1 medium summer squash (zucchini or yellow squash), roughly chopped
6 cloves garlic, with skin on
3 Tbsp olive oil
1 tsp sea salt
½ tsp black pepper
6 basil leaves
Basil oil (recipe below)
Fried zucchini spirals (recipe below)

  • Preheat oven to 400°F.
  • Slice tomatoes into quarters or eighths if they are really big.
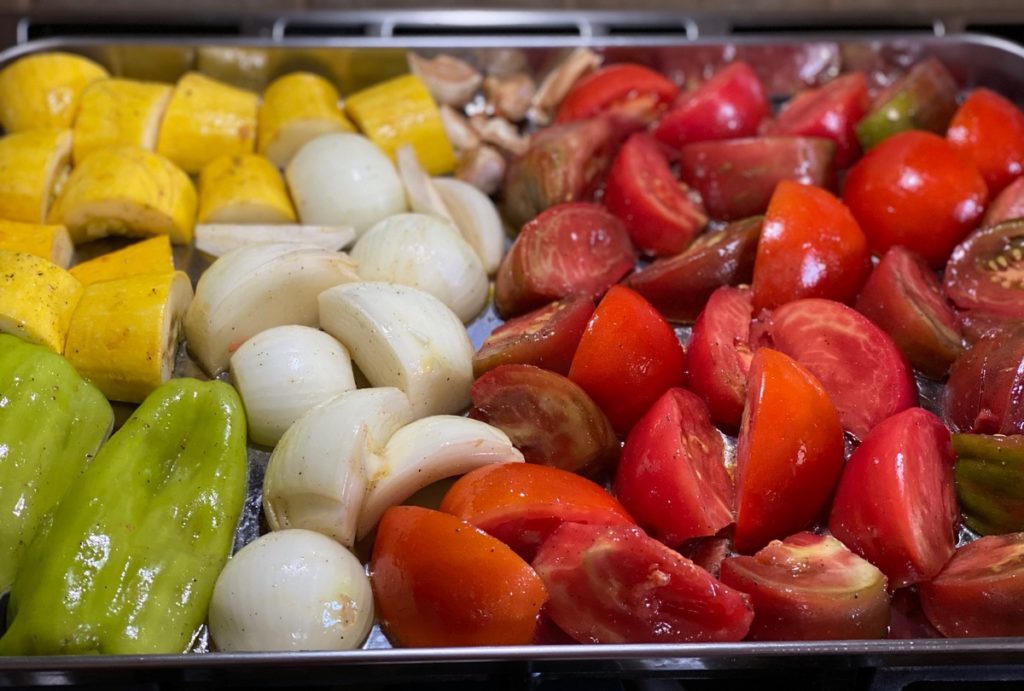
  • Place tomatoes, onions, pepper, summer squash and garlic in a large bowl. Add olive oil, salt, and pepper.  Toss to coat.
  • Place tomato mixture on baking sheet.

  • Roast for 25-30 minutes. Vegetables should be fork tender.
  • Allow to cool for a few minutes. Remove the skin from the garlic cloves.
  • Transfer mixture to blender, including juices on baking sheet. Add basil.  Process until smooth.  You may need to process in two batches.
  • Serve immediately or place in large saucepan and reheat later.
  • To serve, ladle soup into bowls. Drizzle on basil oil and top with fried zucchini spirals.
  • Soup can be stored in the refrigerator for up to a week. It also freezes well.

Basil Oil

Ingredients:
¼ cup basil leaves, packed
2 Tbsp olive oil
Pinch sea salt

  • Place boiling water in a bowl. Quickly blanch basil leaves (about 10 seconds) and then pat dry.
  • In food processor or blender, combine basil leaves, salt, and olive oil. Process well.

Fried Zucchini Spirals

Ingredients:
½ zucchini
½ cup avocado or coconut oil
Sea salt

  • Spiralize zucchini. If you don’t have a spiralizer, you can thinly slice strips of zucchini.  Place between paper towels to remove some of the water.
  • Heat oil in small saucepan.
  • When oil is hot, fry zucchini. Place one spiral in the oil to make sure it is hot enough.  Process the spirals in small batches for about 6 minutes each.  When done, the zucchini spirals should be crunchy.
  • Lay on paper towels and sprinkle with sea salt.

Recipe and photos by Stephanie Borzio.  Stephanie is a mom of three active boys and is an autoimmune warrior.  After battling her own health for several years, Stephanie found healing through food and lifestyle changes, including joining Blooming Glen Farm CSA of which she is a long time member.  She is a Board Certified Integrative Nutrition Health Coach who is passionate about sharing healthy living tips and real food recipes.  Instagram and Facebook: Tru You Essentials; Website: www.truyouessentials.com

Ground Cherries are such a fun fruit to work with.  This from Farmer Tricia, “These sweet tart little fruits are in the nightshade family (along with tomatoes, peppers, eggplants and potatoes). The fruit is encased in a tan paper wrapper, like a tiny tomatillo. You DO NOT eat the wrapper, just the golden fruit inside (it may be greenish, but the more yellow/golden the sweeter it will be). The flavor is definitely not tomatoey, there is more the suggestion of pineapple perhaps? You be the judge!” This recipe features them in a sweet treat that is super easy to make.

Ingredients
1 cup ground cherries, husks removed
1 Tbsp salted butter
1 ½ Tbsp honey
1 puff pastry, thawed**
1 egg
2 tsp maple sugar (or other granulated sweetener)
1 Tbsp coconut oil

  • Preheat oven to 400°F.
  • Grease muffin tin with coconut oil.
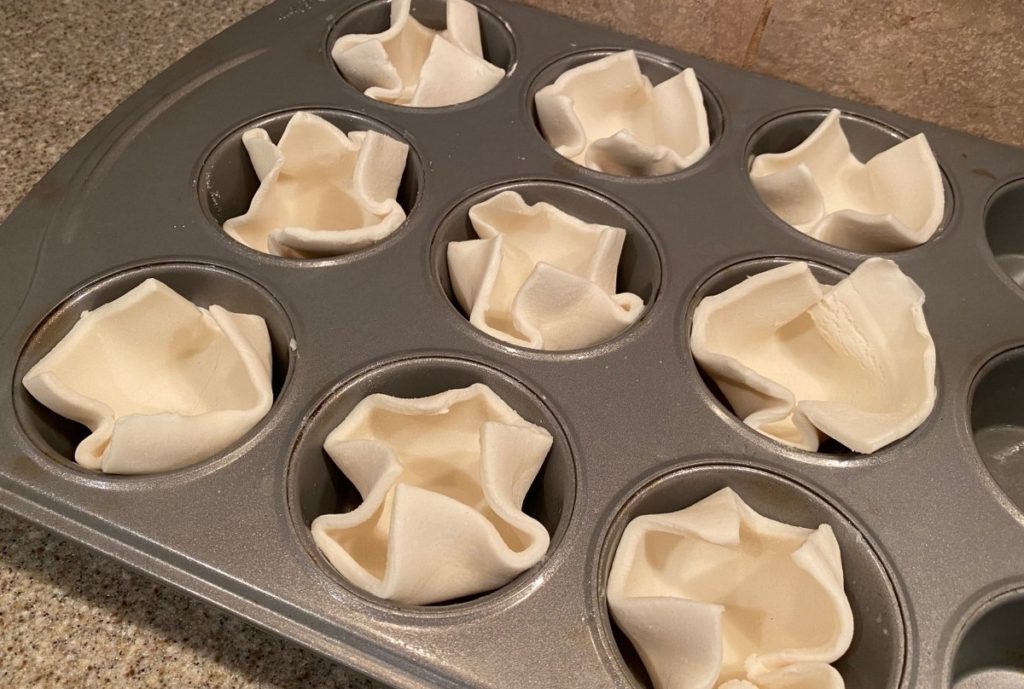
  • Roll out puff pastry. Cut into 9 squares.
  • Gently push the squares into the greased muffin tin.

  • In a small saucepan, combine ground cherries, butter, and honey. Heat through and simmer for 10 minutes.  If the mixture is dry, add a tablespoon of water to prevent burning.  The cherries will release their juices as they cook.
  • Remove cherry mixture from heat and allow to cool.
  • While mixture is cooling, bake puff pastries for 8 minutes.
  • Remove from oven and let rest for 5 minutes. Push down the center of the pastries.
  • Mix egg in small bowl. Brush egg on pastries and then sprinkle with sugar.
  • Spoon 1 Tbsp of cherry mixture into the center of each pastry.
  • Bake for an additional 5-10 minutes until pastries are golden.
  • Best if served warm. Enjoy!

**Feel free to make your own puff pastry if you have a great recipe, but they sell puff pastry usually in the frozen section of the grocery store.  I was able to find a gluten free puff pastry that we used for this recipe.

Recipe and photos by Stephanie Borzio.  Stephanie is a mom of three active boys and is an autoimmune warrior.  After battling her own health for several years, Stephanie found healing through food and lifestyle changes, including joining Blooming Glen Farm CSA of which she is a long time member.  She is a Board Certified Integrative Nutrition Health Coach who is passionate about sharing healthy living tips and real food recipes. 

Instagram and Facebook: Tru You Essentials

Website: www.truyouessentials.com

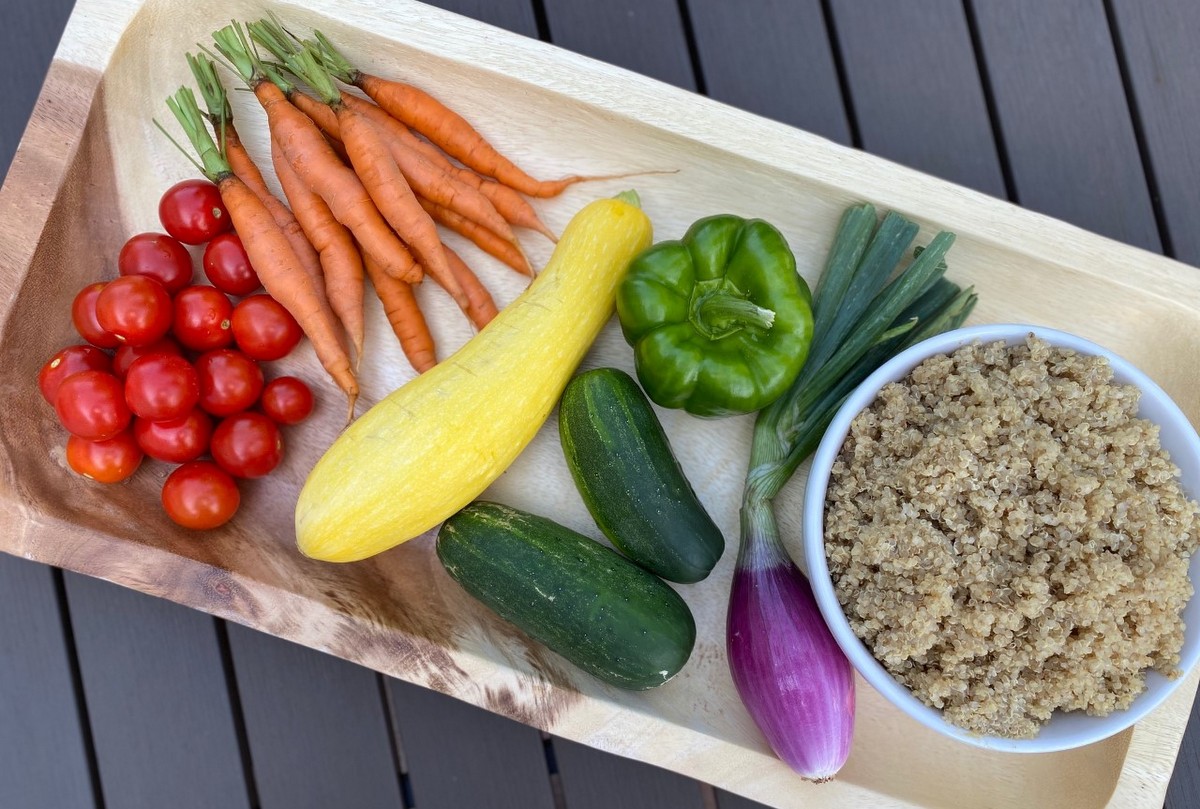
Quinoa is a versatile grain that is often considered a superfood.  It is a great source of protein, fiber, and other essential vitamins and nutrients.  This week we received a variety of farm fresh produce that pairs well with quinoa and creates a colorful salad that is full of flavor.

Salad Ingredients:
1 cup quinoa
2 cups water
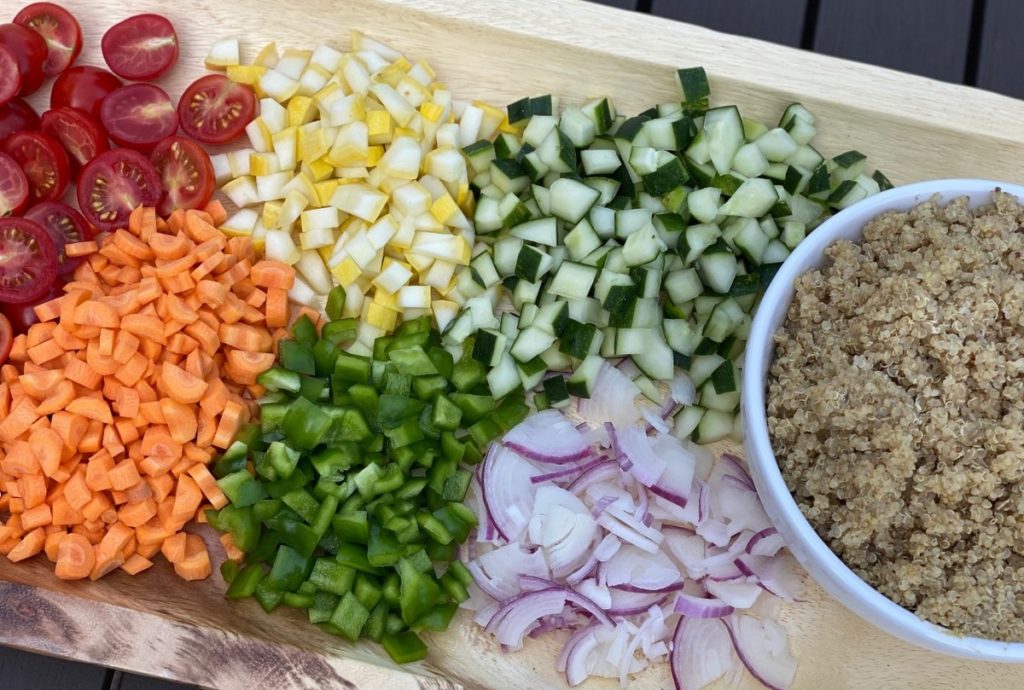
½ pint cherry tomatoes, sliced in half
1 cup carrots, peeled and chopped
½ yellow summer squash, seeds removed and chopped
2 Kirby cucumbers, seeds removed and chopped
1 green bell pepper, chopped
½ torpedo onion, thinly sliced
½ jar kalamata or black olives, sliced in half (optional)

Dressing Ingredients:
¼ cup olive oil
¼ cup red wine vinegar
1 Tbsp lemon juice
¾ tsp sea salt
½ tsp garlic powder
¼ tsp black pepper

  • Rinse quinoa and drain.
  • Place rinsed quinoa and water in medium saucepan. Bring to a boil.
  • Reduce to a simmer, cover, and cook for about 15 minutes or until liquid is absorbed.
  • Fluff cooked quinoa with a fork and allow to cool.
  • Prepare all produce and place in large bowl. If using olives, add them as well.  Add cooled quinoa and mix.
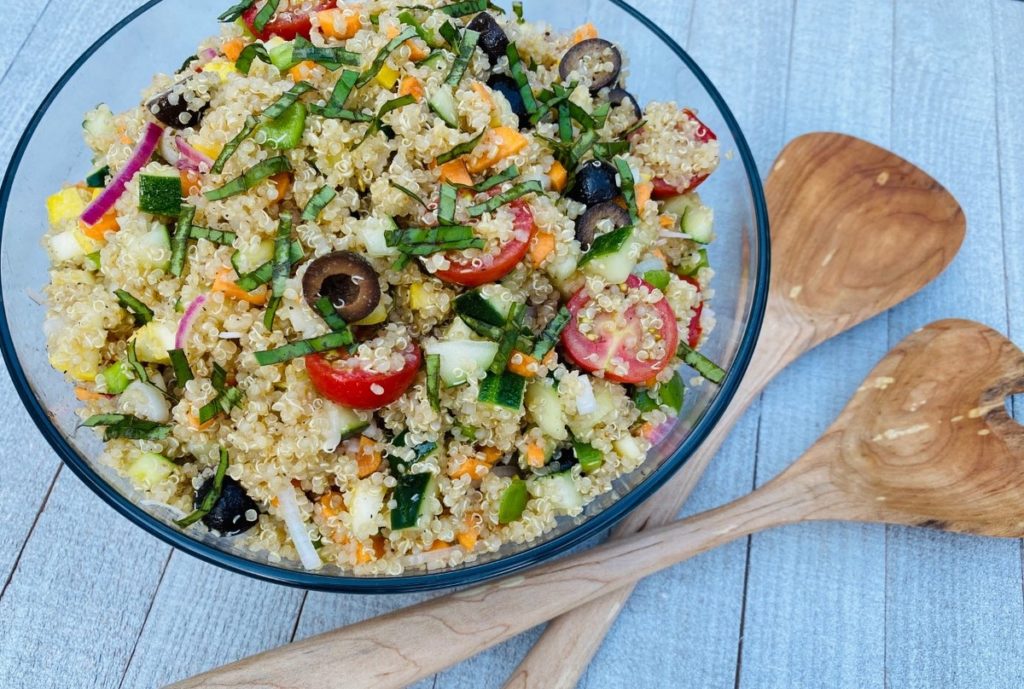
  • Mix dressing ingredients and pour over quinoa mixture. Toss to coat.
  • Best if allowed to marinate for at least 30 minutes before serving.
  • Refrigerate for up to 4-5 days.
  • Before serving, you can top with fresh chopped herbs like basil, chives, or parsley.

**Feel free to add diced, cooked chicken or chickpeas to this dish as well.  This is a great dish to bring for lunch, on picnics, or to potlucks.

Recipe and photos by Stephanie Borzio.  Stephanie is a mom of three active boys and is an autoimmune warrior.  After battling her own health for several years, Stephanie found healing through food and lifestyle changes, including joining Blooming Glen Farm CSA of which she is a long time member.  She is a Board Certified Integrative Nutrition Health Coach who is passionate about sharing healthy living tips and real food recipes. 

Instagram and Facebook: Tru You Essentials

Website: www.truyouessentials.com

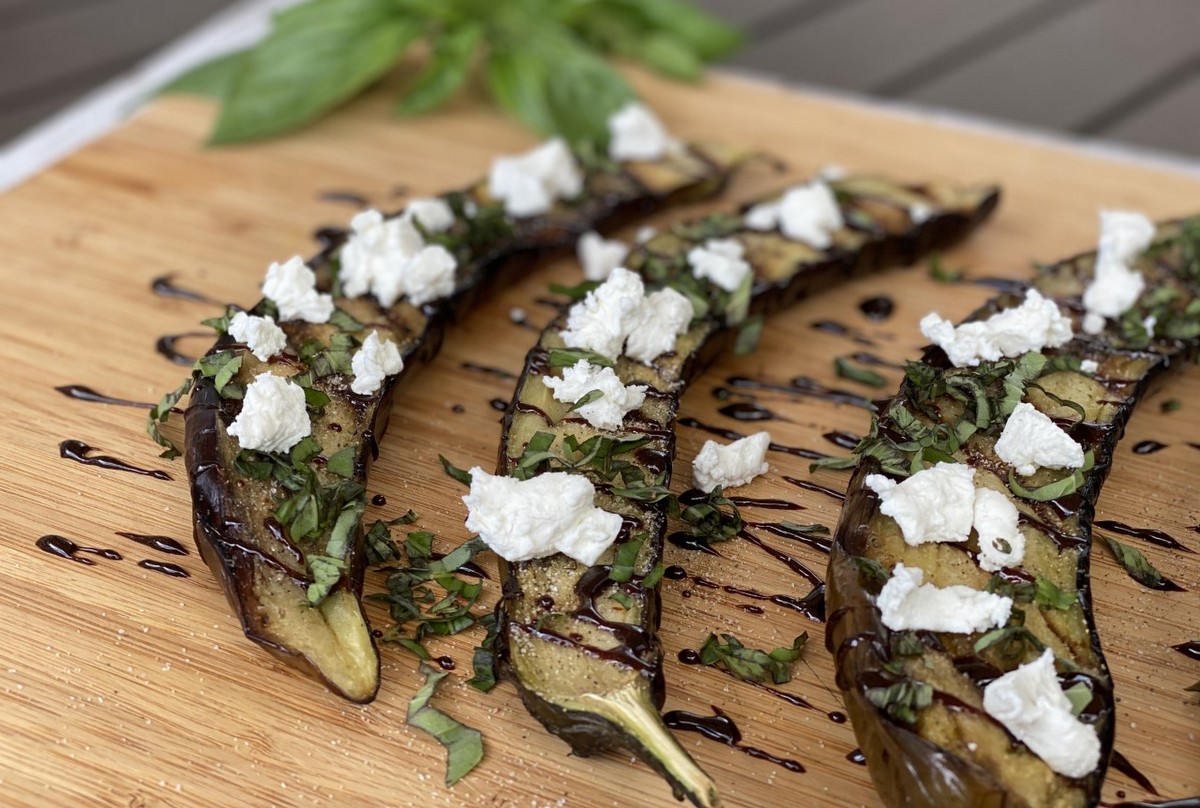
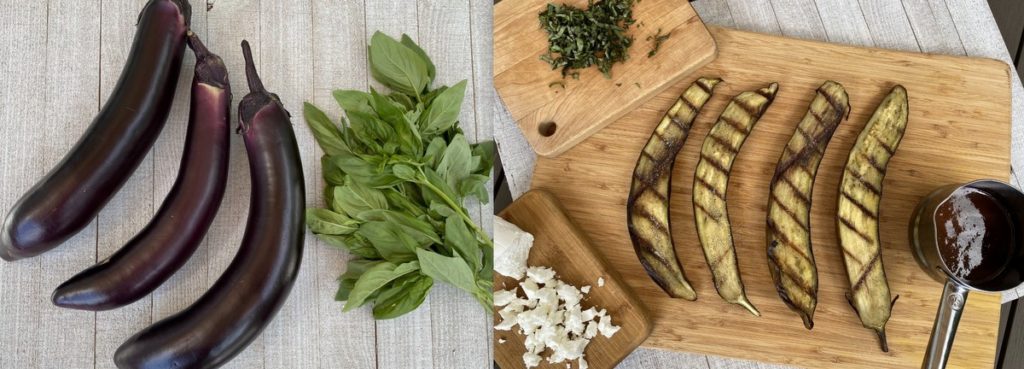
This week we have the addition of some gorgeous Asian eggplant in our shares.  This long, thin-skinned variety is less bitter than others eggplant types and becomes creamy-tender with minimal cooking.  This recipe showcases the eggplant, along with the fresh basil.

Grilled Eggplant
Ingredients:
2 Asian eggplants, cut lengthwise in half
3 Tbsp olive oil or avocado oil
1/8 tsp garlic powder
1/8 tsp black pepper
¼ tsp sea salt
2 Tbsp fresh basil, chopped
2 oz goat cheese, crumbled (or use Valley Milkhouse Creamery’s “Clover” cheese from your cheese share)
Balsamic glaze, recipe below

  • Preheat grill to about 375°F.
  • Cut eggplant in half lengthwise.
  • Brush all sides of eggplant with oil.
  • Once grill is heated, place eggplant skin side up on the grill. Grill for 4 minutes.
  • Flip and grill other side for an additional 4 minutes.
  • Remove and place skin side down on serving dish.
  • Mix garlic powder, black pepper, and sea salt in small bowl. Sprinkle on eggplant.
  • Drizzle the balsamic glaze over the eggplant and then sprinkle on the chopped basil and goat cheese.
  • Enjoy!

Balsamic Glaze
Ingredients:
¾ cup balsamic vinegar
1 Tbsp honey

  • Pour vinegar and honey in saucepan. Heat to a boil, stirring often, and reduce to a simmer.
  • Simmer for about 10 minutes or until the mixture reduces and thickens a little. It is done reducing when it coats the back of the spoon.
  • Remove from heat and store in a glass jar in refrigerator. The glaze will thicken as it cools.

**If it gets too thick, you can heat and thin it out with a little water.

Recipe and photos by Stephanie Borzio.  Stephanie is a mom of three active boys and is an autoimmune warrior.  After battling her own health for several years, Stephanie found healing through food and lifestyle changes, including joining Blooming Glen Farm CSA of which she is a long time member.  She is a Board Certified Integrative Nutrition Health Coach who is passionate about sharing healthy living tips and real food recipes. 

Instagram and Facebook: Tru You Essentials

Website: www.truyouessentials.com

Cucumbers are a refreshing and welcome addition to our CSA shares!  There are so many amazing things you can make with cucumbers.  Simply slice them up and enjoy or use them in various recipes.  This week I have two wonderful recipes to share with you.  The first one is a family recipe for our cucumber salad.  It is a salad that has been passed on for generations, but I’m not sure a recipe was ever written down.  The second is an easy refrigerator pickle that can be ready in as little as 24 hours!

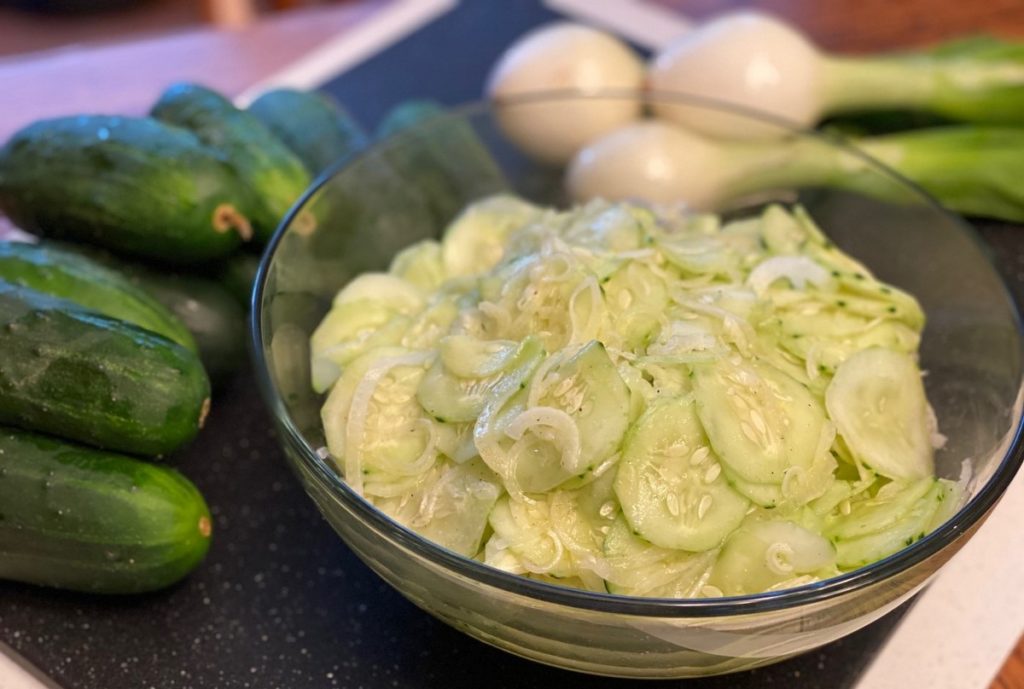
Cucumber Salad
Ingredients
5 Kirby cucumbers or 3 regular cucumbers
2 medium sweet onions or regular onions
6 Tbsp white vinegar
¼ cup olive oil
1 tsp sea salt
1 tsp honey
¼ tsp black pepper
¾ tsp garlic powder

  • Peel cucumbers. Thinly slice to about 1/16” or 1/8” on mandolin.  Place in large bowl.
  • Use the bulbs of the onions only. Cut bulb in half and then slice on mandolin (same thickness as cucumbers).  Place in bowl with cucumbers.
  • In small bowl, combine vinegar, oil, salt, honey, pepper, and garlic powder. Whisk well.
  • Pour dressing over cucumbers and onions. Mix well to coat.
  • Refrigerate until ready to serve.

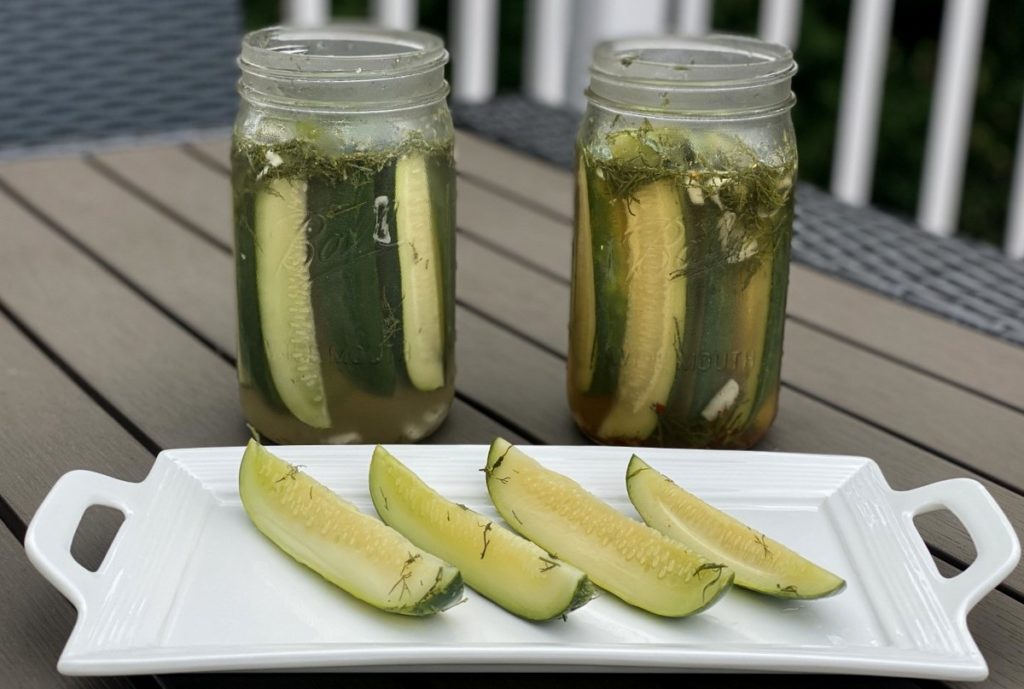
Refrigerator Pickles
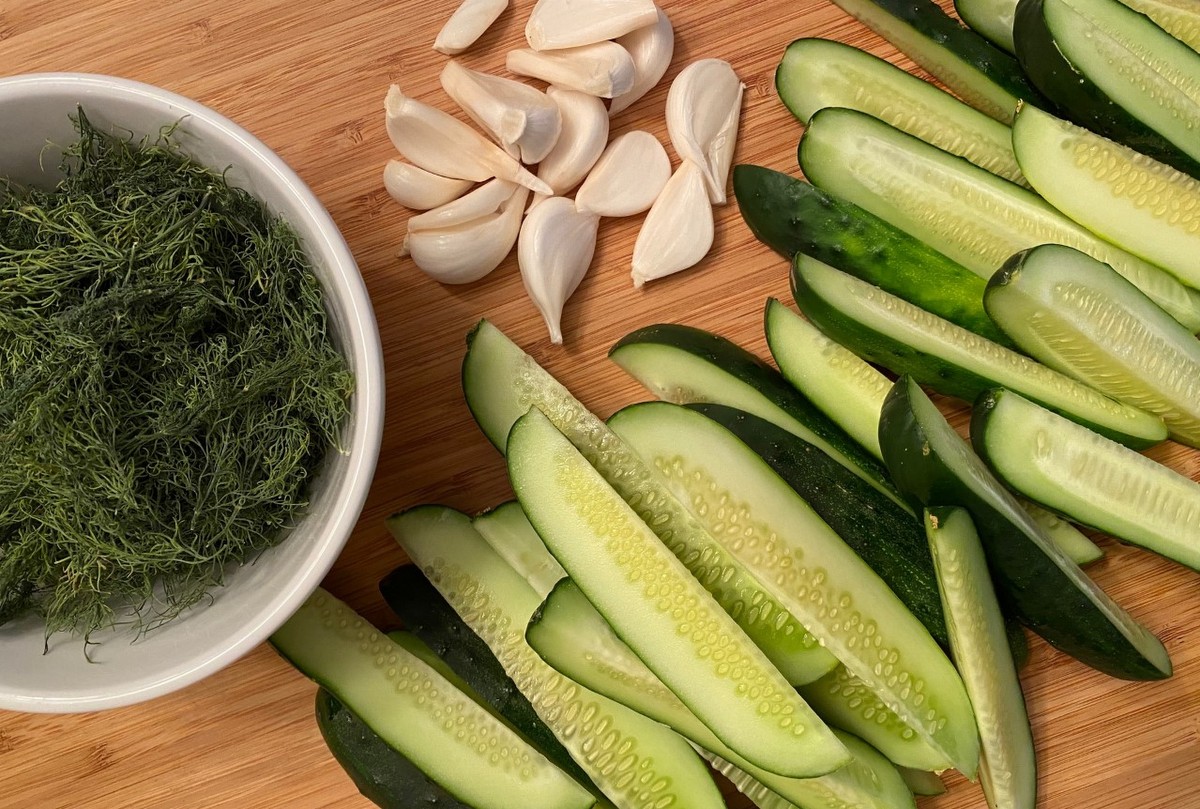
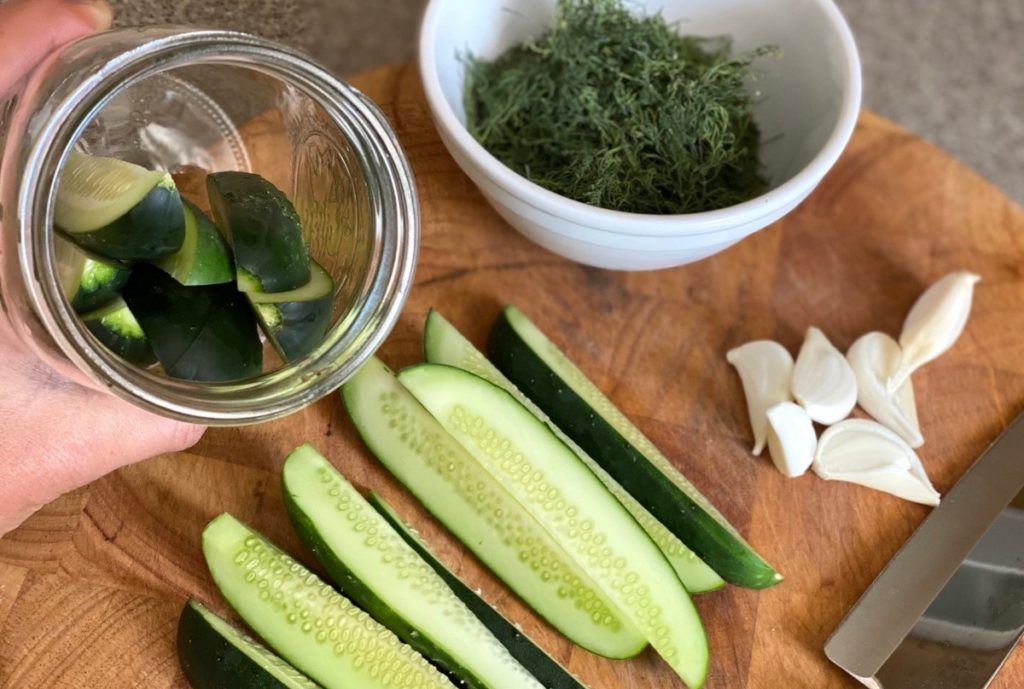
Fresh cucumbers + dill + garlic = the perfect blend for crisp, delicious pickles.  This recipe is easy and does not require canning.  Feel free to cut in half if you only want to make one quart jar. 

Ingredients
6-8 Kirby cucumbers (you can use other cucumbers, these are just my favorites for this recipe)
3 cups water
1 cup white vinegar
3 Tbsp honey
3 ½ Tbsp sea salt
5 tsp dried dill or 4-6 sprigs of fresh dill (I prefer fresh dill but sometimes only have dried on hand)
4 cloves fresh garlic

  • Clean two quart jars and lids.
  • Cut cucumbers into spears or rounds. Pack into jars.  The number of cucumbers needed varies depending on their size.  Cucumbers should be tightly packed.

  • Slice garlic and add 2 cloves per jar.
  • Add 2 ½ tsp dried dill to each jar or 2-3 sprigs of fresh dill to each jar.
  • In a medium saucepan, combine water, vinegar, honey, and sea salt. Bring to a boil and mix well.  Allow to simmer until honey and salt are dissolved.  Remove from heat and allow to cool to room temperature.
  • Pour liquid into each jar. Fill to the top.  Place lid on and gently flip upside down to mix.
  • Refrigerate for at least 24 hours.
  • Keep refrigerated. Best if eaten within 1 month.

**Optional: Add ½ tsp red pepper flakes to each jar or add fresh sliced jalapenos to give your pickles some spice.

Recipe and photos by Stephanie Borzio.  Stephanie is a mom of three active boys and is an autoimmune warrior.  After battling her own health for several years, Stephanie found healing through food and lifestyle changes, including joining Blooming Glen Farm CSA of which she is a long time member.  She is a Board Certified Integrative Nutrition Health Coach who is passionate about sharing healthy living tips and real food recipes.  Instagram and Facebook: Tru You Essentials; Website: www.truyouessentials.com