Author: bloomingglenfarm

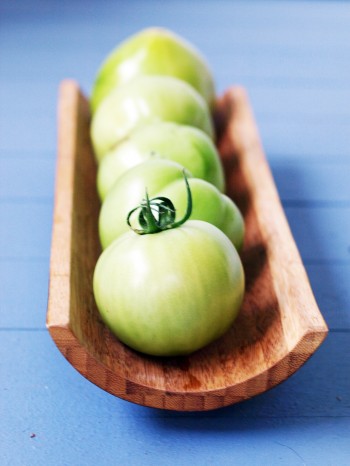
I always consider green tomatoes a bonus veggie: An unexpected and tasty gift us CSA members get during the summer-fall transition of share season. For the most part, green tomatoes carry much of the same nutritional value as their red counterparts.  They’re both very good sources of vitamins A, C, and K, manganese, and potassium, and both deliver health-boosting fiber.  Green tomatoes, however, have the added nutritional benefit of being a very good source of the B5 vitamin, pantothenic acid, which is essential in aiding in the metabolizing of carbohydrates, fat, and protein.

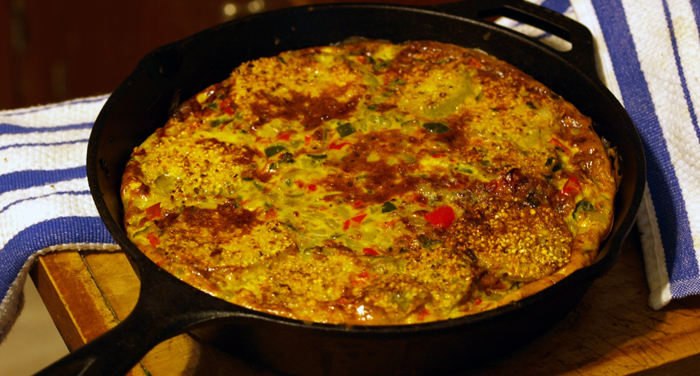
Green tomatoes are firmer than their red buddies, so they hold up nice to pickling, cooking, and baking without turning to mush. They have a tart flavor when eaten raw, which some people don’t prefer, but pairing them with a sweeter veggie like red tomatoes, corn, and/or onion, creates a great sweet-and-sour balance.  Green tomatoes bring a brightness to soups, sauces, and salsas, where they also pair well with hot peppers and spices.  Of course, fried green tomatoes is probably the dish we’re most familiar with, but green tomatoes actually do really well baked — either as baked green tomatoes or in savory breads and biscuits.  The recipe below is probably my favorite green tomato recipe; it’s a frittata suitable for a quick breakfast, lunch, or dinner.  Check out the links below for more green tomato nutritional info and links to other yummy recipes!

References and recommended links:

Green Tomato Frittata

Ingredients
1-1/2 green tomatoes, sliced about 1/4″-1/2″ inch thick, lightly sprinkled with salt and pepper
1/2 green tomato, chopped fine (about 1/2 cup)
1 frying pepper, chopped fine (about 1/2 cup)
1 poblano pepper, chopped fine (about 1/2 cup)
1 small onion, chopped fine
1/2 cup cornmeal for dredging
3 garlic cloves, minced
2-3 tablespoons fresh herbs (basil, parsley, chives, and/or thyme are all good here)
10 large eggs
Salt and pepper to taste
Cooking spray

Method
Preheat oven to 400-degrees.

Dredge tomato slices in cornmeal. Coat a large oven-safe skillet (cast iron works great) with cooking spray and fry each tomato slice for 2 minutes. Spray tomato again, and flip, frying again for 2-3 minutes. Set slices aside, and wipe pan clean.  Spray skillet again with cooking spray, add onion, and cook until translucent and soft, about 3 minutes.  Add pinch or two of salt and garlic and mix well. Stir in the chopped tomatoes and peppers, and mix until combined well.  Season to taste with salt and pepper, and cook, stirring often, until all veggies are softened, about 10 minutes. Stir in fresh herbs.

Meanwhile, beat eggs and season with salt and pepper.

Add egg mixture to skillet, turn heat up to medium-high, and lightly combine the ingredients, allowing the egg to distribute evenly throughout the filling, and making sure there is an egg coating on the bottom of the pan.  Place the fried sliced green tomatoes on the top of the frittata. Turn heat down to medium, and cook until edges begin to set, about 3-4 minutes. Place frittata in oven and cook until the center is firmly set, about 12 minutes.

Finish frittata under the broiler until it’s lightly browned, about 3 minutes. Remove from the heat, and allow to cool and set for 10-15 minutes. Loosen the edges with spatula and slice for serving.

Post and photos by Mikaela D. Martin: Blooming Glen CSA member since 2005, board-certified health counselor, and co-founder and -owner of Guidance for Growing, an integrative wellness practice in Souderton. Read more about healthy eating and living on her site, http://guidanceforgrowing.com!

In the height of tomato season we wouldn’t dream of stealing a tomato’s destiny to become juicy ripe and red, but at some point in the fall the harvest of unripe fruit is inevitable, typically because we are facing frost. Our last planting of field tomatoes were all killed by late blight, but the dead plants are still loaded with the green fruit. Tomorrow’s recipe by Mikaela will feature these green tomatoes. I do look forward to the day Tom gives the go ahead for the green tomato harvest because it means it’s time for my mom and I to get together, make a big mess in the kitchen and a big pot of my grandmother’s green tomato relish. It’s a tradition that neither of us would miss, and a winter pantry staple for our family. You can find Nanny’s relish recipe on our website.

CSA share, week 18, 9/11/12

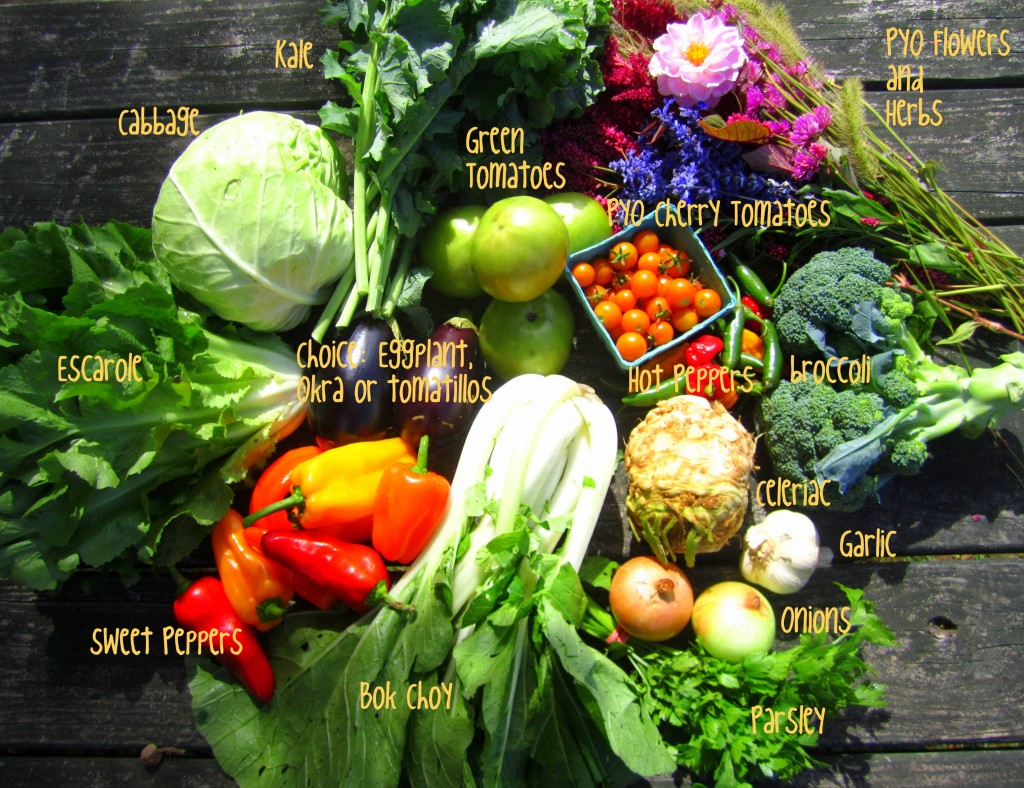
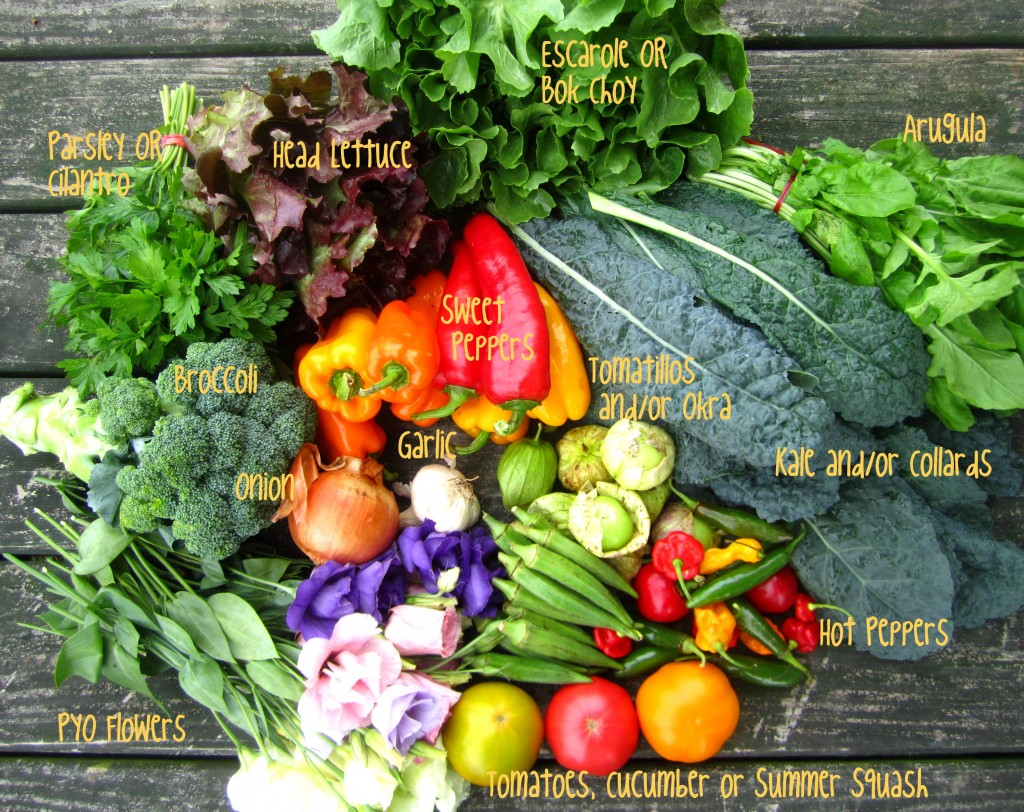
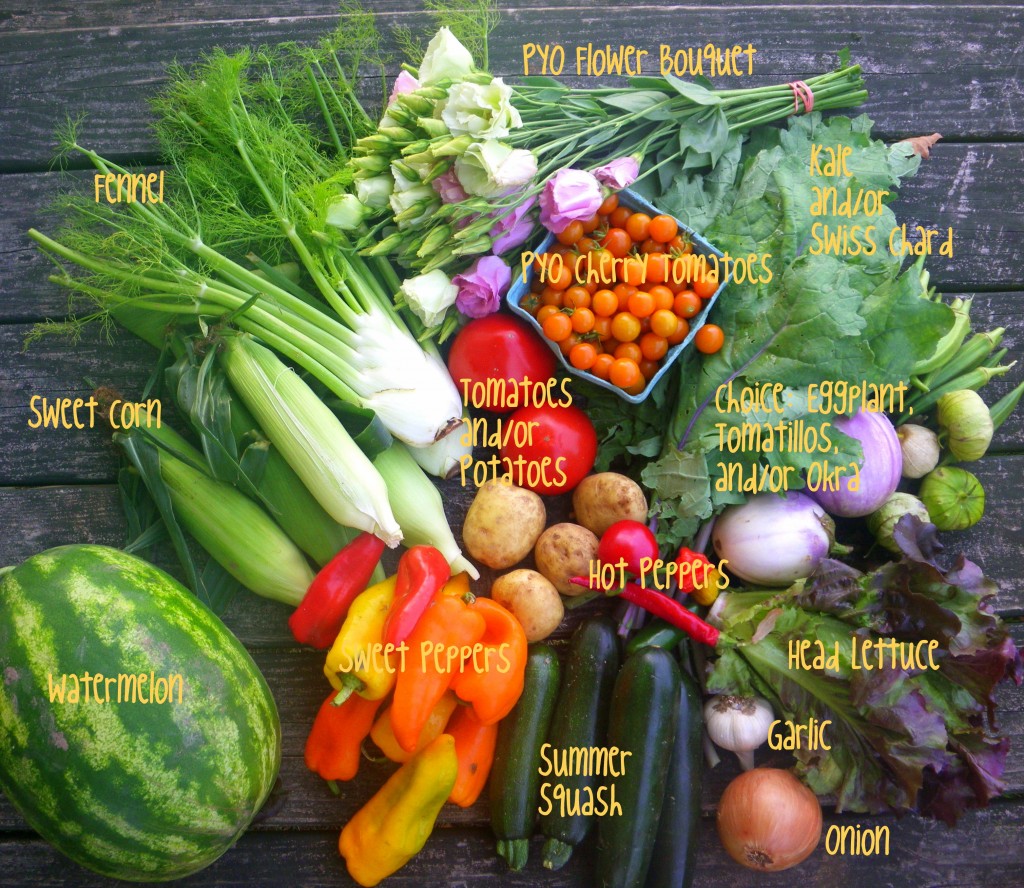
The share is reflecting the changing of the seasons- all the wonderful nourishing fall greens are here- cabbage, escarole, bok choy, kale. (**Feeling overwhelmed by the bounty? Come to nutrition counselor Patti Lombardi’s class on greens here at the farm September 26th.)

You’ll also notice the addition of celeriac, or celery root, in the share. Before I started farming I had no idea that this vegetable exisited. Now I can’t imagine fall or winter without it. Its bright celery flavor enlivens any soup, it is delectable roasted with other vegetables, or boiled and mashed with potatoes. You’ll find quite a few recipes on our website, as well as plentiful use and storage information in the cookbook “From Asparagus to Zucchini”, for sale at the farm.

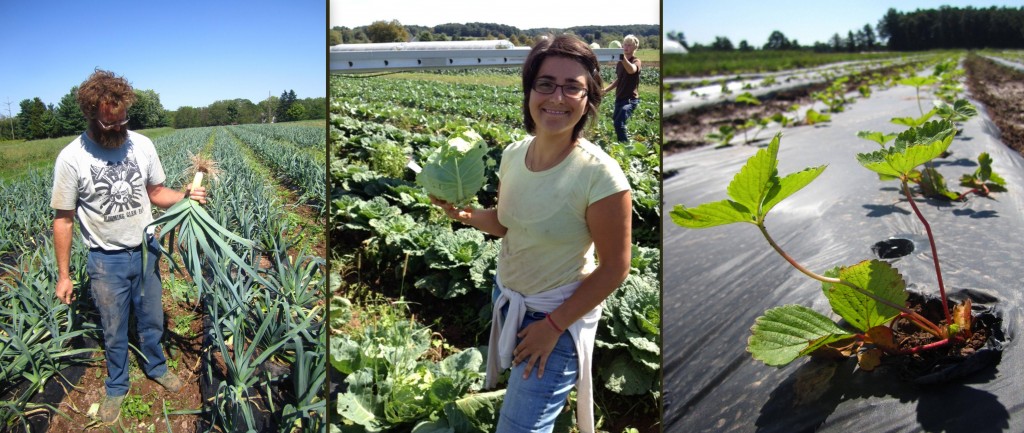
It’s September and our crew is working together like an orchestra- everyone knows their roles, and the jobs to be done are familiar. With cooler nights and shorter days come a more relaxed pace, and in general a more pleasant climate to do outdoor work. The leeks have been weeded- they stand tall and stout, and they’ll begin to be harvested next week. We have begun to tackle the big task of digging the remainder of our potatoes (actually the tractor does the digging, and we do the gathering). Next task on the list: getting all our bundled and dried garlic trimmed and processed.

Tom checking the leeks; Natalia harvesting cabbage; next year's strawberries

This week the strawberry plugs, purchased from a farm in New Jersey, went into the ground. Next year’s strawberry crop begins its long nine month journey to harvest. We treat our strawberries as annuals, and plant them new every fall. This helps us to deal with the weed and disease management issues facing organic strawberry growers. Ultimately it is the weather during harvest of these spongy permeable fruits that determines their quality, but we baby the plugs now, carefully planting thousands by hand.

Looking ahead to the fall fest- we are seeking donations of yarn. Artist Katia McGuirk will be leading a community “yarn bomb”, an all-age art installation along the deer fence bordering the fall fest. Please bring your unwanted yarn to the farm to be turned into art. There will be a collection box in the distribution room. Thanks!

Photos and text by Tricia Borneman, Blooming Glen farmer and co-owner.

Wet weather aside, I’m welcoming the cooler temperatures of late because they have allowed me to reacquaint myself with my kitchen. It seems like I’ve taken a hiatus recently from actually cooking. Instead of cooking meals, I’ve been favoring anything fresh I can throw into the same bowl. Now that it’s not 100 degrees in my kitchen, I’m a bit more excited to prepare a real dinner.

And what better way to celebrate my reintroduction to cooking than with juicy pork chops, fragrant herbs, and creamy swiss chard? This meal is easy, quick, and heavenly. It’s got all the advantages of a one-pot meal, but all the elegance of a steak house entree. The perfect end to a day spent working in the rain. (I could barely manage to squeeze in the photo shoot before scarfing it down).

Herbed Pork Chops with Dijon Swiss Chard

Rub both sides of 2 pork chops with salt, pepper, and 2 tablespoons of fresh chopped sage and thyme (both can be found in the Discovery Garden during your CSA pick-up, or at our farmstand at market).

Heat 1 tablespoon butter and 1 tablespoon olive oil in a heavy skillet over medium-high heat. When butter is melted, add pork chops. Sear chops, about 4 minutes per side, until there is a nice crust of fried herbs and meat is just cooked through. Remove from pan and cover with foil to keep warm.

Using the same pan, reduce heat to medium and add  1/2 yellow onion, chopped. Cook until translucent. Add 3/4 pound swiss chard, stems removed and leaves roughly chopped. When chard has partially wilted, stir in 3 tablespoons dijon mustard and 1/4 cup half-and-half or whole milk. Continue cooking the chard until it is fully wilted and the sauce has thickened a bit.

Top a mound of chard with a pork chop and drizzle any remaining sauce from the pan on top. Fluffy homemade biscuits drizzled in local honey make a divine addition to the meal, but it would go equally well with some crusty bread or steamed rice. (Serves 2)

Text and photography by Kate Darlington – Blooming Glen Farm second year intern, fresh food enthusiast, and budding food blogger. She also writes for the Digging Deep Campaign as well as for her personal blog, Growing Things.

Like clockwork Labor Day weekend rolls around and with it hurricane season and intermittent downpours. In anticipation of the heavy rains (and motivated by the memory of last fall when the rains came and never left), we scrambled to move through our “to do” list last week. Our crew put in some late days planting, cultivating and bulk harvesting, all while continuing the “weekly chores” of CSA and market harvests.

CSA share, week 17, 9/4/12

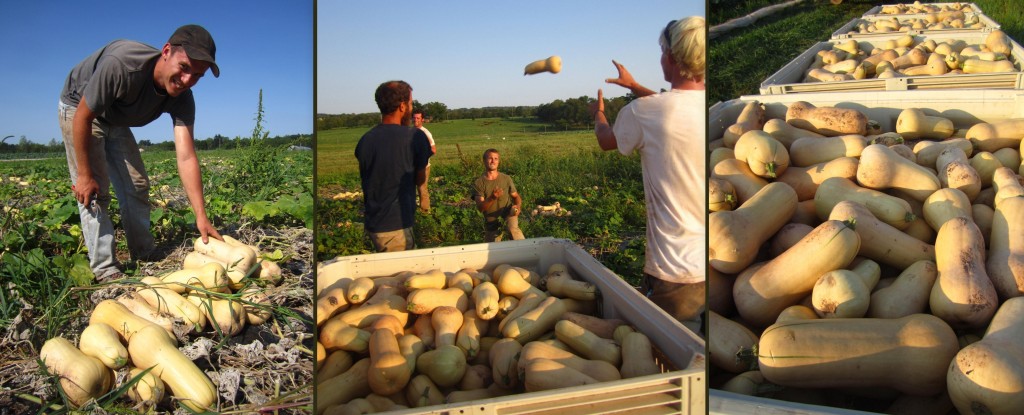
First on the priority list- butternut squash. Always a fun crop to harvest, the farm crew gets to hone its squash tossing skills, filling palette bin after palette bin with this wonderful fall vegetable- a favorite here at Blooming Glen Farm. Soup season, here we come!

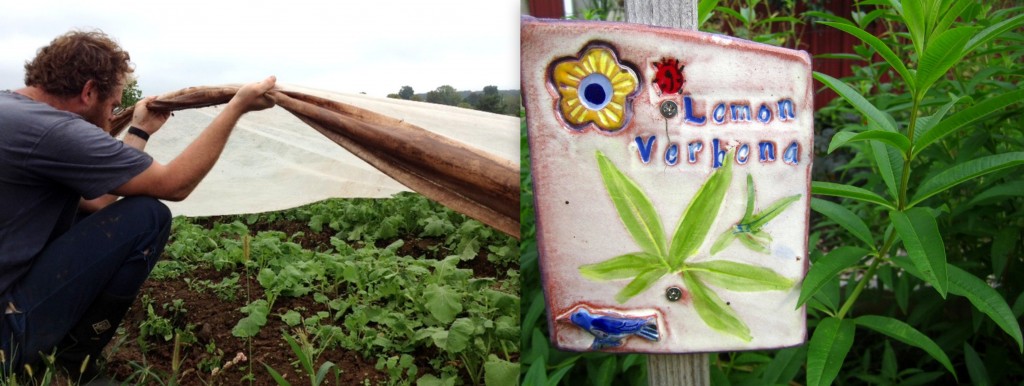
The fall roots tucked under row covers continue to grow- red radishes will most likely be harvested next week. This is a wonderful time of year when the overlap of summer and fall crops occur. Yet as many of the summer crops come to an end, we are tilling in fields and getting them ready to be seeded with cover crops- legumes and grasses that will help prevent erosion over the winter and replenish nutrients in the soil.

Radishes under row cover; herbs in the discovery garden

The discovery garden is a wonderful place to spend a few peaceful moments when you come to the farm. You may hear the laughter of children following the hidden tunnels through the teepees and corn plants, catch sight of a hummingbird, or smell the aroma of fresh picked pineapple mint. There are many herbs to discover and choose from like mints, lemon verbena, thyme, sage, garlic and onion chives, marjoram, and edible flowers. Herbalist Susan Hess will be holding a class here at the farm on Wednesday evening at 6pm, Sept. 12th, called “Preserving the Herbal Harvest“. Topics will include: proper harvesting techniques, proper drying and storage methods and basics of making vinegars, syrups, pestos, and more. Click here for more information and to pre-pay and pre-register.

Save the date! Blooming Glen Farm Fall Fest is coming up- Saturday, October 13th, 2pm until dark. The annual pie bake-off, live music and children’s crafts, a drum circle, and potluck dinner at 5pm. Be sure to join us to celebrate the season! Sign up sheets to enter the pie contest as well as to volunteer will be in the distribution room. The talent of our farm community is always welcome- contact us if you have an idea, musical talent, or anything else you’d like to contibute!!

Photos and text by Tricia Borneman, Blooming Glen farmer and co-owner.

Lemongrass and CurryLemongrass is one of the many herbs grown at Blooming Glen Farm. Its lovely scent is due to citral, also the active ingredient in lemon peel, which has strong bacteria- and fungal-fighting antimicrobial qualities. Lemongrass is high in folic acid and essential vitamins, including B5, B6, ND B1, as well as the antioxidants vitamins C and A, potassium, zinc, calcium, iron, manganese, copper, and magnesium.

Native to India, lemongrass is not only nutritious, but tasty, too! It’s commonly used in Thai and Vietnamese dishes, particularly soups and curries. It’s unique citrus flavor really brightens up recipes, and is more versatile than one might think. It pairs well with everything from tofu to beef, and can even be used in tea. See below for a flavorful green curry recipe that not only uses lemongrass, but also lots of other goodies from this week’s share.

References and recommended links:

Summer Veggie and Lemongrass Green Curry

Summer Veggie and Lemongrass Green Curry

Ingredients:
1 can coconut milk
2-3 tbs green curry paste (I use Thai Kitchen, available in the Asian section of the grocery store)
4-5 stalks of lemongrass; trim off the grassy tops so that you’re left with about 6 inches or the stalk, then remove any tough outer leaves and mince.
2 tbs tamari
2 tbs brown sugar
1 lb tofu, drained, pressed, and cubed
2 sweet peppers, julienned
1 zuchinni, sliced into disks
1/2 an onion, julienned
1/2 Chinese eggplant, sliced into disks
1/3 cup basil, cut into ribbons

Method:
Heat coconut milk, lemongrass, curry paste, tamari, and brown sugar in a deep skillet over medium-high heat. Mix well, bring to boil, reduce heat and simmer 5 minutes. Add tofu, simmer 7 minutes longer. Add vegetables, cover, and simmer, stirring occasionally, until veggies are cooked through, about 10 minutes. Stir in basil and serve.

Post and photos by Mikaela D. Martin: Blooming Glen CSA member since 2005, board-certified health counselor, and co-founder and -owner of Guidance for Growing, an integrative wellness practice in Souderton. Read more about healthy eating and living on her site, http://guidanceforgrowing.com!

The dreaded late blight has made it’s way to Blooming Glen Farm, and rather rapidly moved like wildfire through the beautiful cherry tomatoes and field tomatoes. All told we were lucky this season. Some of you may remember the first year late blight caused a real problem in this area of the country- it is a funguslike pathogen that also targets potatoes (it was responsible for the infamous Irish potato famines in the mid 1800’s), and is exacerbated by wet conditions. It is a real issue for organic farmers who don’t have the arsenal of preventative chemicals and fungicides that conventional growers use. In 2009, we didn’t have a single harvestable field tomato, and we watched in agony as the plants turned black and the fruit rotted on the vine in a matter of days. This season’s dry weather kept the late blight at bay, and I think overall we have had many weeks of bountiful tomatoes. We do have a later planting in a field about a mile from here. We are hoping they will be red and ready to harvest soon, before they too succombe to the disease.

CSA share, 8/28/12, week 16

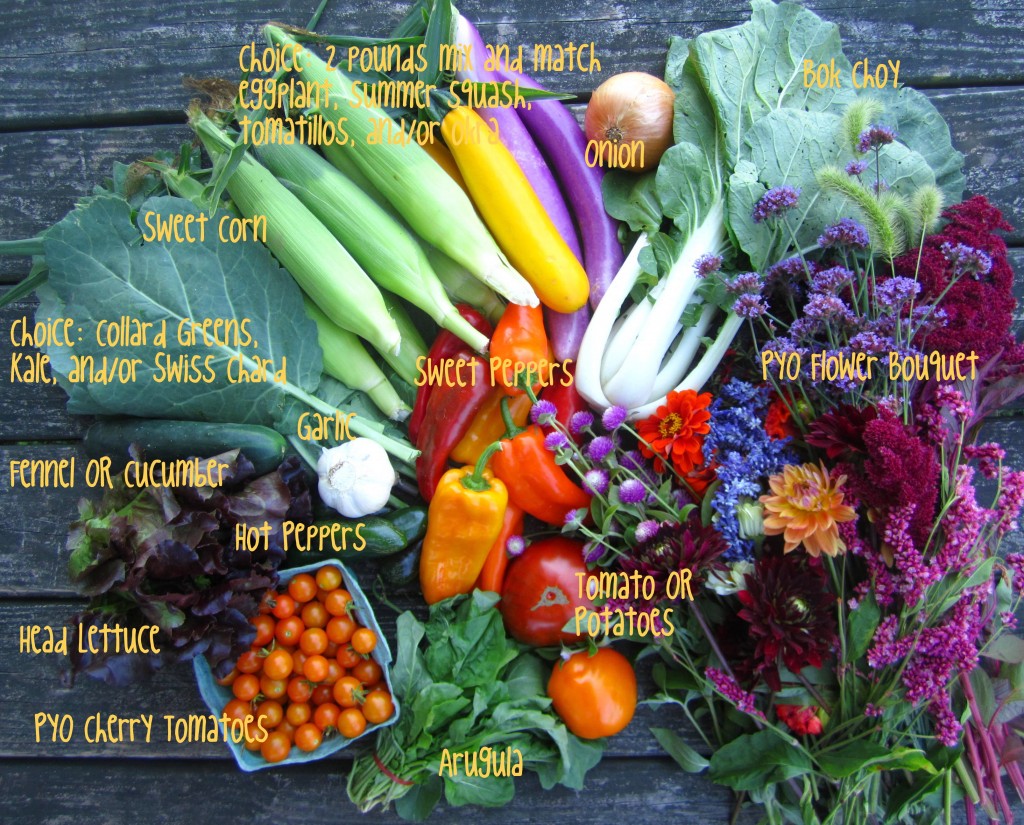
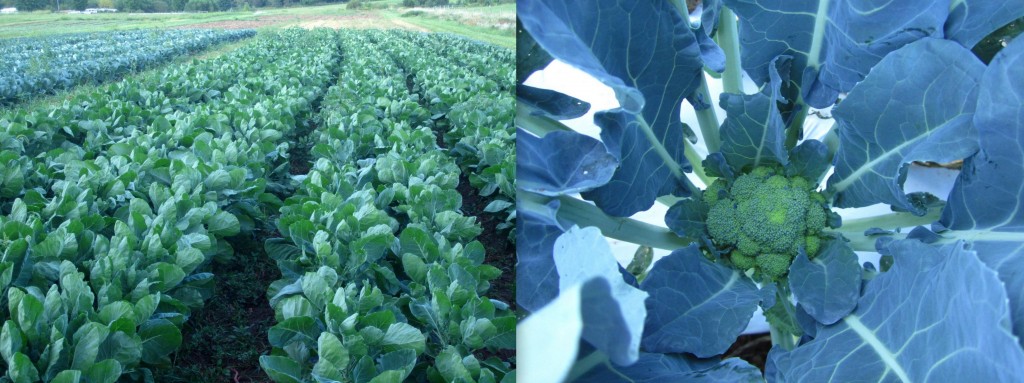
Meanwhile, the farm crew is busy getting the last late season plantings into the fields- arugula, kohlrabi, bok choy, more rotations of broccoli, fennel and head lettuce. Plantings of purple-top turnips, watermelon radishes and daikon radishes have all been thinned. We are very excited to be growing brussel sprouts this season, for the first time ever. The plants look amazing, so we are hopeful all will go well with them. Our first planting of broccoli already has ping-pong ball sized heads- a few more weeks to go until they hit your dinner plates!

Field of brussel sprouts and cabbage; Baby broccoli

You may have noticed that the fall greens are starting to make their way back into the share and into the markets. We are excited to be growing collard greens again after taking a few years off. We hope you’ll enjoy them, as well as the kale and swiss chard. To help you prepare for the return of greens, we will be hosting a class at the farm focused specifically on greens. On Wednesday, September 26th, from 7-8:30 pm, Patti Lombardi, nutrition coach, will give a hands-on demonstration on a variety of ways to add greens to your diet. You will get to taste and enjoy a number of dishes featuring seasonal greens, and leave with helpful handouts and recipes. The cost of this class is $20. Email Patti to pre-register!

Photos and text by Tricia Borneman, Blooming Glen farmer and co-owner.

This time of year is bittersweet here at the farm. The weather is cooler, the pace is back to reasonable, but with school just around the corner, there is some transition that happens on our farm crew. Our part time summer help typically ends this week and next, heading off in various directions, be it high school, college, or in one case, fourth grade (teaching, that is).

Jared Grace is a fourth grade teacher at Gayman Elementary, where he will use lessons learned at the farm in real-life math examples: “You have 20 bins of tomatoes, all weighing 25 pounds, and 150 CSA members- how many pounds of tomatoes go in the share this week?”….But in all seriousness, thanks to Jared’s passion for sustainability his school is composting on a small scale within the classrooms, and he hopes to get the cafeteria composting this year. His classroom students learn about local food production and CSA’s and his long term vision is to inspire the students through the creation of a school garden.

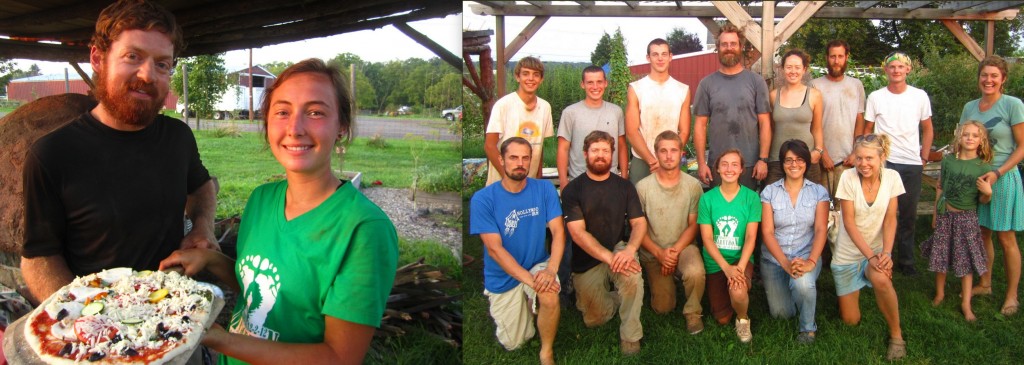
Jared, Mordan and the farm crew

Mordan Pappas heads to Oregon for a year to study holistic health at Ananda College. Inspired by her season at the farm, Mordan then plans to study sustainability in natural building and design. Aaron Gunderson who is entering 12th grade at Pennridge High School and beginning his college visits, after two seasons at Blooming Glen Farm, has also decided to look into a Sustainability major. High School senior Kevin McDonald, despite morning and evening polo practice and weight lifting, still manages to come to the farm in between, lift heavy bins of produce, all with a smile on his face.

They all bring a wonderful inquisitive energy to the farm, and their hard work and smiling faces will be missed! We fired up the farm’s earthen oven for a farewell thank-you pizza party. We also welcomed some new fall help to the farm. Thanks Jack, Mordan, Jared, Aaron, Paul and Kevin and welcome to Lexi, Natalia and Tim!

CSA share, week 15, 8/21/12

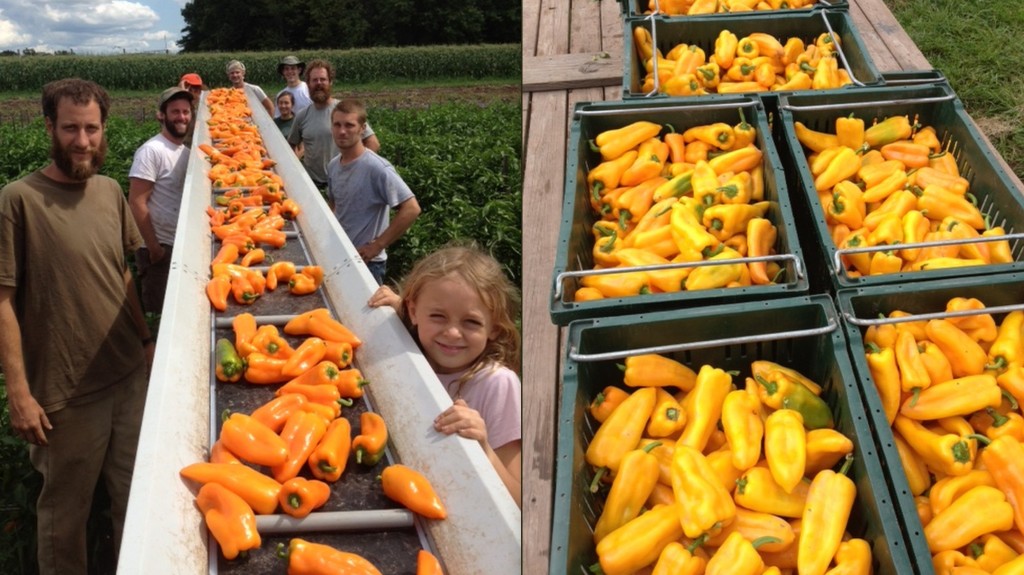
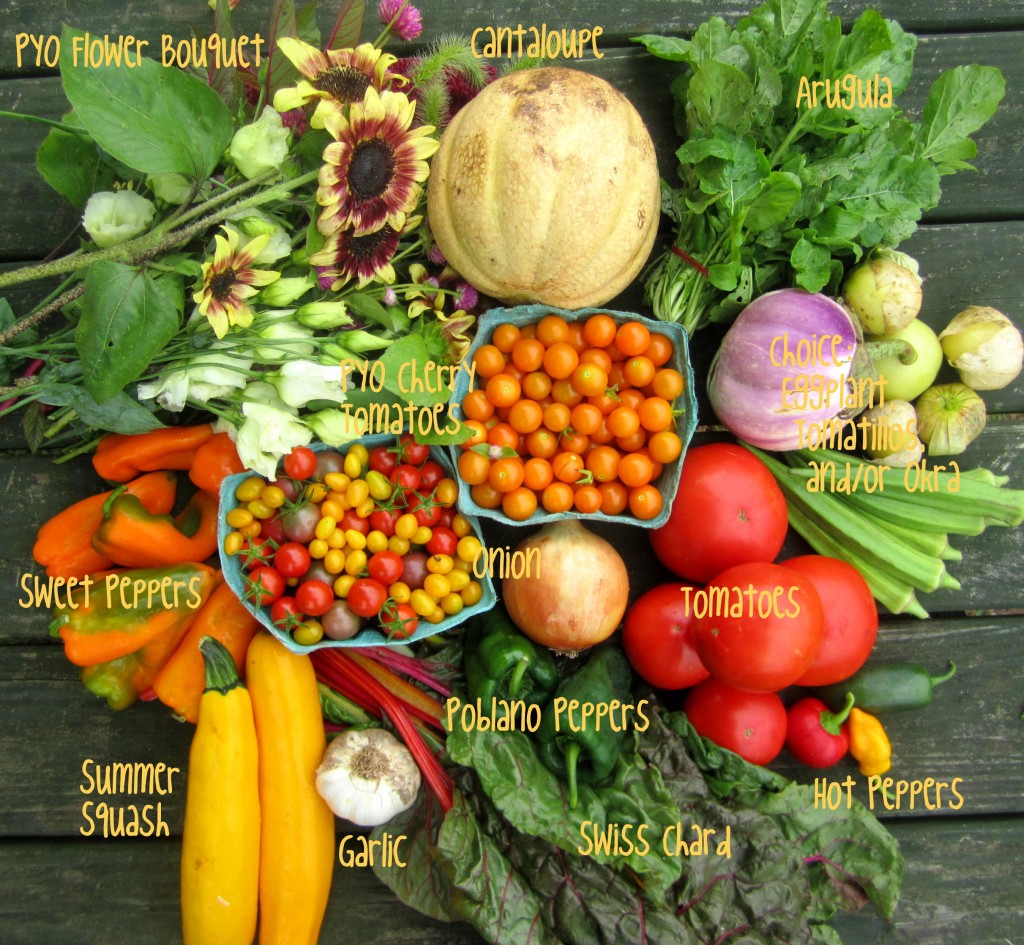
This week an avalanche of sweet peppers descended on the farm. We love when crops do well enough that we are able to offer them in bulk for the preservers in the crowd. Many of you took advantage of the discounted 10 pound bags of assorted sweet peppers…and if you didn’t, we’ll have them again this coming week. Just send us an email and we’ll have them ready for you at your CSA pick-up.

I love to freeze sweet peppers for the winter- they are so easy to do, and the flavor (and price) can’t beat those shipped in sweet peppers you’ll see in the stores in the colder months. Just cut them into strips and flash freeze them on a cookie tray, popping them into freezer bags when finished. Then just grab a handful frozen, dice up and add to any saute.

Another option is to roast, pickle and can a batch (or make into fridge pickles)- you’ll be ready for your own antipasto platter. Click here for a recipe. A couple notes: I find it easier to cut the peppers in half and remove the stem and seeds before roasting (skin side up). When the skin is blackened, then it’s easy to just scrape off the charred skin with a knife and slice the peppers up. I like using this charring method even when I’m not going to can them, especially when making homemade pizza. I have been enjoying the sweet peppers grilled lately- the sweet smoky flavor has become a favorite in our house, and makes a wonderful sandwhich with other grilled veggies like summer squash and eggplant.

For even more sweet pepper ideas, keep an eye out for next week’s recipe from Mikaela which will utilize some of the fresh lemongrass from the Discovery Garden.

Photos and text by Tricia Borneman, Blooming Glen farmer and co-owner.

Mmm… nothing says summer like a refreshing, juicy, crunchy slice of watermelon, does it? Big fat watermelons are in the share and at the markets again this week. This, of course, is a great thing, and not just because of the incredible taste — this big fruit offers up some big nutrition, too!

Watermelon is a natural thirst-quencher that has been shown to decrease the inflammation linked to health conditions from asthma to skin conditions. It also provides several beneficial antioxidants, including vitamin C, beta-carotene and lycopene. And, because of watermelon’s high water content, calorie for calorie, it’s a very good source of vitamin B6 and a good source of vitamin B1, magnesium, and potassium.

Here are two new ways to get this delicious and nutritious fruit into your belly:

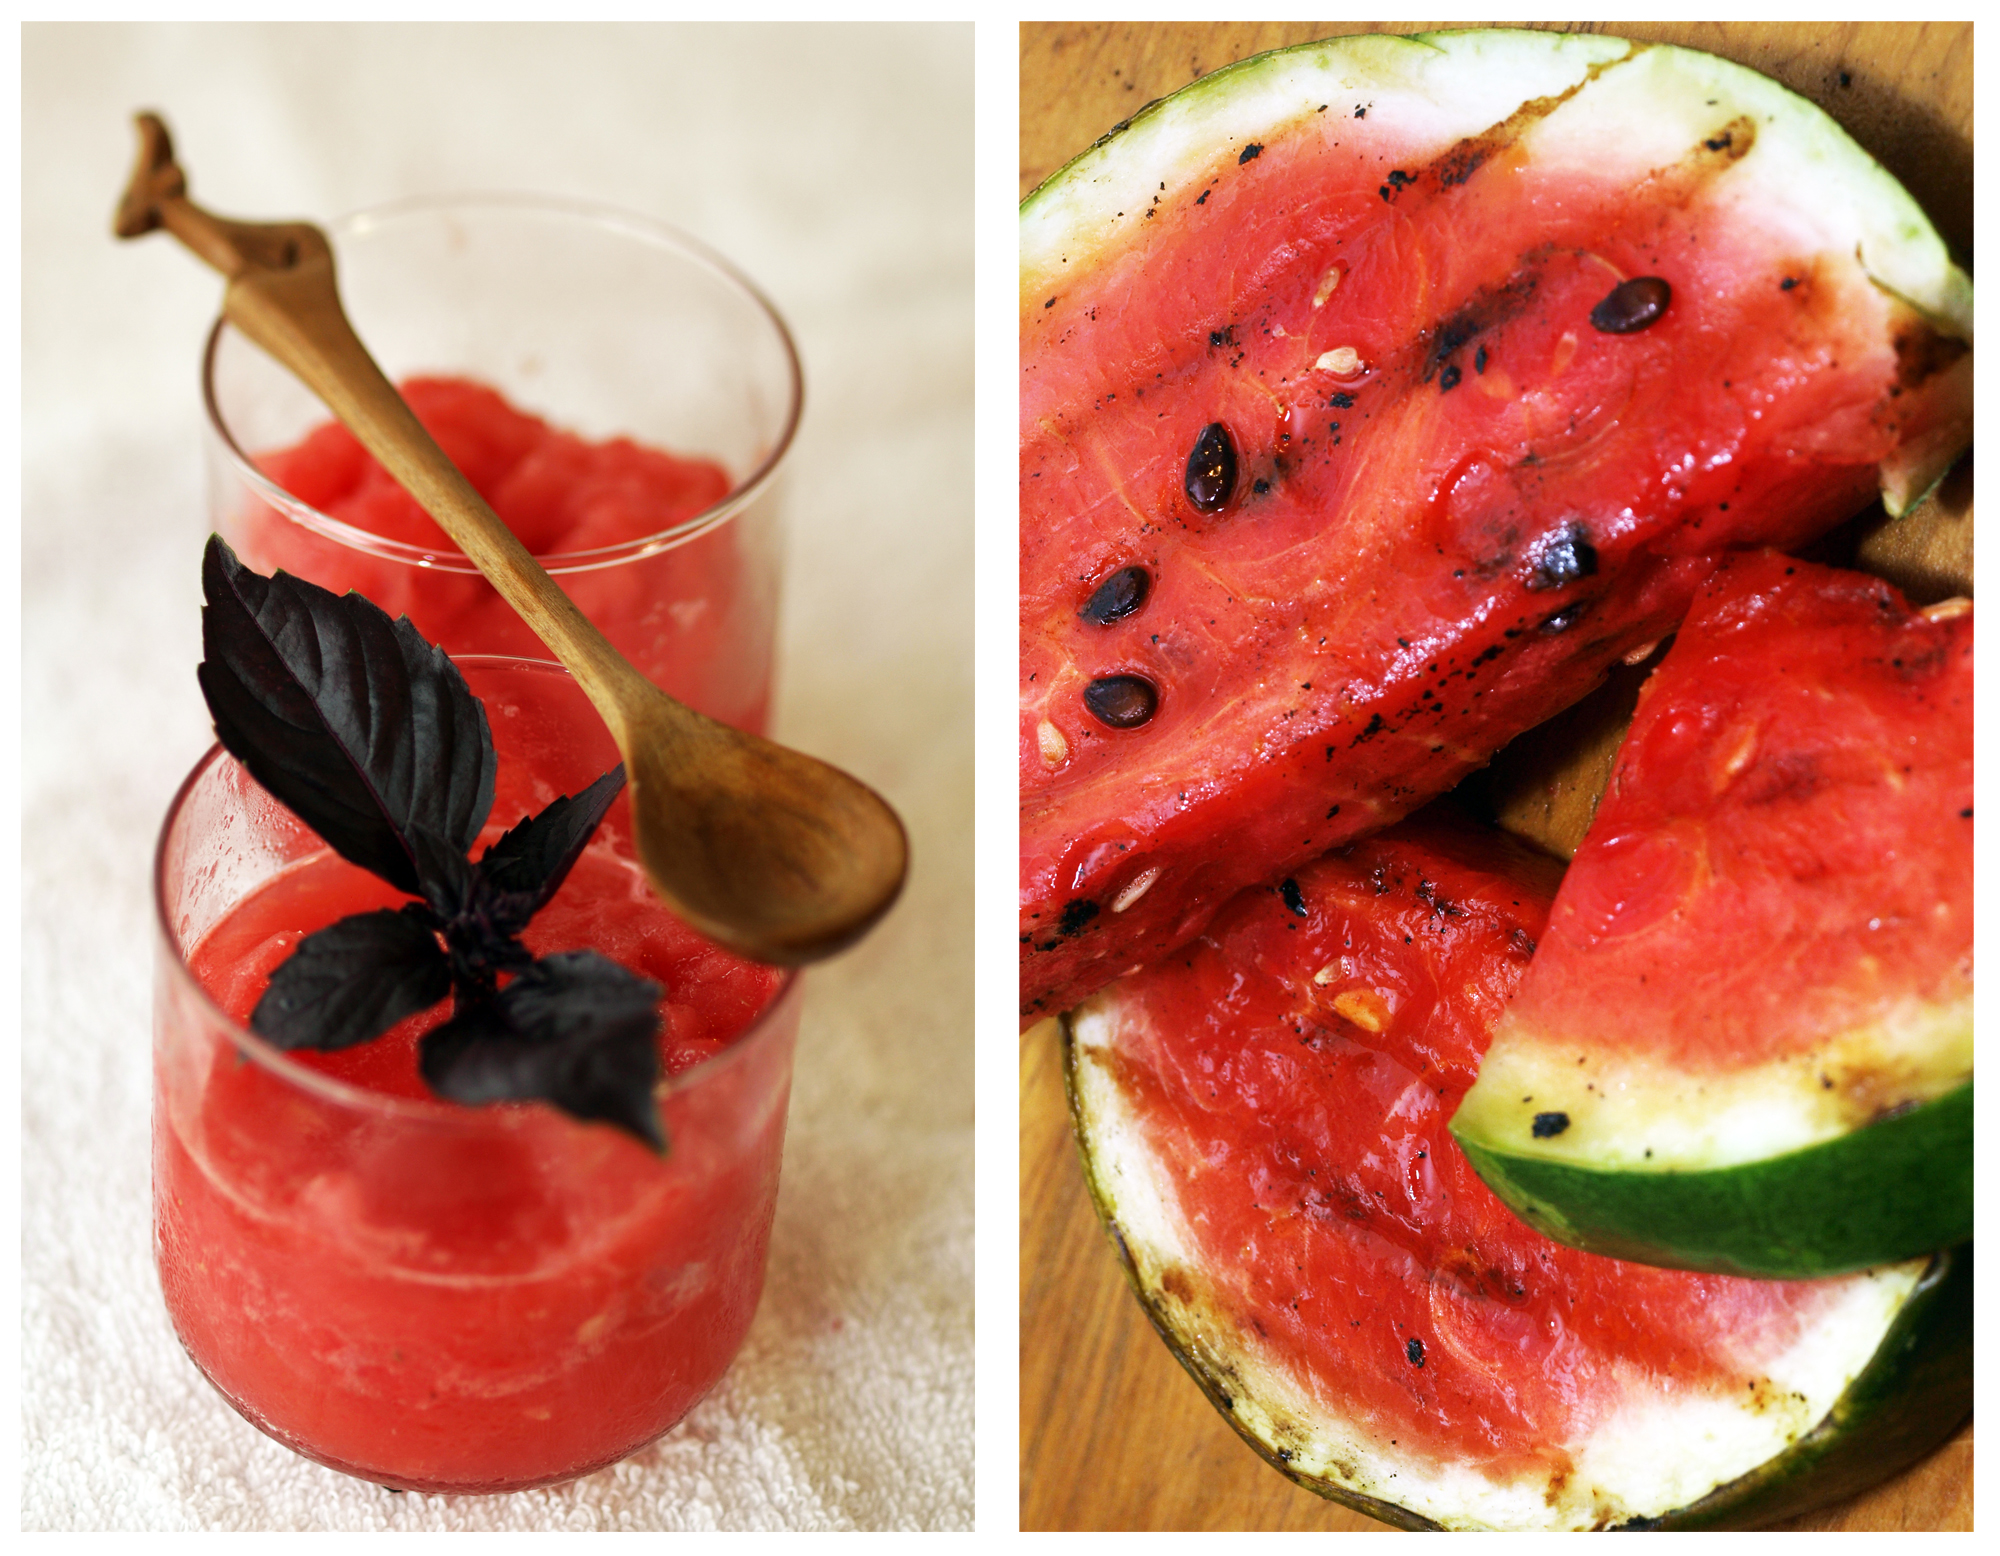
Watermelon two ways: Frozen & Grilled


Frozen —
Cut watermelon into chunks, place on a clean cookie sheet (removing seeds as you go) and freeze overnight. Frozen watermelon chunks can then be used to make all kinds of smoothies, just add your favorite juice or water, a bit of sweetener and/or fresh herbs, and blend. Our most recent favorite flavor is a raspberry-lime watermelon smoothie: Mix 2 cups of watermelon chunks, 1/2 cup water, 1/2 teaspoon raspberry agave and a squeeze of lime juice in a in a blender or food processor (or use a hand blender). Garnish with basil — or blend it in!

Grilled — Slice watermelon in 1″ slices. Place on heated grill for 2-3 minutes, flip and heat for another 2-3 minutes. You should see grill marks and the sugars from the fruit should become caramelized. Eat slices as is, or cut into chunks and serve on a bed of spring greens with vinaigrette dressing, a topping of feta cheese and/or nuts.

Post and photo by Mikaela D. Martin: Blooming Glen CSA member since 2005, board-certified health counselor, and co-founder and -owner of Guidance for Growing, an integrative wellness practice in Souderton. Read more about healthy eating and living on her site, http://guidanceforgrowing.com!

As a farmer I consider myself food rich- my currency is not in dollars, but in the bounty and flavors of the season. As the stream of veggies flows by my front door from field to market, I can often get overwhelmed with the impermanence of it all. On those occasions the only thing that helps soothe my nagging thoughts is to put some of that food in jars. Seeing the freezer stocked and some preserves on the shelves brings a satisfaction like no other. I admit, my canning is limited to what I can do with a water bath canner, but that’s okay- there is so much in that realm, and every year I discover a new favorite. I hope to take a class and master the pressure canner someday, but for now I stick to jams, pickles and tomatoes, low in risk and high in satisfaction.

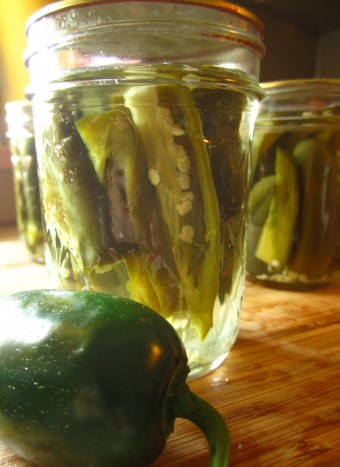
This week, for Farmer Tom, I decided to put up some pickled jalapenos, and for myself, some cantaloupe preserves. (We don’t grow tree fruit on our farm, but thanks to a gift of a box of peaches from our neighbors at Easton farmers market, Scholl Orchards, I also discovered the joy of homemade peach jam! I won’t go into that in this post, but I encourage you to make some- it was amazing! (I used the recipe in Put ’em Up, by Sherri Brooks Vinton.)

I have been canning on and off for the 12 years since we started farming. But I had a eureka moment after attending a class by blogger and cookbook author Marisa McClellan of Food in Jars fame. I had the mentality that canning needed to be an all day production involving crates of vegetables, cases of jars, a hot kitchen and my big black enamelware canning pot. Low and behold, Marisa talked about small batch canning, 3 pints or even better, 6 half pint jars of jam at a time. And, here comes the clincher: using your staple stock pot, not the big black canning pot that takes an hour to get the water to boil.

I ordered a cheap flexible flower-shaped trivet for sitting the jars on in the bottom of my pot and voila, my basic 12-quart stainless-steel stock pot was turned into a maneageable canning pot.  As long as your jars can be covered by an inch or two of boiling water, you can use any size pot you’ve got.

Now don’t get me wrong, there is a place for the big canning pot: salsa, and canned whole tomatoes, and my grandmothers sweet and sour relish, those I like to spend part of a day on and do in big batches. But pickled okra, pickled garlic scapes, pickled jalapeno, bread and butter pickles, and fruit jams with various herbs- now those can be done in smaller amounts in an hour or so. Smaller batches takes some of the pressure off to produce larger quantities and puts the fun back into exploring new flavor combinations. From past experience I’ve learned that you may can a lot of something, but if it’s not a hit, it will sit for a year in your pantry collecting dust. So making smaller batches is a great way to find your family’s favorite preserves, and to focus your precious time on canning what you really can’t make it through winter without!

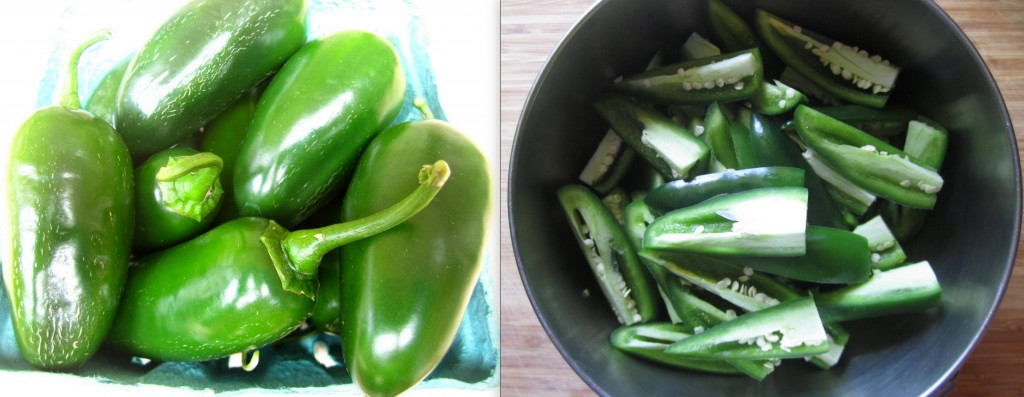
Pickled Jalapenos

*This basic recipe is from Food in Jars. It makes approx. 5 half pint jars.

Prepare a boiling water bath and boil your empty jars while preparing the other ingredients. Place the lids in a small saucepan and simmer over very low heat.

Combine 2 cups distilled white vinegar, 2 cups water and 2 tablespoons pickling salt in a pot over high heat and bring the brine to a boil.

Meanwhile prepare 1 pound jalapeno peppers (about 1 quart). Wearing rubber gloves (very important!!), slice the jalapenos in half lengthwise, but leave on the seeds and guts- this is where the heat is.

Pack the peppers tightly into the jars. Pour in the hot brine, leaving a 1/2 inch headspace. Gently tap the jars on a towel lined surface to release any air bubbles before using a wooden chopstick to dislodge any more bubbles. Check the headspace and add any more brine if necessary.

Wipe the rims, apply the lids and rings, and process in a boling water bath for 10 minutes.

Let these pickles cure for at least one week before eating. Tom loves these in burritos, on hot dogs or nachos, on scrambled eggs with tomatoes- anywhere you want a little extra heat.

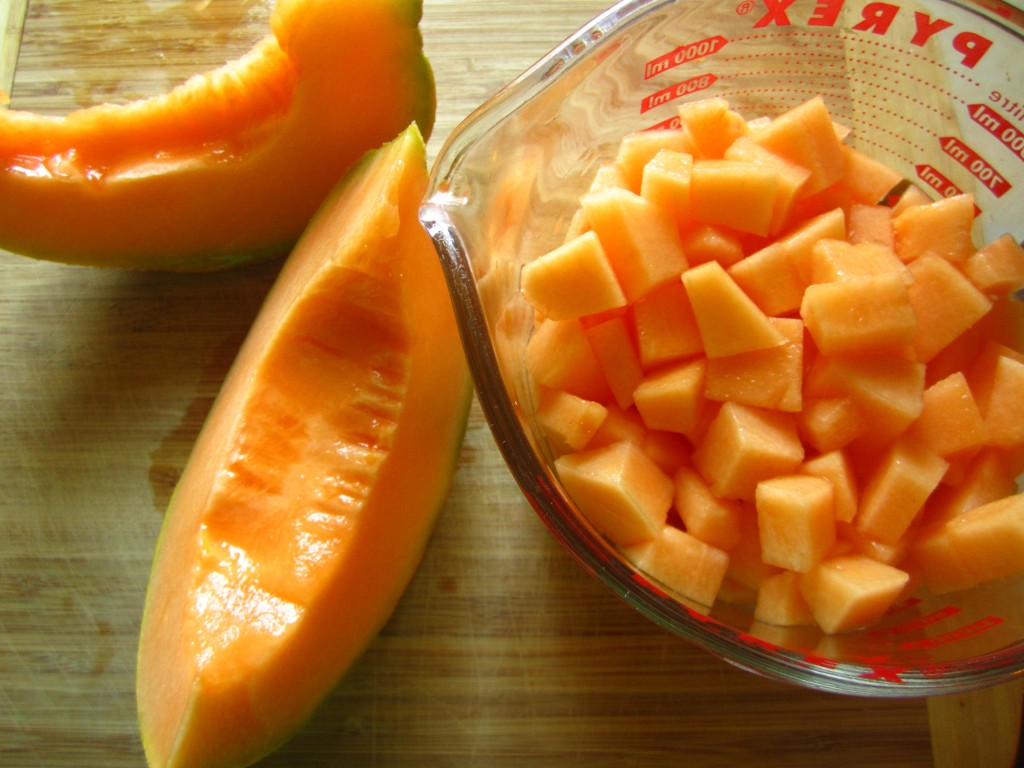
The cantaloupe we are growing at the farm is a new variety this season with a wonderful aromatic sweet flavor. They don’t have the best shelf life, however, so I rescued one that was a bit soft and headed for the compost heap. It made the best small batch of cantaloupe jam. And I figured since cantaloupes have been in the share for the past few weeks, you too might want something new to do with them. The cantaloupe I used was on the larger end, so I even had a few slices left to eat.

Cantaloupe Preserves

*This recipe is from Put ’em Up!

Cut one cantaloupe into 1-inch chunks; you should have about 4 cups. Combine the melon with 1/2 cup water in a large pot and bring to a boil. Stir together 1 cup sugar and 2 teaspoons Pomona’s Universal Pectin powder. Add the mixture to the boiling fruit and stir some more. When the mixture returns to a boil, stir in 2 teaspoons calcium water (included in the Pomona box, with instructions), 1/2 cup bottled lemon juice, and 1 teaspoon cinnamon. Remove from the heat and let rest for 5 minutes, stirring occasionally to enable air bubbles to settle out. Skim off any foam (and enjoy a taste!).

You can refrigerate for up to 3 weeks, or can it using the boiling-water method. Process for 10 minutes- it should fill about 4 half pint jars.

Photos and text by Tricia Borneman, Blooming Glen farmer and co-owner.

Thunderstorms have made harvesting tricky business of late. CSA share members start picking up their produce at 1pm, and we start harvesting all that produce at 7am the same day. We will harvest in all kinds of weather- rain, wind, mud, frost, even snow, but not a thunderstorm. We don’t mess around when it comes to thunder and lightning, so we watch the radar and call our crew inside when necessary. This week and the end of last week was the first that storms coincided with our harvest mornings, making the pace a bit more frantic than usual when we could finally get back outside. Luckily the storms blew in and out within an hour, bringing downpours, then cooling temperatures.

CSA share, week 14, 8/14/12

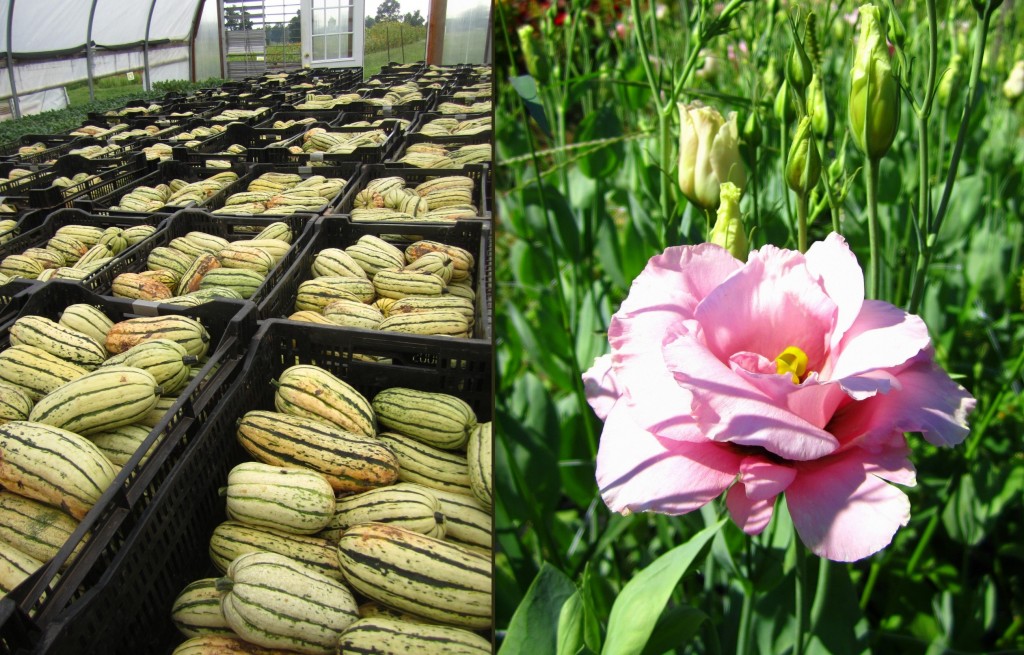
When we weren’t harvesting for the shares or markets, we were harvesting our field of delicata winter squash, getting the ripened fruits out before mud and bugs threatened the crop, and into our warm greenhouse to cure. The butternuts will be the next out of the field- they still need a bit more time, but not much.

Farmer Tom’s direct seeding of fall carrots, winter radishes, and turnips all germinated after the rain, leaving little green strips against the deep red soil. In the pick-your-own flower field, look for the lisianthus. They are in full bloom, and are a real treat- with their delicate petals in various shades of white, purple and pink, they look almost like roses. Lisi’s have a wonderfully long vase life- so pick a bouquet and enjoy!

Delicata winter squash and Lisianthus flower

In other good news, just today we discovered that our delicious bicolor sweet corn crop is ready for picking- hooray!- so most likely the Thursday pick-up group this week, and Tuesday next week will enjoy this bounty, if not longer.

On another note, as part of our mission at Blooming Glen Farm, we feel it is important to spread the word about other farmers practicing sustainable agriculture. For those of you who do choose to eat meat protein, it is important to us that you are able to purchase these products from reputable, local farmers who share our values, and we know that many of you value the opportunity to buy pastured poultry from Ledamete Grass Farm, and sustainably harvest seafood from Otolith. If you are looking for a great local source of grass fed beef, look no further.

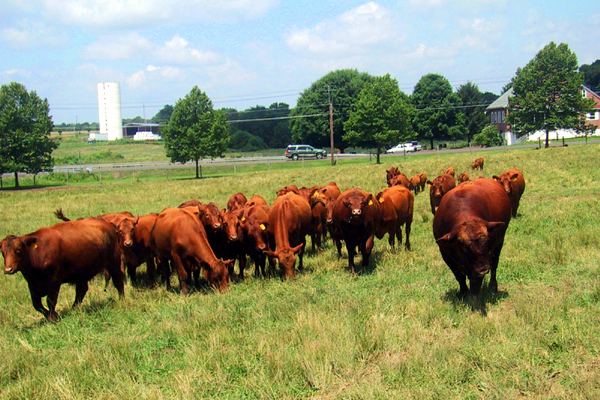
Tussock Sedge Farm, our neighbors and landlords, located at 1239 Route 113, across the street from Moyer Road, would like to invite you to stop in at their farm and purchase their direct marketed, totally grass fed beef on the CSA pickup days of Thursday, August 23, 1-5 pm and Tuesday August 28, 1-5 pm.   You have probably noticed their herds of red angus cattle grazing the fields surrounding the CSA when you come to pick up your vegetables.  Owners and operators Henry and Charlotte Rosenberger raise their cows from calves. Their calves are born on their farm (about 100 each year) and over the next 2 years graze their pastures.  They do not feed their cattle hormones or use preventative antibiotics, only grass, organic minerals and salt. 

Tussock Sedge Farm's Red Angus Cattle

Tussock Sedge Farm accepts cash or check and you do not need to pre-order on August 23 and 28.  They will offer you the following to purchase:

  • 12 lb. Sampler Pack for $95. Contents:  5 lbs. of ground beef, 1 lb. of cube beef, 1 pack of chipped steak, 1 roast and at least 3 steaks.  The roasts and steaks vary and they will let you choose between the packs they have available.
  • 1 lb. packs of ground @ $5.00 per lb.
  • 1 pkg. of 6 oz. patties, 4 in a pack, for $7.50.
  • 1 pkg. of 8 oz. patties, 4 in a pack, for $10
  • Liver ($4.), marrow bones, oxtail, heart ($5.)

Photos and text by Tricia Borneman, Blooming Glen farmer and co-owner.