Author: bloomingglenfarm

Orangey Sweet & Sour CabbageCabbage is probably one of the most abused vegetables in town. On St. Patrick’s Day, it’s appearance is first upstaged by the potato, and then its nutrition is slow-cooked to near depletion. In picnic season, it’s coated with fatty oils, dressings and cream sauces. Probably worst of all, it’s reputation seems to be forever tarnished, thanks to the tiresome cabbage soup fad diet.

But, the cabbage deserves so much more than this! It’s anti-inflammatory properties are stellar, thanks to the high content of an amino acid called glutamine. In addition to promoting the digestive process and intestinal health, glutamine has been shown to be useful in all sorts of treatments including burns and peptic ulcers. Because cabbage is a member of the cruciferous family, it’s also a great cancer-fighting food. Cruciferous veggies are high in indole-3-carbinol, a chemical shown to block the growth of cancer cells, as well as stimulate DNA repair in cells. Finally, a look at cabbage’s nutritional profile shows it as an excellent source of vitamins K and C, a very good source of fiber, manganese, folate, vitamin B6 potassium and omega-3 fatty acids, and a good source of thiamin (vitamin B1), riboflavin (vitamin B2), calcium, magnesium, vitamin A, and protein.

Clearly, cabbage deserves to shine in all of our diets.  To get the most nutrition, be sure to eat it raw or fast-cooked. Cabbage is delicious steamed and splashed with balsamic vinegar, fits well into just about any stirfry, and makes a perfect wrap:
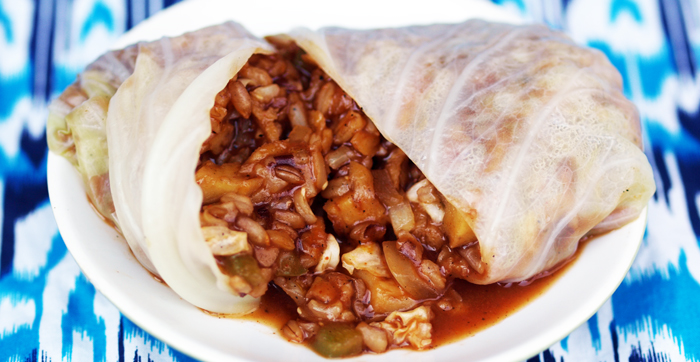
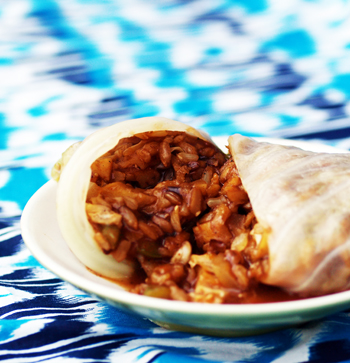
Orangey Sweet & Sour CabbageOrange Sweet & Sour Cabbage Wraps

Steam 12-15 large cabbage leaves until just tender, about 4 minutes, and set aside.

Combine sauce ingredients and set aside:
2/3 cup white vinegar
1/3 cup tamari
1/2 cup ketchup
1/4 cup agave
4 tablespoons fresh orange juice
2 tablespoons arrowroot powder or cornstarch
1 teaspoon ground ginger
1/4 tsp cayenne
zest from 1/2 orange

Heat 1 tablespoon grapeseed oil in a large skillet over medium-high heat. Add 2 cups seitan*, chopped small, and cook until crispy (about 10 minutes), stirring occasionally. *Use crumbled tempeh for a gluten-free version, or if seitan is not available.

Reduce heat to low-medium, stir in 1 1/2 cup bell peppers, chopped small, 1 1/2 cup onion, chopped small and 4 cups cabbage, thinly shredded and cook until tender, but still crisp (about 5 minutes), stirring occasionally; if mixture is sticking to pan, add a little water.

Reduce heat to low, stir in 3 cups cooked brown rice and half of the sauce, mix well and allow to thicken. Add sauce until the filling reaches your desired consistency. Remove filling from heat, scoop onto cabbage leaves and wrap ’em up!

Serve these immediately, two to three as a main dish or one as a side.  Options: Substitute peppers and rice for any veggies that are in season and grains that are on-hand.  Increase cayenne if you want to turn up the heat.  Substitute pineapple juice for orange juice and eliminate the orange zest if you want a more neutral sweet-and-sour flavor.

Post and photo by Mikaela D. Martin: Blooming Glen CSA member since 2005, board-certified health counselor, and co-founder and -owner of Guidance for Growing, an integrative wellness practice in Souderton. Read more about healthy eating and living on her site, http://guidanceforgrowing.com!

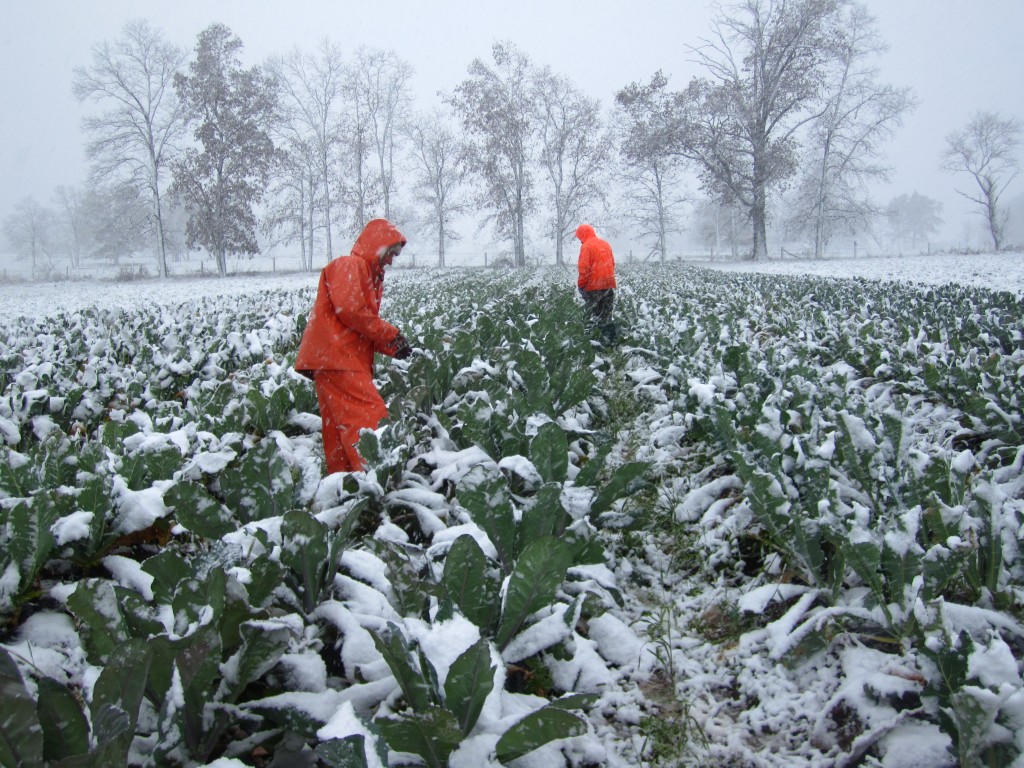
A whopping six inches of heavy snow fell on the farm this weekend… a first for the end of October, but considering the fall we’ve had, not all that surprising. A few crops that we thought we might have for this week and next are buried under snow (arugula) or just didn’t hold up to the hard freeze (swiss chard). But thanks to the high tunnels, we have bok choy, head lettuce and greens. Next week is the last pick-up of the season: Tuesday, November 8th and Friday, November 11th.

November 1, 2011

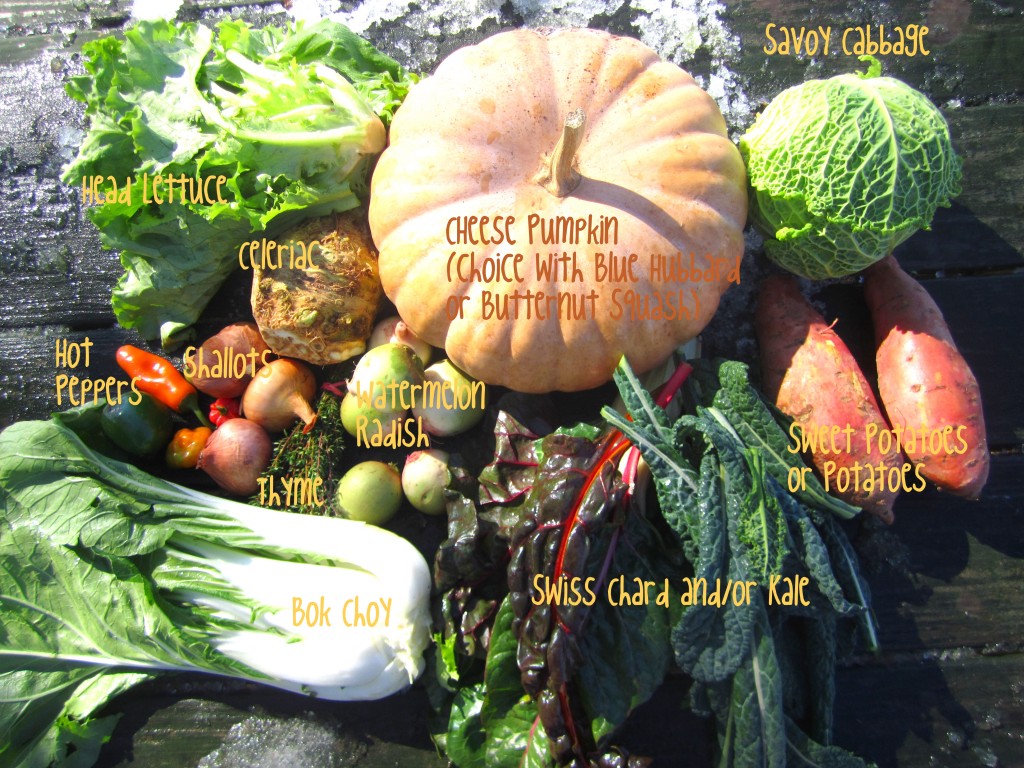
In the share this week are a few new crops you may not be familiar with.

The watermelon radish when sliced looks just like a watermelon with a green rind and rosy pink interior.  The color intensifies with a splash of vinegar.  Gorgeous in a salad raw, this radish can also be roasted, added to stir fries, sautéed, added to stews, or even boiled and mashed (peel the skin first). Milder than most radishes, it is actually slightly sweet with a nice crisp bite when raw. The watermelon radish is an heirloom variety of the Daikon.

In the squash family there is a choice of cheese pumpkin, blue hubbard squash and butternut.

A classic pumpkin of the 19th century, the Long Island Cheese pumpkin was likely named for its shape and color, which bring to mind a wheel of dairy-fresh cheese. The name may also come from the colonial practice of making “pumpkin cheese”, a somewhat sweet preserve (or what we would call pumpkin butter) from squashes that do not store well. This pumpkin has a sweet flesh that’s good for baking.

The Blue Hubbard winter squash is believed to have originated in the West Indies, and first arrived in Marblehead, Massachusetts in the 1700’s. It is described as “starchy, dry, thick, flaky, floury, melting, nutty and fine-textured with a brilliant orange flesh”. It has excellent storage properties. When kept in a cool place (around 50°) it will last for a few months. It is delicious in pies, for which it is best known, but it can also be cut into serving size pieces and baked or steamed. Because of its grainy texture, it is often mashed or pureed with butter and seasonings before serving. You can bake it whole, or if it is too large, cut it, or break it by putting it in a big plastic bag and dropping it on the ground. Excellent source of Vitamin A and contains fair amounts of iron and riboflavin.

The butternut squash has the longest storage potential of all squash. The butternut has a bright orange, moist flesh with a nutty flavor and a tan exterior skin and bulbed end. It is very versatile for cooking. Bake in sections in oven with skin on, or peel off the skin, cube and boil, then blend into soup.

Saturday's snowy harvest.

Photos and text by Tricia Borneman, Blooming Glen farmer and co-owner.

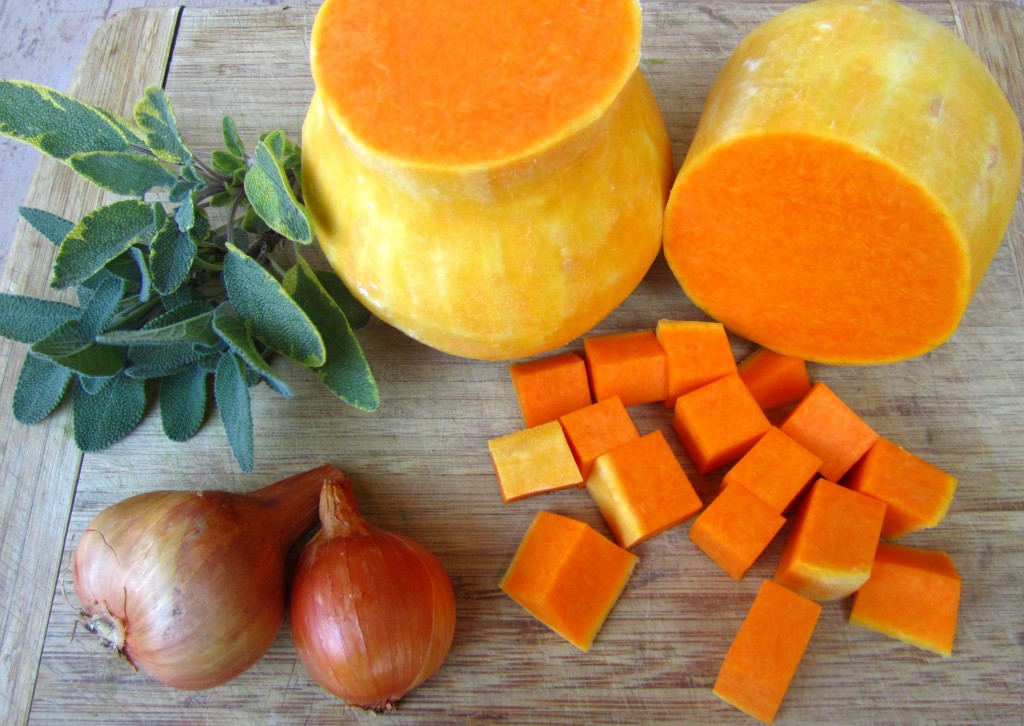
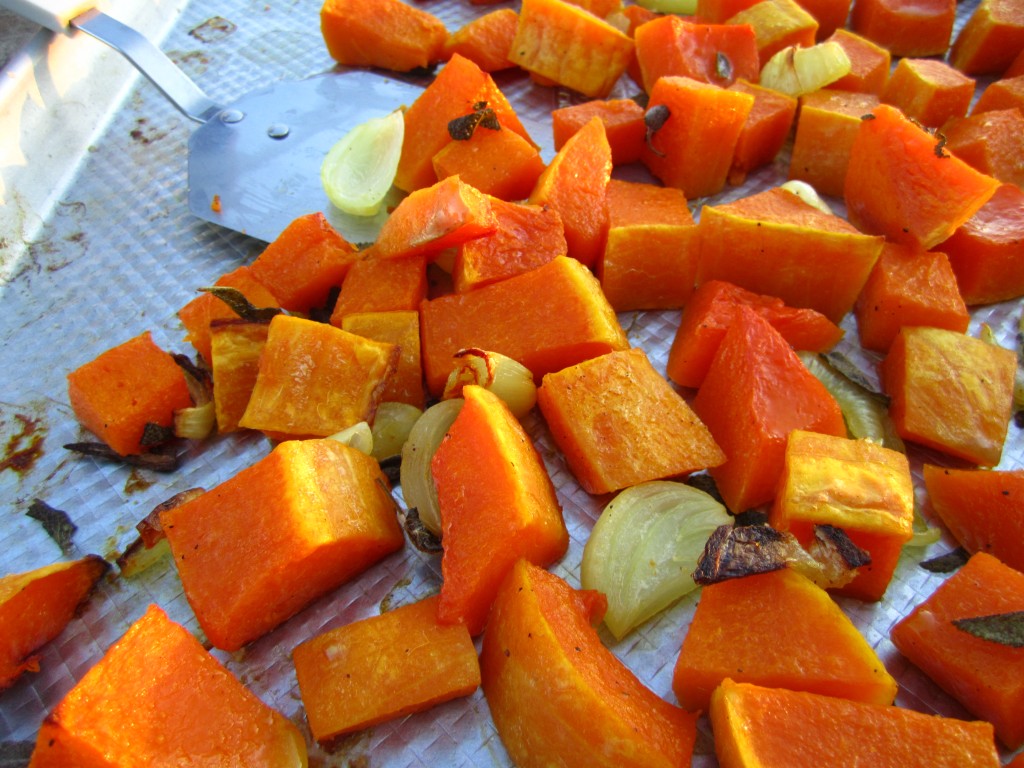
Butternut squash, a type of winter squash, has a sweet nutty flavor, and a rich, orange colored interior. It can be used interchangeably with recipes that call for pumpkin, and roasting the squash will deepen the flavor.  This recipe is a simple but delicious side dish that can be personalized by using your favorite fresh herbs, or adding other diced vegetables, like turnips and potatoes. This recipe makes quite a lot- for two adults I would adjust the quantities by only using half a butternut for this recipe, and reserving the rest for another use.

Roasted Butternut Squash with Shallots and Sage

– Preheat your oven to 450 degrees.

– Take one medium butternut squash (about 2 pounds) and peel, seed and cut into 1-inch chunks.

– Peel two shallots (about 1/4 pound) and quarter lengthwise.

– Toss in a bowl: shallots, diced butternut squash, 1 1/2 tablespoons olive oil, and 1/4 cup fresh sage leaves, roughly chopped. (Thyme could be substituted for the sage, or add a dash or two of cinnamon to tempt the younger set). Season with coarse salt and ground pepper. Spread on a rimmed baking sheet.

– Roast until butternut is lightly browned and tender, about 30 minutes.

Photos and text by Tricia Borneman, Blooming Glen farmer and co-owner.

In your share this week is a 1/2 a pound of golden shallots. Shallots are like a sophisticated onion- one with a more delicate and sweet garlicky flavor. They are wonderful in risotto or roasted alongside a chicken then used as a base for gravy, or carmelized and paired with roast beef. This week’s recipe features roasted butternut with sage and shallots.
A fresh bunch of tasty arugula is in the share for another week- this is a green that doesn’t mind the cold nights. I picked up some wonderful Petite Seckle pears at the Headhouse Farmers Market this weekend, and have been enjoying them in an arugula and goat cheese salad with a balsamic vinaigrette. Delicious!

October 25, 1011

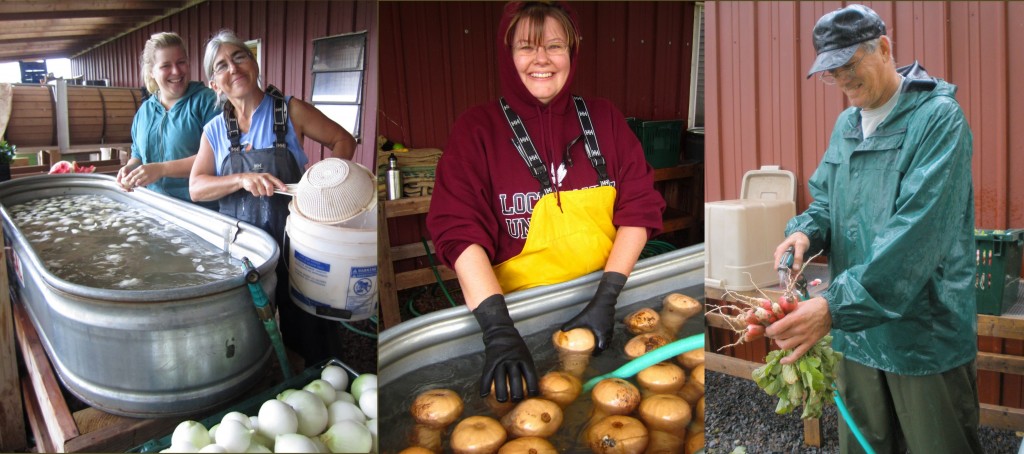
As the CSA winds down, I want to draw your attention to some of the many hands that helped to bring your veggies from the field to your dinner plate. Not only is there our regular crew of folks who are here five days a week out in the fields, but there is our wash crew that comes in once a week, either Tuesday or Friday morning during the 24 week harvest season. Always with a smile, they don their rubber overalls to help wash, dunk, spray, refresh and generally remove mud and dirt.

Meghan, Donna, Stephanie, and Dale: washers extraordinaire!

Meghan, an employee at Whole Foods, has been our wash queen for 4 years now, Donna joins us for year two, and Stephanie started this Spring. My dad (Dale, Pop-Pop, or Mr. B, depending) is a “pinch hit washer”- when he’s not mowing, building or fixing things, cleaning up after all of us, or playing with his granddaughter, he’s washing, or generally doing whatever we need him to do on any given day. Thanks wash crew- we appreciate what you do!

Photos and text by Tricia Borneman, Blooming Glen farmer and co-owner.

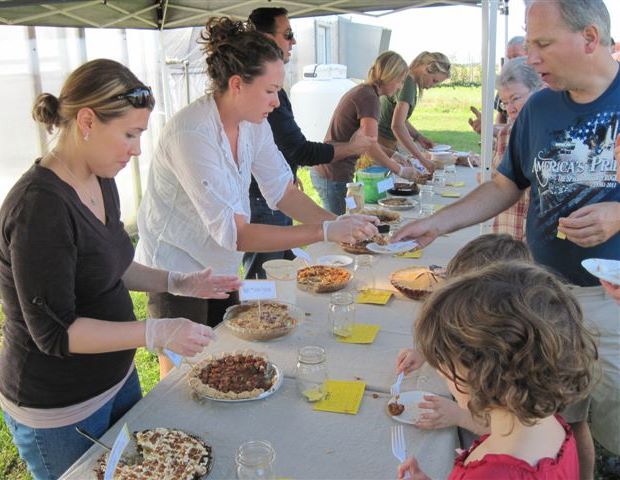
At the Fall Fest on October 8th, over 80 CSA members and friends cast their vote for their favorite pie. Out of 10 delicious creative choices the voting was very close. The recipes for the top three pies are listed below, but other favorite entries included Rosemary Scented Caramel Apple Pie, Cinnamon Pumpkin Walnut Pie, Ginger Pecan Snap Pie, Buttermilk Pie and Peach Creme Fraiche.

Brian Smyth wins the 2011 Pie Bake-off Trophy

Almond, Walnut and Cashew Pie, 1st place, Brian Smyth, modified version of Joy of Cooking’s Pecan Pie.

Preheat the oven to 375F. Spread on a baking sheet:
2 cups mixed almonds, walnuts, cashews, coarsely chopped.
Toast the nuts in the oven, stirring occasionally, until golden and fragrant, 6 to 10 minutes.

Whisk until blended:
3 eggs
1 cup dark brown sugar
1 cup light corn syrup
5 tablespoons unsalted butter, melted
1 teaspoon vanilla
1/2 teaspoon salt
Stir in the toasted nuts.

Warm the pie crust in the oven until it is hot to the the touch, then pour in the filling. (The crust recipe: Pat-in-the-pan butter crust, Joy of Cooking.) Bake until the edges are firm and the center seems set but quivery, like gelatin, when the pan is nudged, 36 to 45 minutes. Let cool on a rack for at least 1 1/2 hours. Serve warm or at room temperature.


Orange Mascarpone Pumpkin Pie, 2nd place, Michelle Guerriero.

Preheat oven to 325 degrees. In a 10-in pie pan, stir together 2 cups finely crushed gingersnap crumbs (about 32-40 gingersnaps) with 6 tablespoons unsalted butter, melted and press into a crust. Bake until set, about 6 minutes. Set aside. Increase heat to 350 degrees.

Beat 4 oz. room temperature cream cheese, 8 oz. mascarpone cheese and 2/3 cup sugar in a large bowl until smooth.
Add 3 eggs one at a time, beating for 30 seconds after each egg.

Add the following and mix until smooth:
1 can pumpkin puree (15 oz)
1 teaspoon Grand Marnier or other orange-flavored liquer
1 1/2 teaspoon freshly grated orange zest
1 teaspoon freshly grated lemon zest
1 teaspoon cinnamon
1 teaspoon ground ginger
1/2 teaspoon freshly ground nutmeg
1/4 teaspoon salt
Pour filling into crust and bake until edges are firm but center still jiggles a bit, 45-50 minutes (bake any extra filling in ramekins). Cool to room temperature, then chill at least 6 hours and up to overnight.

When ready to serve, beat 1 cup heavy whipping cream, 1/2 cup creme fraiche, remaining 2 teaspoon sugar, and 1 teaspoon freshly grated orange zest* in a large bowl until soft peaks form. Spread whipped cream on pie.
*Could also use 1 teaspoon Grand Marnier instead of orange zest in whipped cream.
Top with any extra gingersnap crumbs and/or freshly grated orange zest for garnish.

Tasting the pies!


Hickory Chickory Pie
, 3rd place, Cindy Myers-Long, modified recipe from Fine Cooking, 9/1/11.

Use your favorite pie dough recipe.
Make the pie dough. Position a rack in the center of the oven and heat the oven to 425°F. Line the piecrust with foil and fill with dried beans or pie weights. Bake for 15 minutes. Remove the foil and weights. Reduce the oven temperature to 375°F and continue baking until the bottom looks dry and the edges are golden, 5 to 7 minutes more. Cool on a rack while you prepare the filling. Reduce the oven temperature to 325°F and put a large, rimmed baking sheet on the oven rack.

Make the filling:
-Combine 1/4 cup Dandy Blend Instant Herbal Beverage with Dandelion purchased at Queen’s Health Food store (or other brand ground chickory coffee) and 1/2 cup plus 2 tablespoons heavy cream in a 1-quart saucepan and heat over medium heat just until small bubbles form at the edge of the cream, 3 minutes.
-Stir, remove from the heat, and steep for 10 minutes. Strain and reserve.
-Put 8 large egg yolks in a medium heatproof bowl set on a kitchen towel and add 1 teaspoon pure vanilla extract.
-Combine 2/3 cup packed light brown sugar, 4 oz. (1/2 cup) unsalted butter, cut into 4 pieces, 1/2 cup light corn syrup, coffee and cream mixture, and 1 teaspoon kosher salt in a 1-quart saucepan.
-Heat over medium heat just until the butter is melted and the mixture is hot but not boiling, 3 to 5 minutes.
-Whisking vigorously and constantly, very slowly pour the hot sugar mixture into the yolks.
-Strain through a fine strainer set over a 1-quart measuring cup.

Fill and bake the pie:
-Spread 1 1/2 cups hickory nuts (or pecans) evenly in the piecrust. Slowly pour the filling over the pecans. Tip: Pour the filling over the nuts in a slow, spiral motion; if you go too fast, the nuts may move, leaving gaps in the finished pie.
-Put the pie on the baking sheet and bake until the center of the pie is slightly firm to the touch and the filling doesn’t wobble when the pie is nudged, 35 to 40 minutes.
-Let cool for at least 1 hour before serving. Serve with chickory (or coffee) flavored whipped cream.


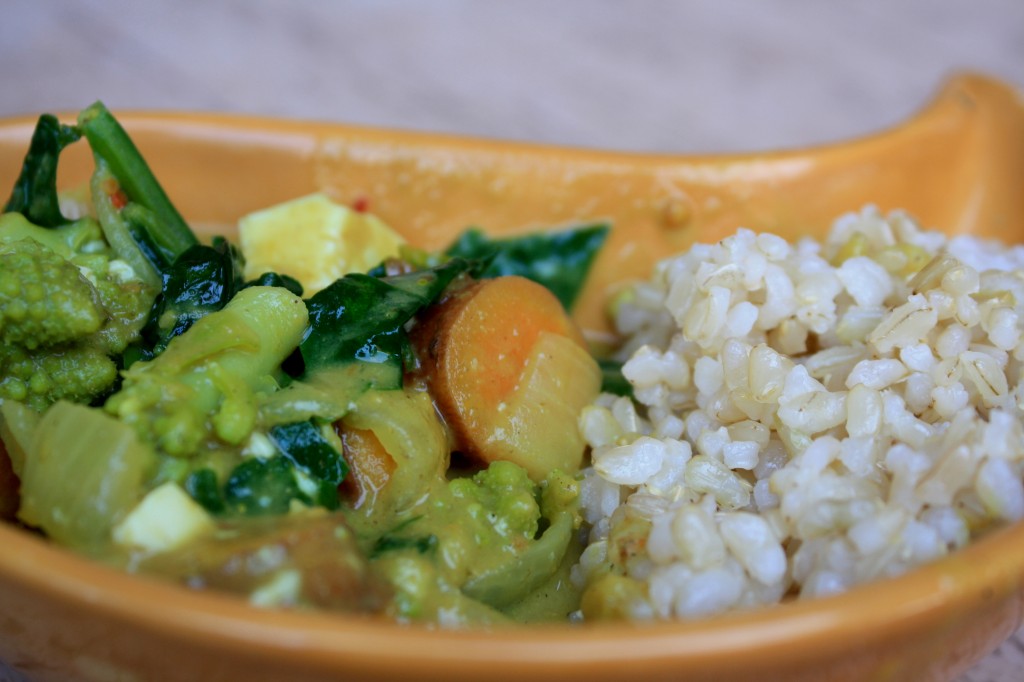
This Thai-style curry is a light, mild version of the one I usually get at my favorite Thai restaurant. Filled with seasonal veggies such as sweet potatoes, spinach and cauliflower cooked in a creamy peanut sauce, this vegetarian dish is packed with flavor. You can adjust the amount of curry if you like a more bold flavor and substitute the tofu with chicken or beef if you like. Serve alongside brown rice.

Serves 4-5.

Massamun Curry

-In a large pot, heat 2 tablespoons of coconut or olive oil. Chop 1 yellow onion and saute for a few minutes until onion starts to sweat. Throw in 3 cloves of minced garlic and 1 inch cube of fresh ginger, also minced finely. Saute for 2 more minutes.

-Add in:

1 tablespoon of mild curry powder
1/2 teaspoon of salt
1/2 teaspoon of red pepper flakes (only if you want it a little spicy)
1 cup of coconut milk
2 tablespoons of peanut butter

-Stir all the ingredients together before adding 2 cups of broth or stock and 2 cups of sweet potatoes, diced. Bring to a boil then turn down to a simmer and cook for 10 minutes with the lid on.

-Break up 2 small cauliflower heads into florets (about 2 cups) and add in. Cook for 10 more minutes with the lid on.

-Roughly chop 1 bunch of fresh spinach (or substitute with tatsoi or bok choy) and throw in the pot, mixing until wilted. Cook for 5 more minutes with the lid off.

-Let cool slightly and serve on top of brown rice. ENJOY!

Recipe and photos by Jana Smart- Blooming Glen Farm employee and frequent creator of creative recipes using farm fresh seasonal ingredients.

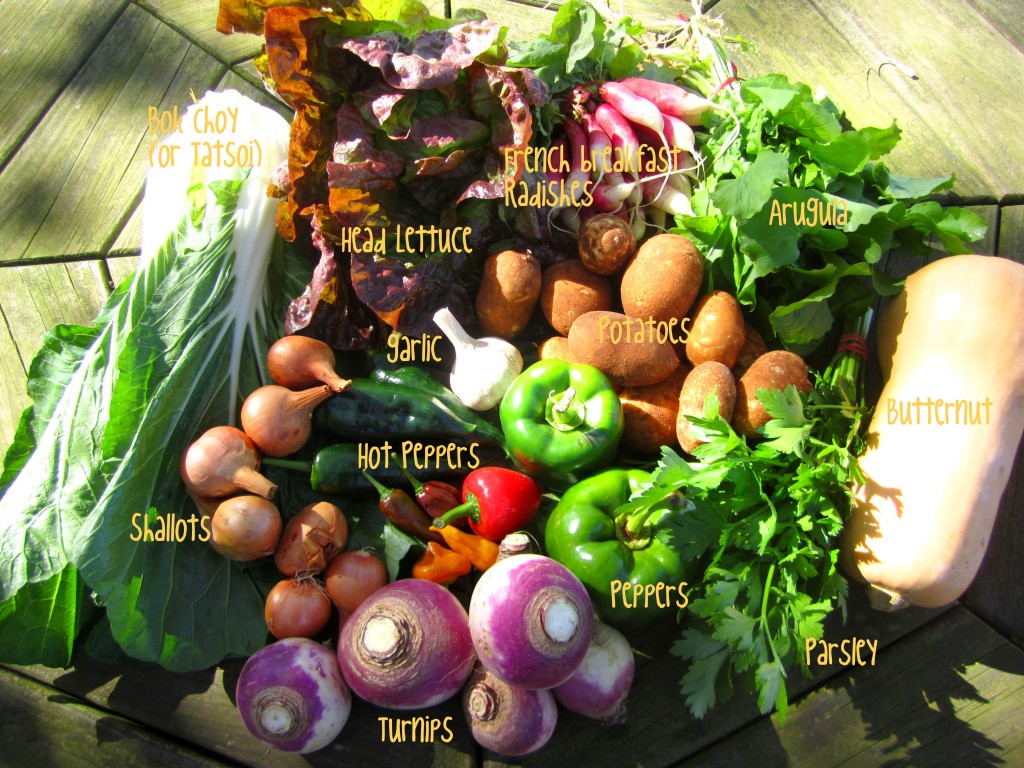
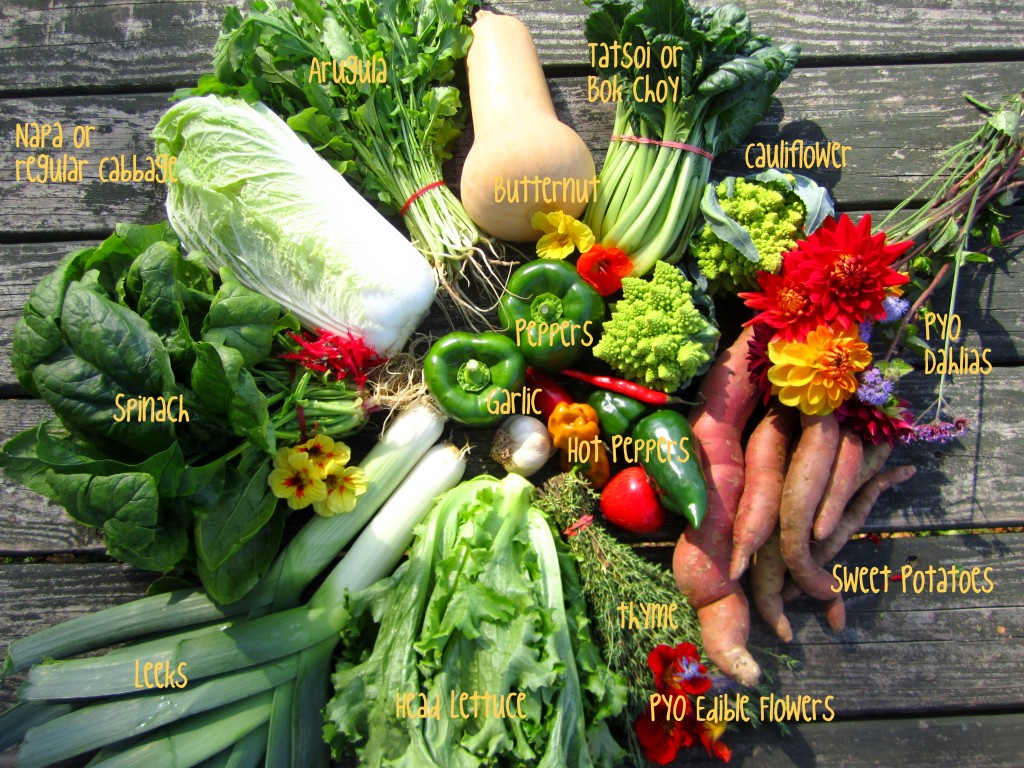
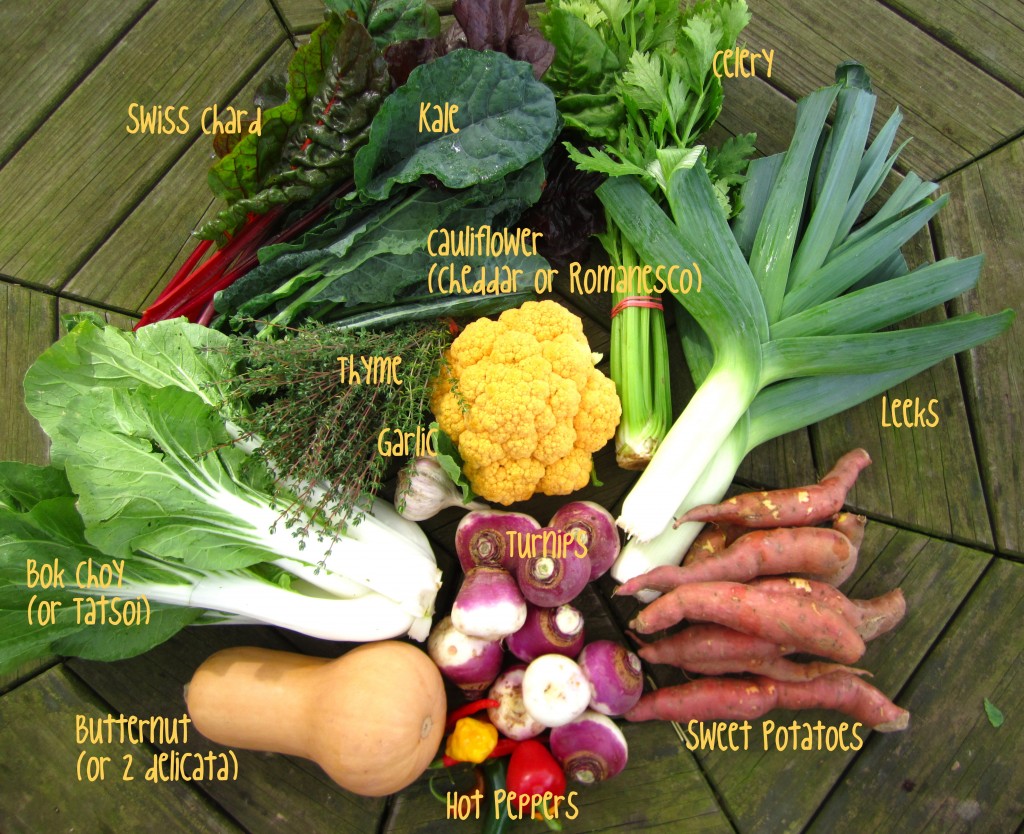
This week’s share photo is on the green end of the color spectrum- lots of wonderful nutritious and delicious greens like spinach, arugula, head lettuce and cabbage, as well as green cauliflower, peppers and leeks. During those wet weeks on the farm, thanks to Farmer Tom’s quick thinking we got busy planting the greenhouses, so that’s why we have that gorgeous bunch of spinach this week. It is especially tender from being coddled indoors. Take advantage of the edible flowers in the Discovery Garden and spice up your salad- we are expecting a frost any day now! On that note, the hot peppers freeze really well on a cookie tray, and can then be stored whole in freezer bags for that mid-winter spicy chili. So even if you have enough now, plan ahead for those cold winter months!

October 18, 2011

Photos and text by Tricia Borneman, Blooming Glen farmer and co-owner.

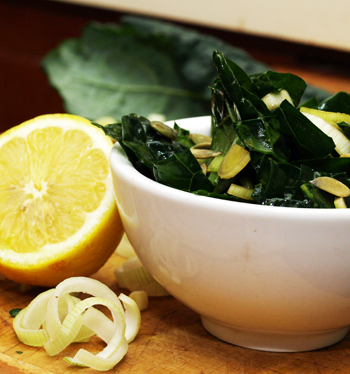
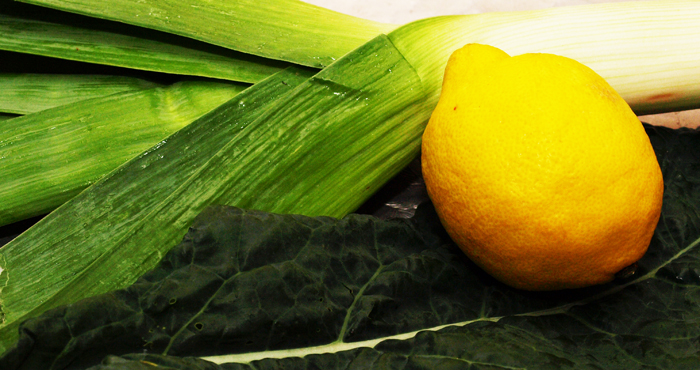
Lemon & Leek Kale SaladKale shares similar health benefits with its friend, Swiss chard. In addition to being a cancer-fighting and heart health-promoting superhero (thanks to all those antioxidants), kale’s omega-3 and enormous vitamin K content make it a great tool to fight against the inflammation that’s linked to so many chronic health conditions.

My favorite benefit of kale though, is its detoxification abilities. Kale’s glucosinolates make isothiscyanates, which studies have shown assist our cell’s detox activities. The nutrition and compounds in kale assist in eliminating the toxic molecules in our body caused simply from the hazards of daily living; pollution, medication, processed food chemicals, etc.  We all could benefit from a little cleansing, right? 🙂

Kale is most often eaten cooked, but there are health benefits to eating our foods raw. The recipe below uses the acidity in fresh lemon juice to help “cook” the kale, leaving it a nice, soft and chewy texture.

Lemon & Leek Kale Salad

Lemon & Leek Kale Salad

Add dressing ingredients in a large bowl, stir until combined:
1 tablespoon olive oil
1 tablespoon tamari sauce
Juice and zest of one lemon
1/2 teaspoon of honey (use agave for vegan version)
salt and pepper to taste

Add to bowl:
1 bunch of kale (~20 leaves), stems removed, cut into bite-sized chunks or strips.
1 leek, white part sliced in half lengthwise and then into thin half-moons.

Stir into the dressing to well coat. A great method is to use your hands and “massage” the leaves with the dressing. Allow to marinate in fridge until ready to eat (ideally 4-8 hours, but it’ll be tasty after even just 30 minutes).

Stir in 1/4 cup seeds and/or chopped nuts (sesame and pumpkin seeds or slivered almonds are a great choice) right before serving.

Post and photo by Mikaela D. Martin: Blooming Glen CSA member since 2005, board-certified health counselor, and co-founder and -owner of Guidance for Growing, an integrative wellness practice in Souderton. Read more about healthy eating and living on her site, http://guidanceforgrowing.com!

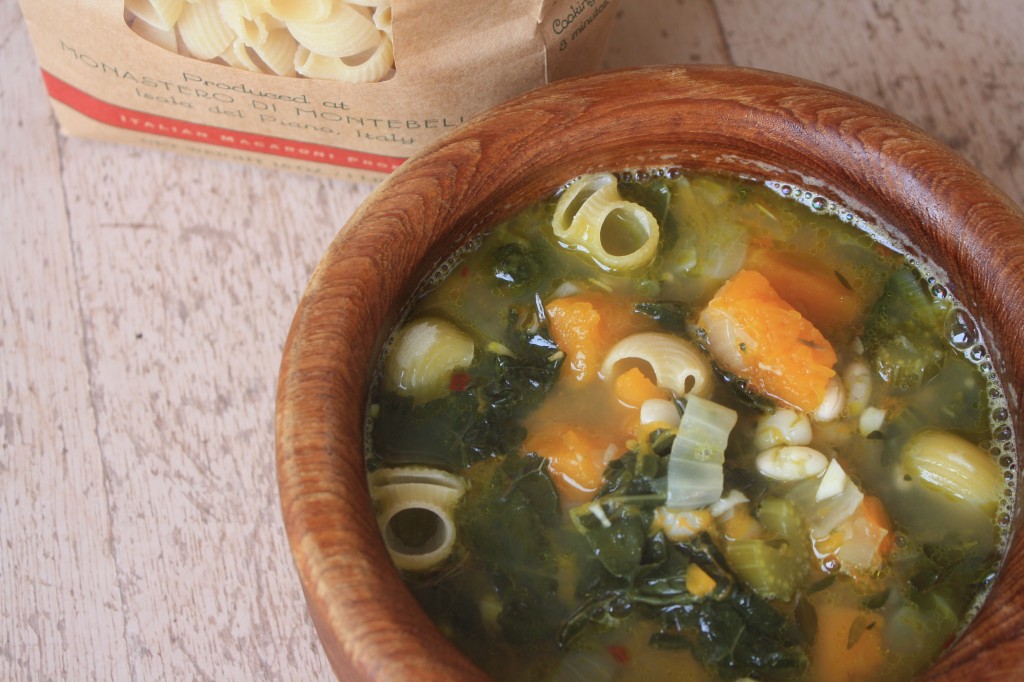
Minestrone means “big soup” in Italian: a big soup of many vegetables. A tasty soffritto (a base of aromatic vegetables) made of celery, onion and herbs gives this soup a rich base and fall favorites like butternut squash and kale make it healthy and hearty. Traditionally, either white beans or pasta are thrown in at the end. In this version I decided to use both to make the soup a complete meal-in-a-bowl! As the season progresses you can also make a “winter” version of this using turnips, potatoes and cabbage in place of the squash and kale.

This recipe was an adaptation of Alice Water’s recipe from her book, The Art of Simple Food.


Fall Minestrone

If you are planning on making this with beans, I first suggest soaking 1 cup dried cannellini beans in plenty of water (beans will swell) overnight so they cook quickly and retain a nice texture.

The next day when you are ready to make your soup…

-Strain beans and place in large pot with fresh water and bring to a boil. Cook until tender but not mushy. About 15-20 minutes. Strain cooked beans but keep the liquid for later.

-Heat 1/4 cup of olive oil in a heavy-bottomed pan over medium heat and add 1 large onion, finely chopped and 3 stalks of celery, chopped. Saute until a rich golden brown color.

-Throw into soffritto:
1 bunch of kale or chard, roughly chopped
1 leek, diced
5 sprigs of thyme
1 bay leaf
4 cloves of garlic, minced
2 tablespoons of salt

-Cook for 5 more minutes until kale is wilted a bit

-Add 4 cups of water and bring to a boil. Turn to medium-low heat and cook everything for 15 minutes with the lid on.

-Add 2 cups of butternut squash (about 1 small squash or 1/2 a large one) that has been peeled and chopped into 1/4 inch cubes. Cook for 15 more minutes. Taste for salt and add more if necessary.

-Add the cooked beans along with 2 cups of the bean cooking liquid and 1 cup of dried pasta (optional). Cook for 8 more minutes until pasta is tender. If  soup is too thick, add more bean cooking liquid. Remove the bay leaf.

-Serve in bowls, each garnished with some extra-virgin olive oil and grated Parmesan cheese.

Recipe and photos by Jana Smart- Blooming Glen Farm employee and frequent creator of creative recipes using farm fresh seasonal ingredients. Check out more of her recipes on her food blog http://www.agrarianeats.blogspot.com/

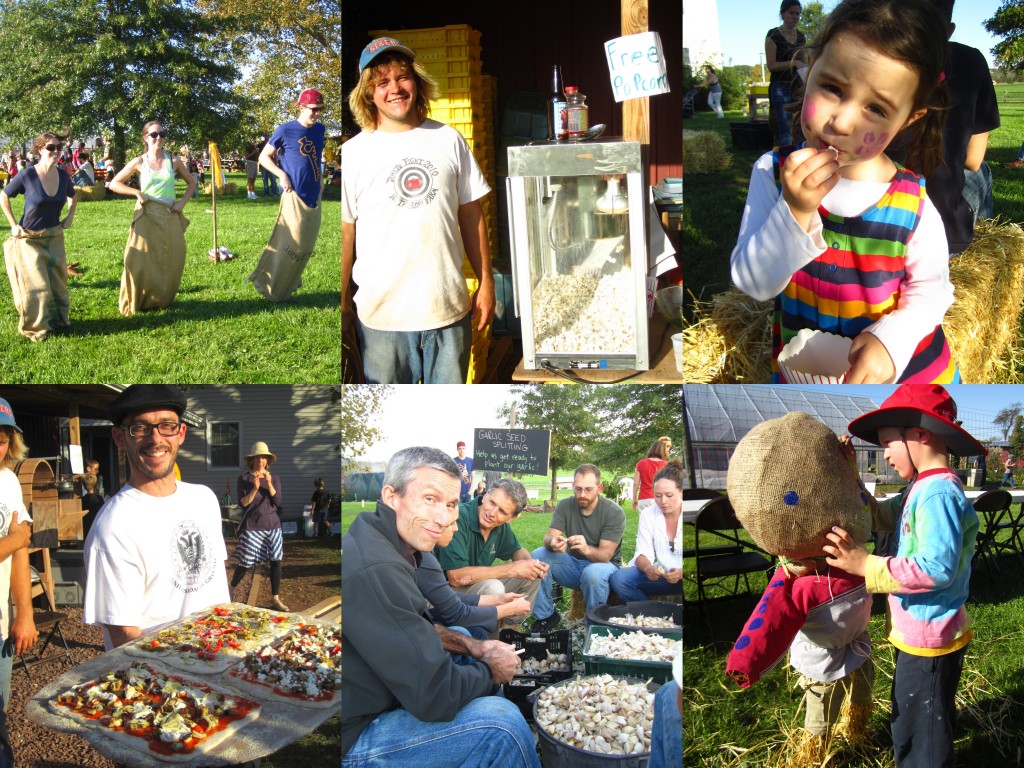
Thanks to all the volunteers who split garlic bulbs at the fall fest, we planted 17 beds of garlic yesterday (that’s over 20,000 cloves!) before this next little round of rain. The share this week introduced the first sweet potatoes of the season (overall yields are down, but the ones we have are delicious!!), as well as a choice of delicata or butternut squash.

October 11, 2011

For those wondering what the heck is up with the gold cauliflower, it is a variety aptly named “cheddar” that holds up well in the field and becomes even brighter orange when lightly cooked. For those who don’t know- to get a classic white cauliflower, growers band the leaves around the head of the plant, which keeps the sun off of it, and gives it that snowy white appearance. Needless to say, we do not go to that trouble, and thought it would be fun to try the gold variety. Here’s the story behind it, as noted in Territorial Seed catalog: “An orange cauliflower! First discovered in the Bradford Marsh in Canada in 1970, Cheddar was smaller and less tasty than white cauliflower, but the color was alluring. Over the years, using conventional breeding techniques, it was crossed with a white variety to create a delicious, high vitamin content cauliflower. The curds contain approximately 25 times more beta carotene than white cauliflower. Excellent flavor and color whether eaten raw or cooked. ” The other choice in the share with the Cheddar cauliflower is Romanesco cauliflower, the small green spirals. It has a delicious nutty flavor.

The Fall Fest was a wonderful event…from potato sack races to contra dancing, scarecrow making and pie tasting, everyone seemed to enjoy the unusually warm sunny day. We will be featuring a few of the pie recipes in a separate blog post, starting with the top 3 winners. If there are any other recipes that people would like, just let me know! Between the pies and the potluck, I’d say we have some of the best “amateur” chefs and bakers in any community!

Fall Fest 2011

Photos and text by Tricia Borneman, Blooming Glen farmer and co-owner.