Author: bloomingglenfarm

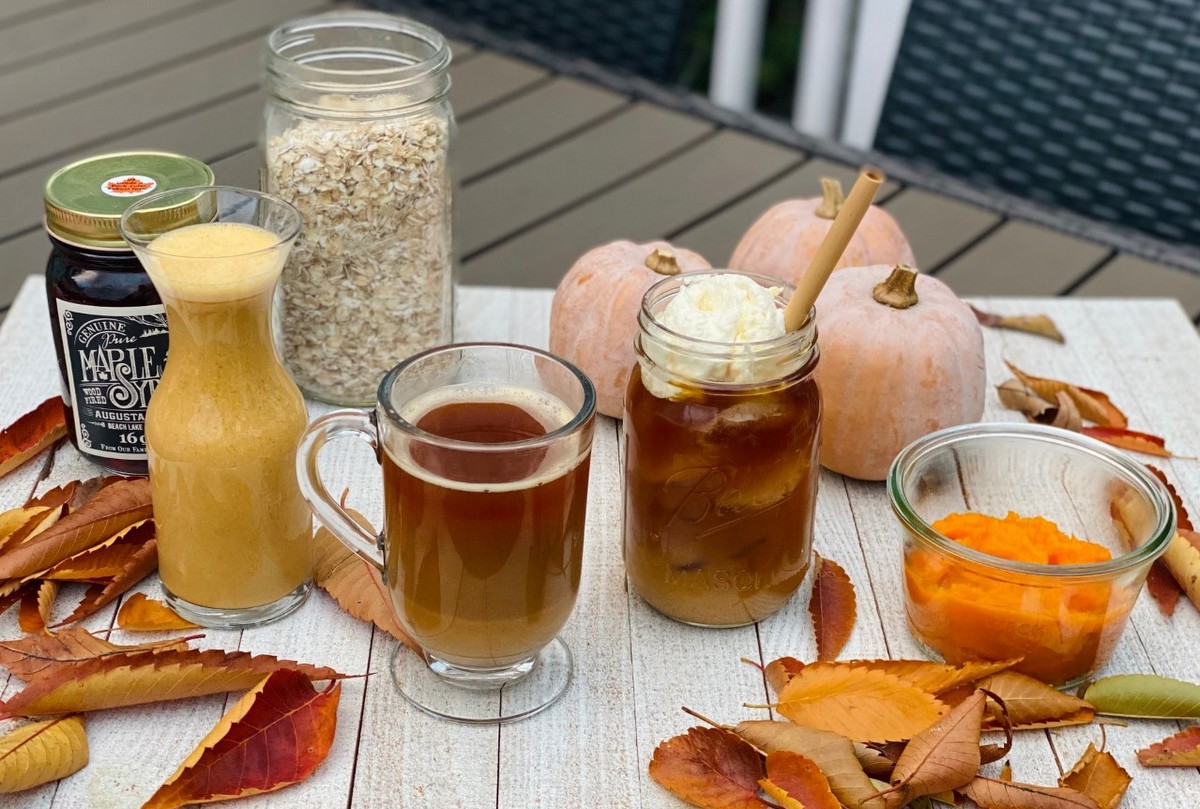
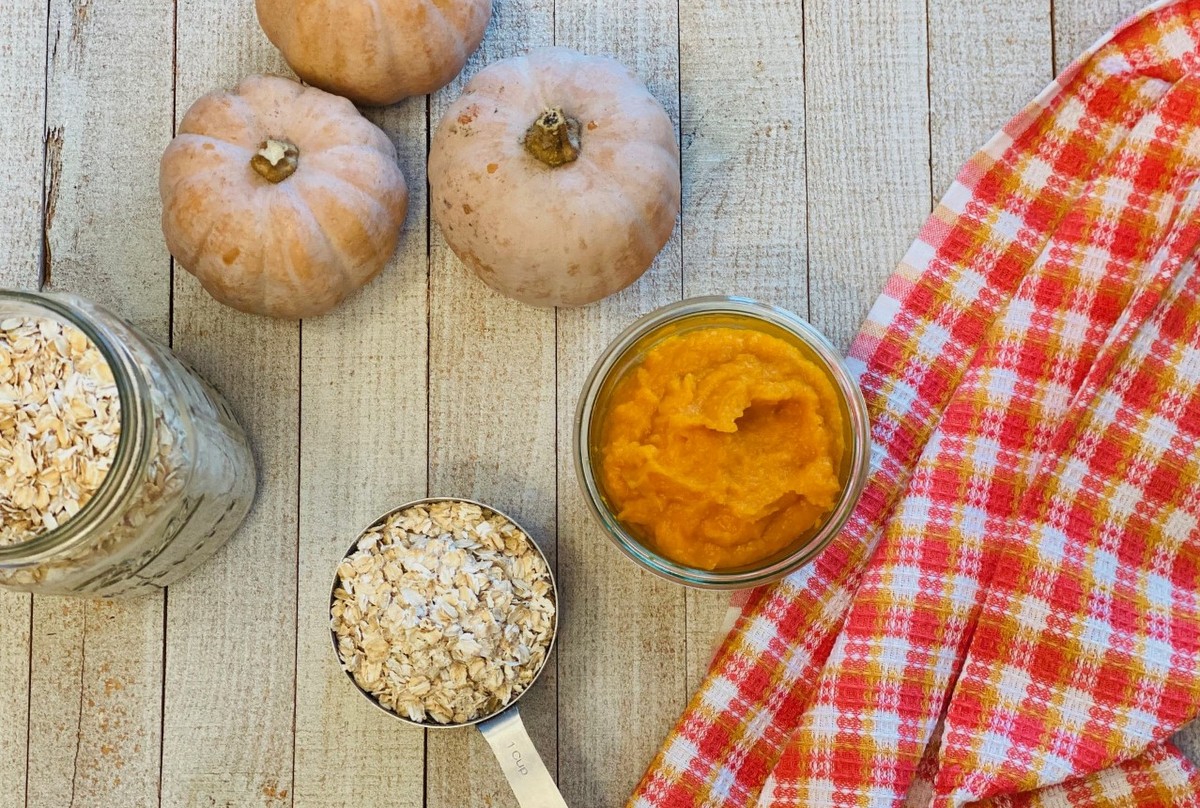
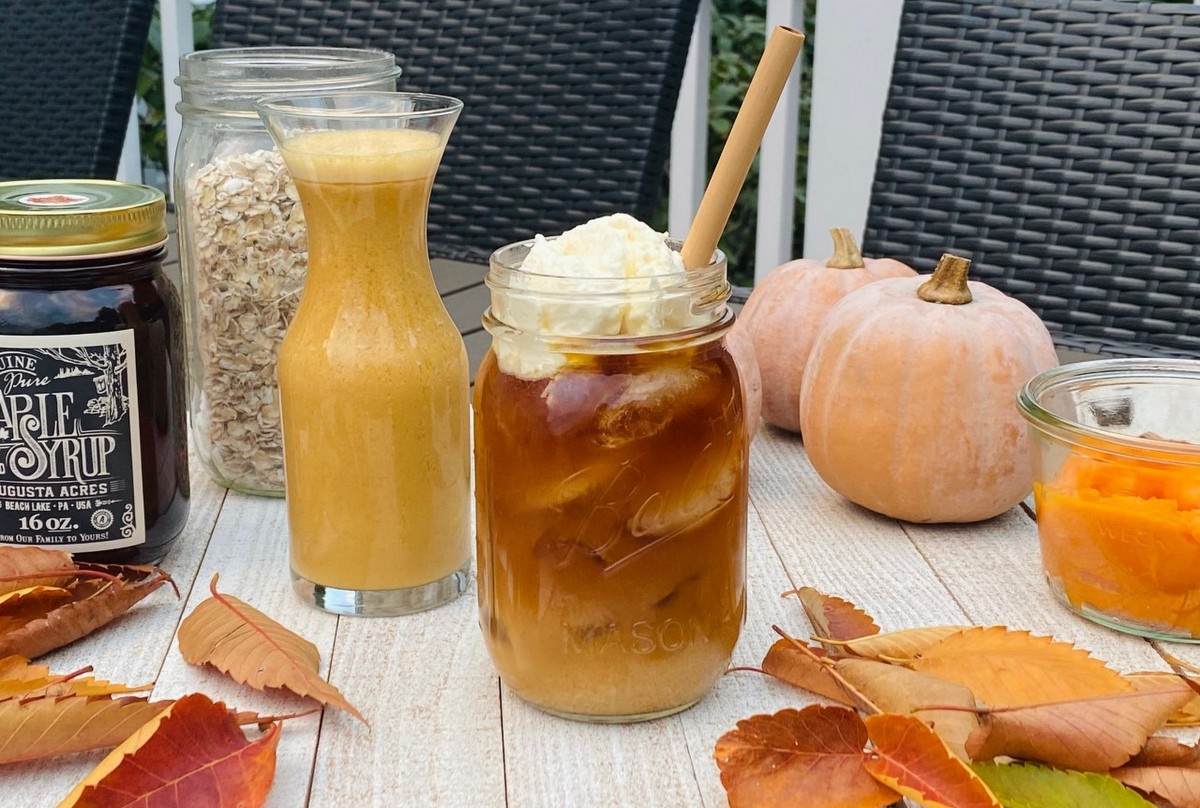
As soon as the weather begins to cool down and we see the colors of this season begin to adorn our trees, pumpkins appear.  Pumpkins are not only used to decorate for the fall, but we see pumpkin flavored everything.  This is what inspired this week’s recipes.  Instead of pumpkins, I use the delicious koginut squash.  Roasting and pureeing this squash gives you the base for both the fall dip and creamer.
Whipped Squash Dip

Ingredients:
8 oz cold heavy whipping cream
8 oz cream cheese, softened
½ cup pureed koginut squash*
1 ½ tsp vanilla
¼ cup + 1 Tbsp honey
½ tsp cinnamon
  • Whip heavy cream in mixer. Start on low and gradually increase to high speed until it forms stiff peaks.
  • Remove whipped cream and place in bowl.
  • Blend cream cheese in mixer. Scrapes sides and mix again.
  • Add squash, vanilla, honey, and cinnamon. Mix on medium speed.  Scrape the sides and mix again.
  • Fold in the whipped cream.
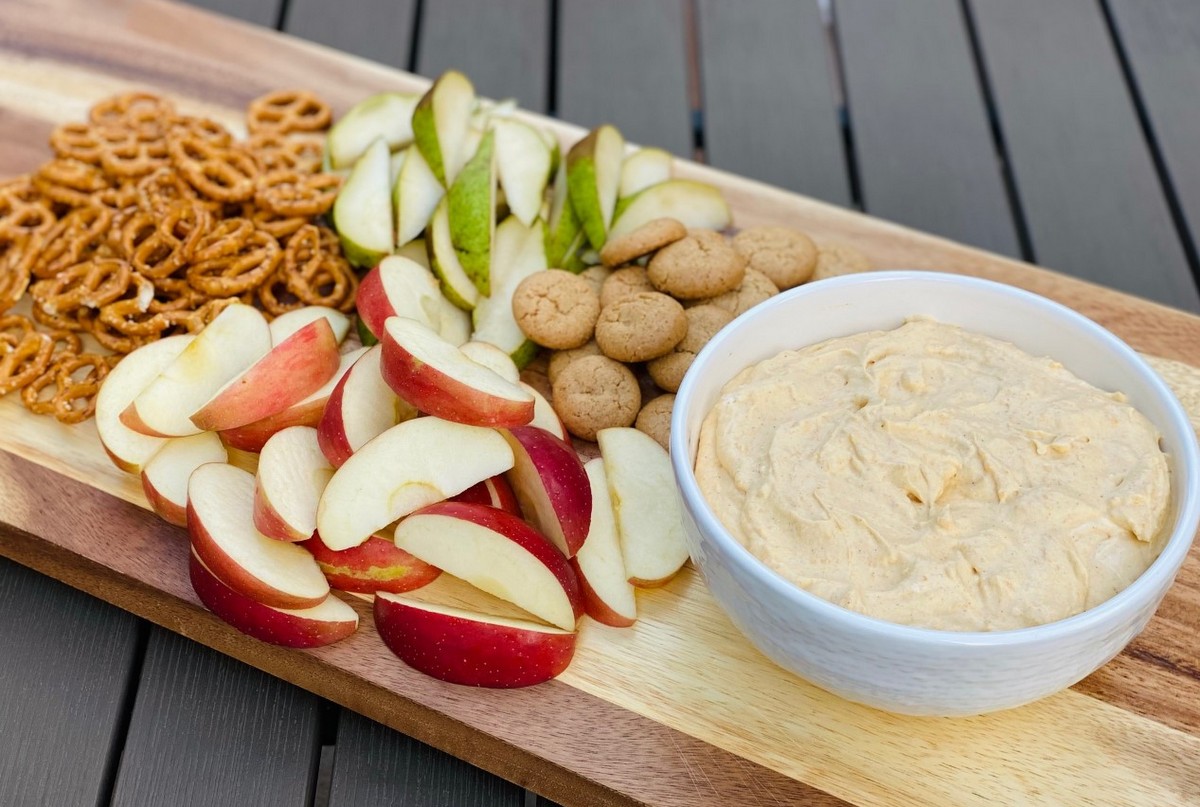
  • Serve with sliced apples, sliced pears, pretzels, graham crackers, etc.
  • Enjoy!


Fall Squash Creamer

Ingredients:
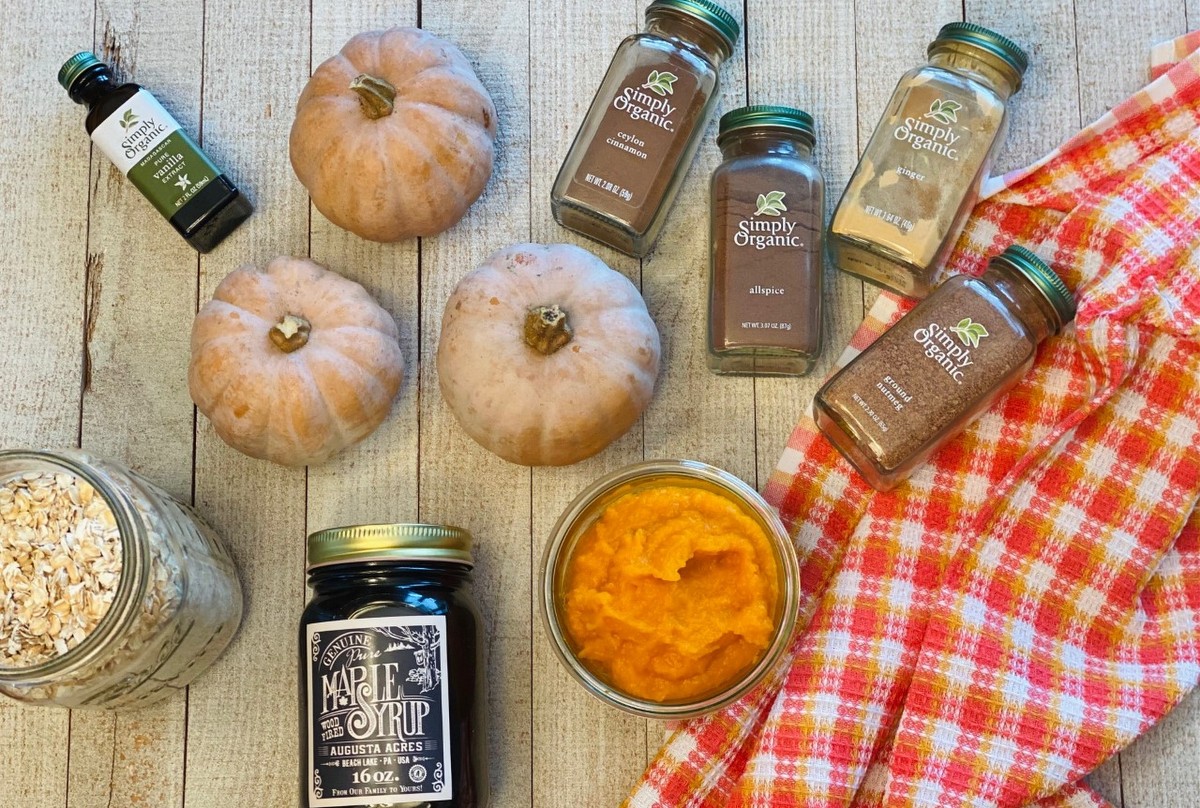
2 cups oat milk**
½ cup koginut squash puree*
¼ cup maple syrup
1 ½ tsp vanilla
¾ tsp cinnamon
1/8 tsp nutmeg
Pinch ground ginger
Pinch allspice
Pinch ground cloves
  • Combine all ingredients in blender.
  • Blend until well combined.
  • Store in airtight container in fridge for up to 5 days.
  • You can also freeze in ice cube trays to preserve for longer.
  • Enjoy in hot coffee, iced coffee, hot chocolate, etc.
  • Shake well before each use.

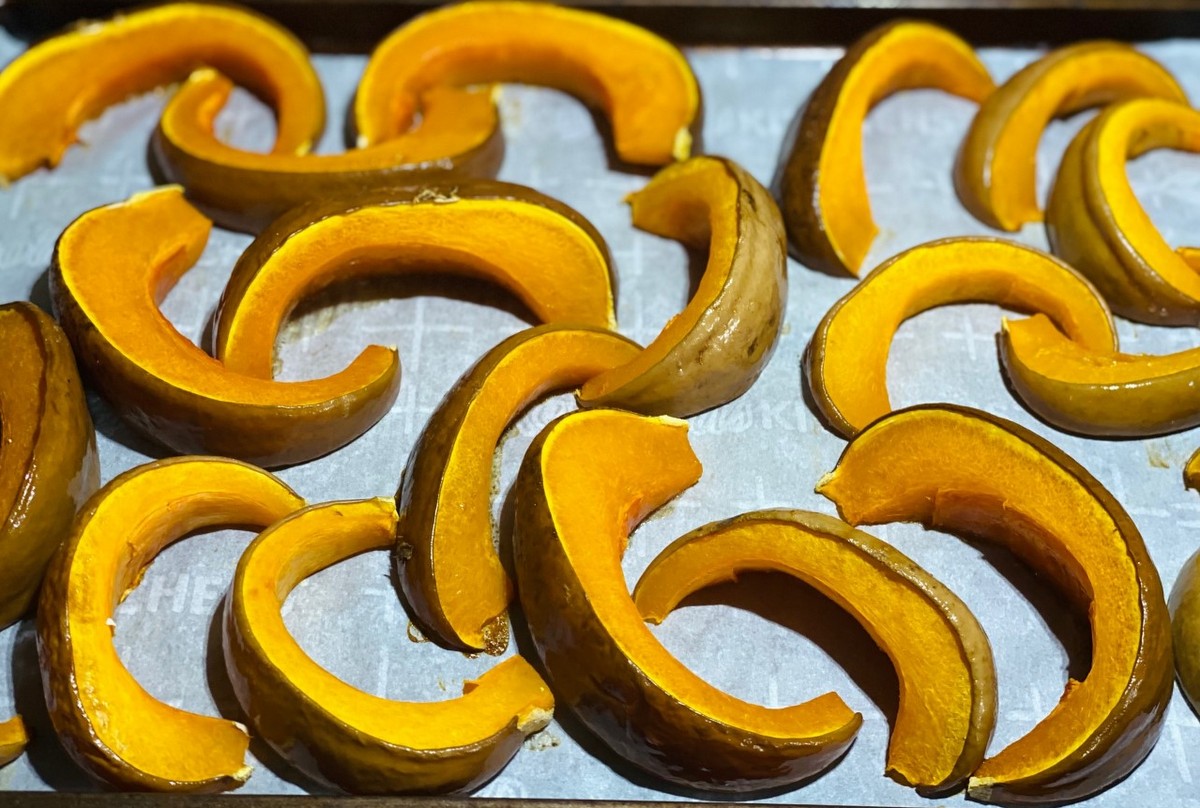
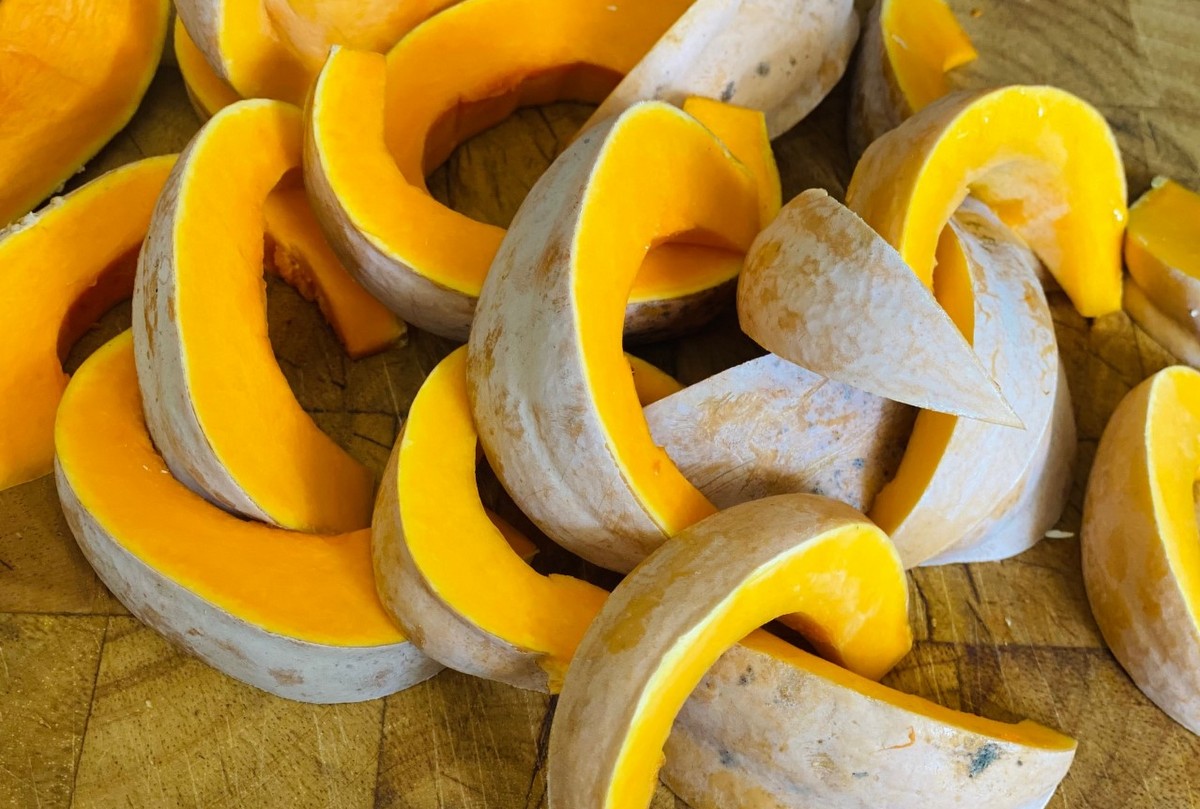
*Pureed Koginut Squash: Cut squash in half and remove seeds.  Cut into 1 inch slices and place on parchment lined baking sheet.  Roast at 375°F for 30 minutes.  Let cool and then peel skin.  Puree roasted flesh in food processor.  Store in fridge for up to a week or freeze to preserve longer.  Depending on the size, 1 koginut squash gives you about 1/3 to ½ cup of puree.
**Homemade Oat Milk: Combine 1 cup rolled oats and 2 cups cold water in blender.  Blend for 30-45 seconds on high speed.  Strain through nut milk bag or cheesecloth.  Do not squeeze.  Store oat milk in fridge for up to 5 days.  Can flavor with vanilla, sweetener, etc.  For this recipe, you want to use it plain.  This will make about 2 cups of oat milk.
 

Recipe and photos by Stephanie Borzio.  Stephanie is a mom of three active boys and is an autoimmune warrior.  After battling her own health for several years, Stephanie found healing through food and lifestyle changes, including joining Blooming Glen Farm CSA of which she is a long time member.  She is a Board Certified Integrative Nutrition Health Coach who is passionate about sharing healthy living tips and real food recipes.  Instagram and Facebook: Tru You Essentials; Website: www.truyouessentials.com

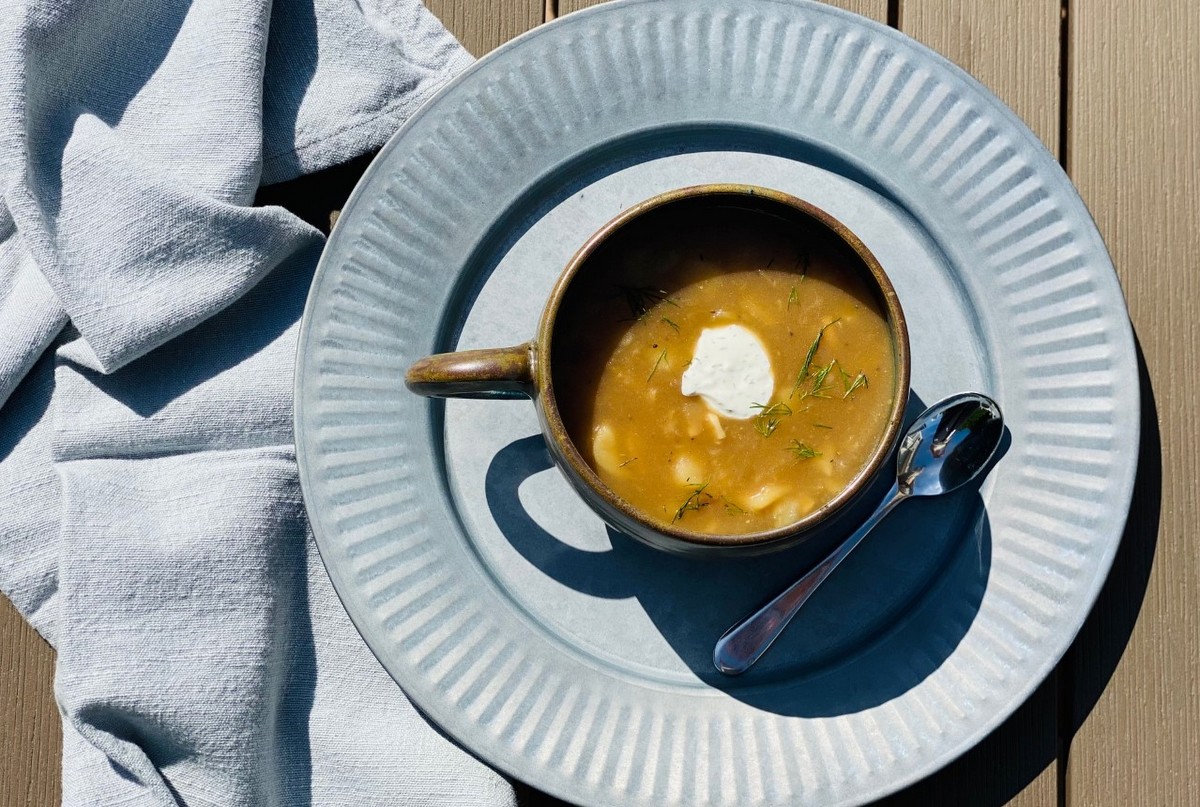
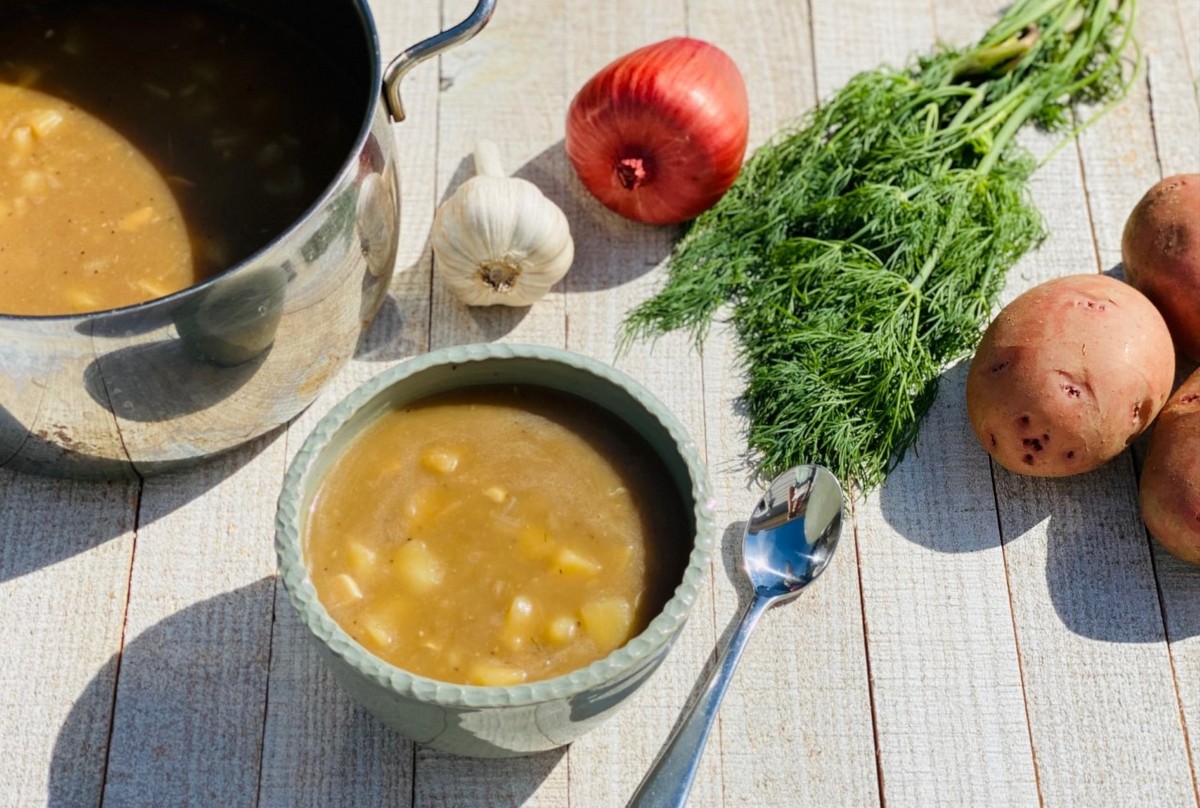
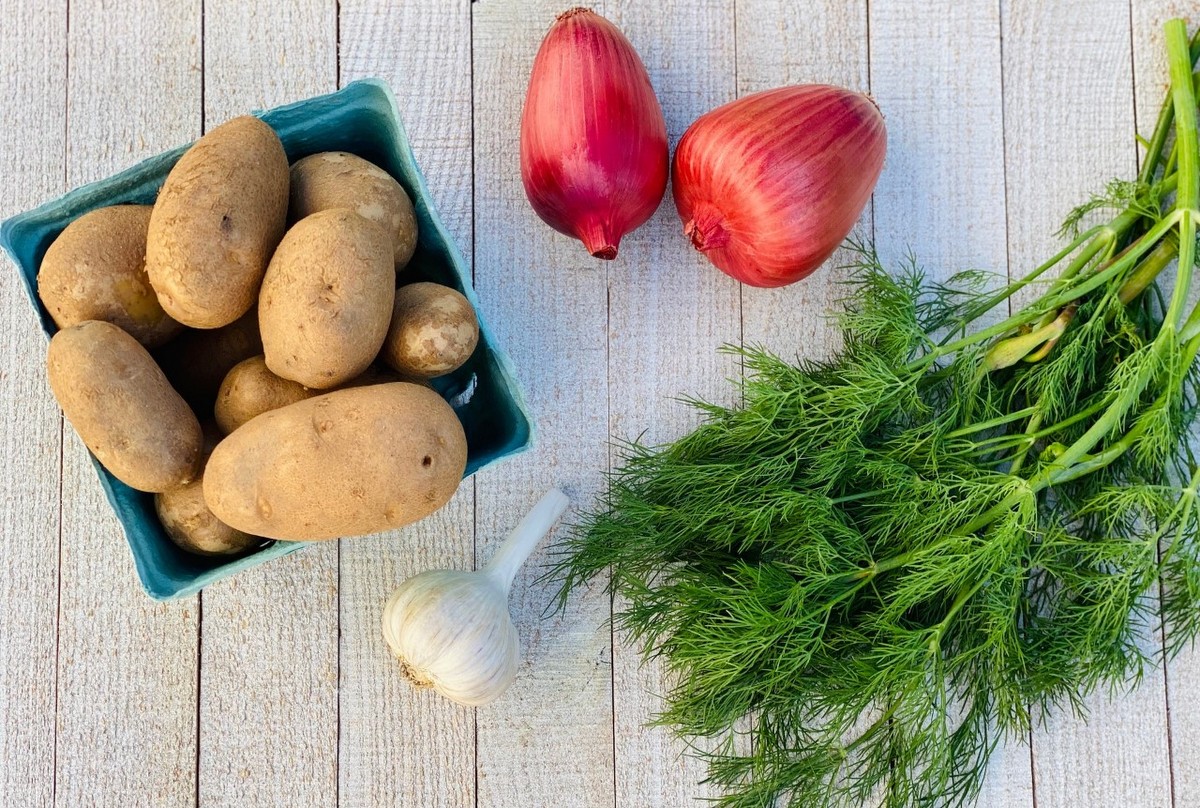
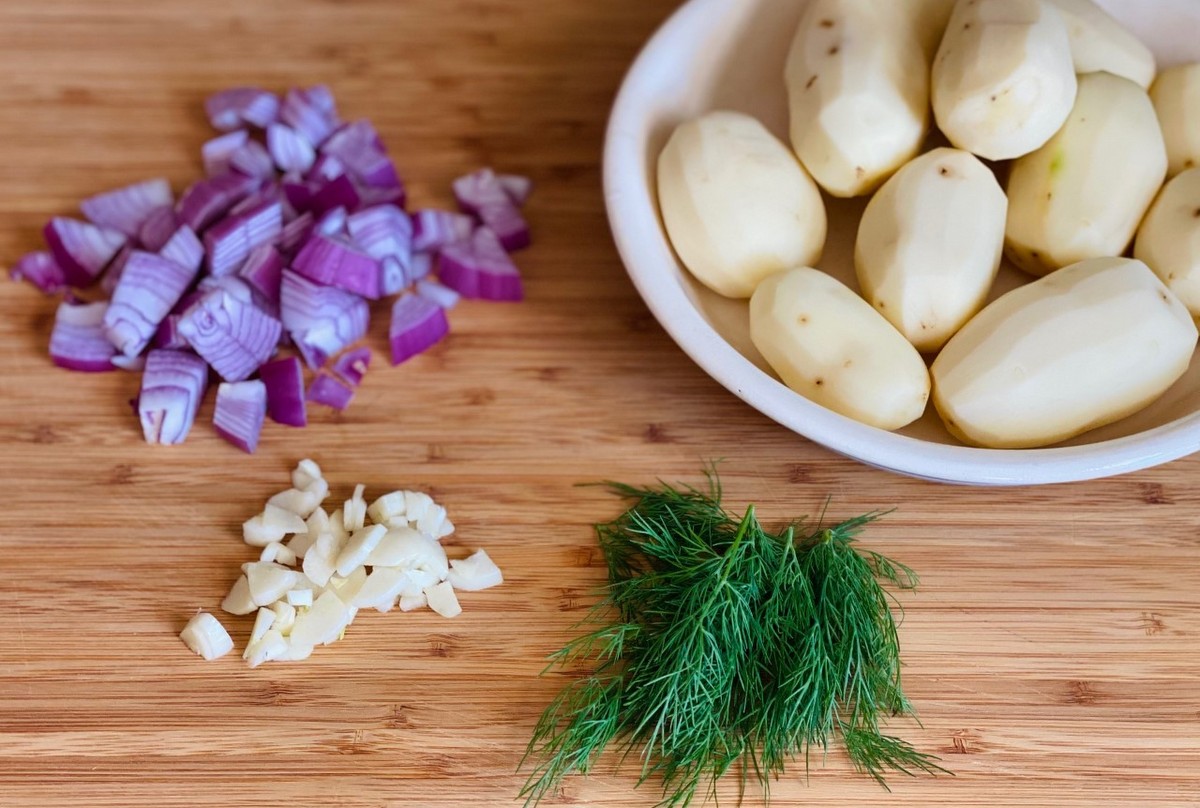
This potato soup is full of flavor, but very simple to make.  It combines the russet potatoes, onion, and garlic from this week’s share and uses the fresh dill as a possible topping.  This is a recipe the whole family will enjoy!

Potato Soup

Ingredients:
4 Tbsp butter
1 red onion, diced
2 cloves garlic, finely chopped
1 quart russet potatoes, peeled and cut into ½ inch cubes
5 cups vegetable broth, divided
1 tsp sea salt
½ tsp black pepper
3 Tbsp flour (*if gluten free, you can use a gluten free flour)
½ cup sour cream
2 tsp finely chopped fresh dill

  • In medium pot on stovetop, melt butter.
  • Add onion and cook on medium heat for 2 minutes.
  • Add garlic and cook an additional minute, stirring constantly.
  • Add potatoes and toss to coat.
  • Pour in 4 ½ cups broth (reserve ½ cup for use later), salt, and pepper. Bring to a boil.
  • Reduce to a simmer and cook for 20 minutes uncovered.
  • Mix the last ½ cup of broth with the flour in a small bowl. Slowly add to the soup, mixing as you go.  Allow to simmer for 2 more minutes.
  • Once the soup is done cooking, you can serve as is or you can blend it up to create a uniform texture.

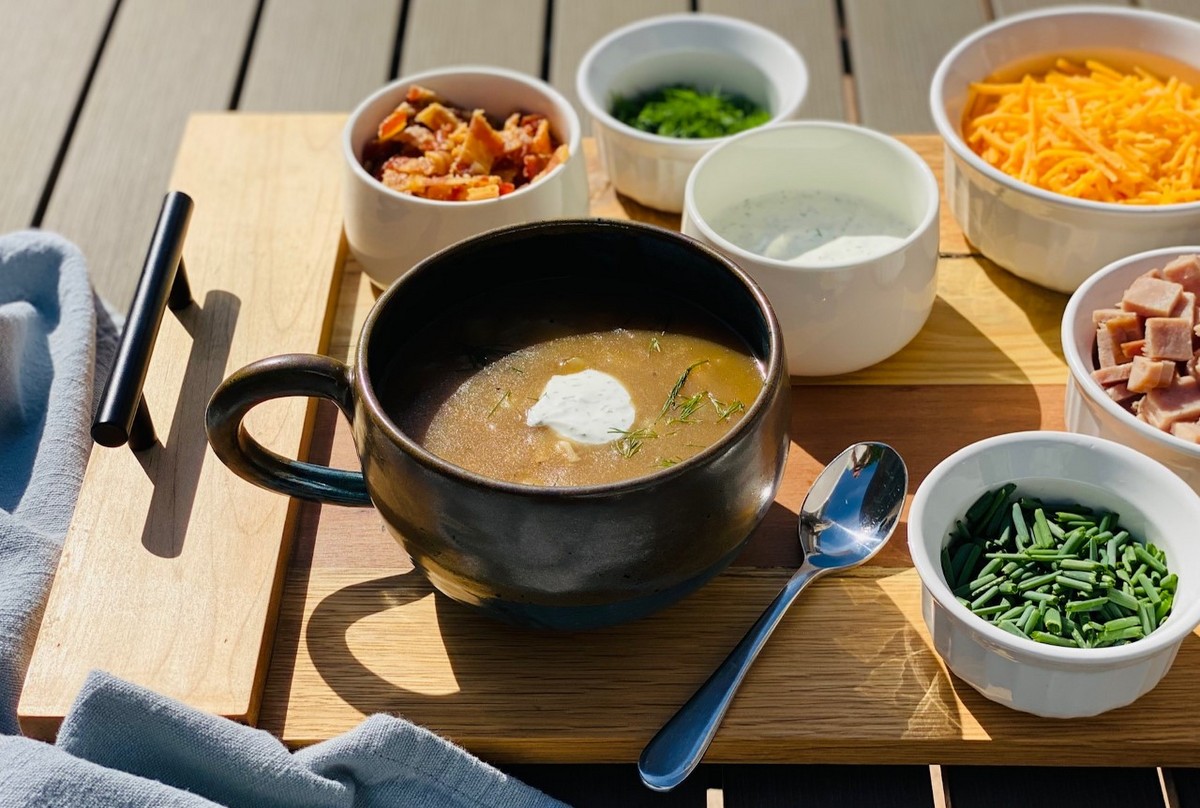
  • Dill Sour Cream: combine sour cream and dill in a small bowl. This can be used as a topping.
  • Divide soup into bowls. Top with the dill sour cream, shredded cheese, bacon, ham, fresh chives, fresh dill, etc.
  • Enjoy!

Recipe and photos by Stephanie Borzio.  Stephanie is a mom of three active boys and is an autoimmune warrior.  After battling her own health for several years, Stephanie found healing through food and lifestyle changes, including joining Blooming Glen Farm CSA of which she is a long time member.  She is a Board Certified Integrative Nutrition Health Coach who is passionate about sharing healthy living tips and real food recipes.  Instagram and Facebook: Tru You Essentials; Website: www.truyouessentials.com

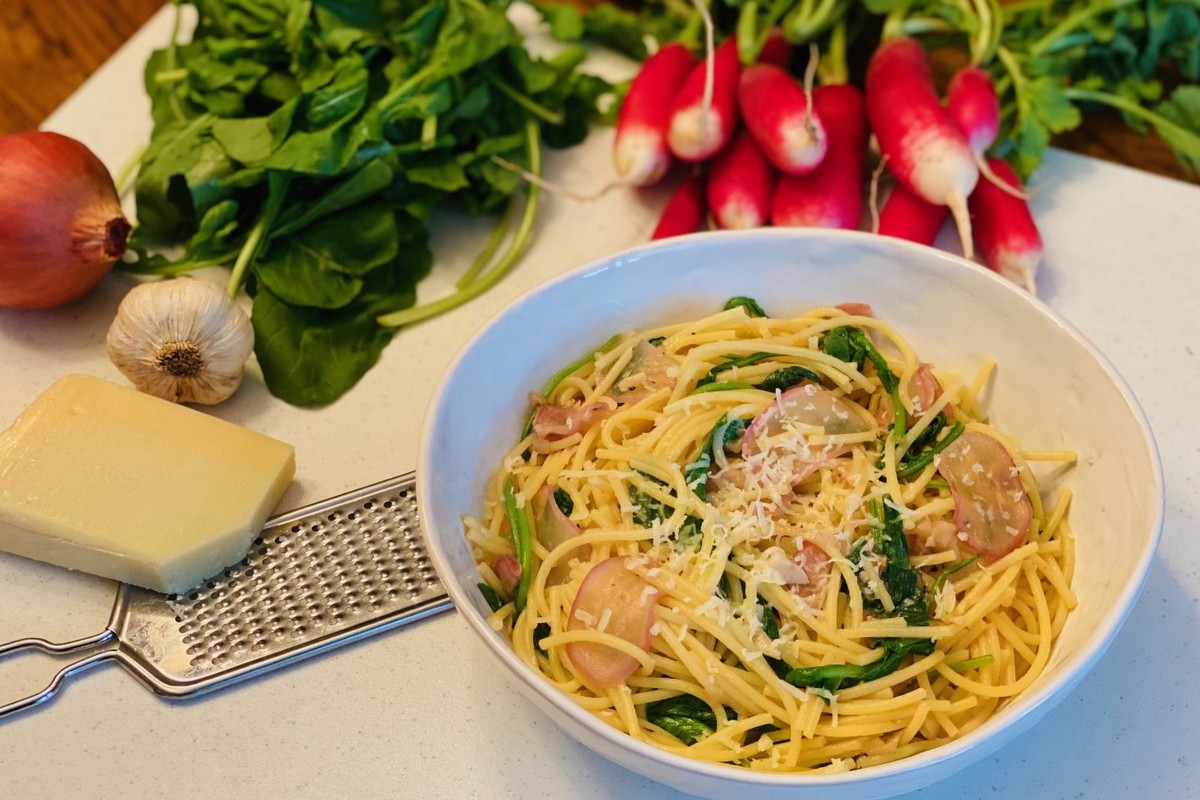
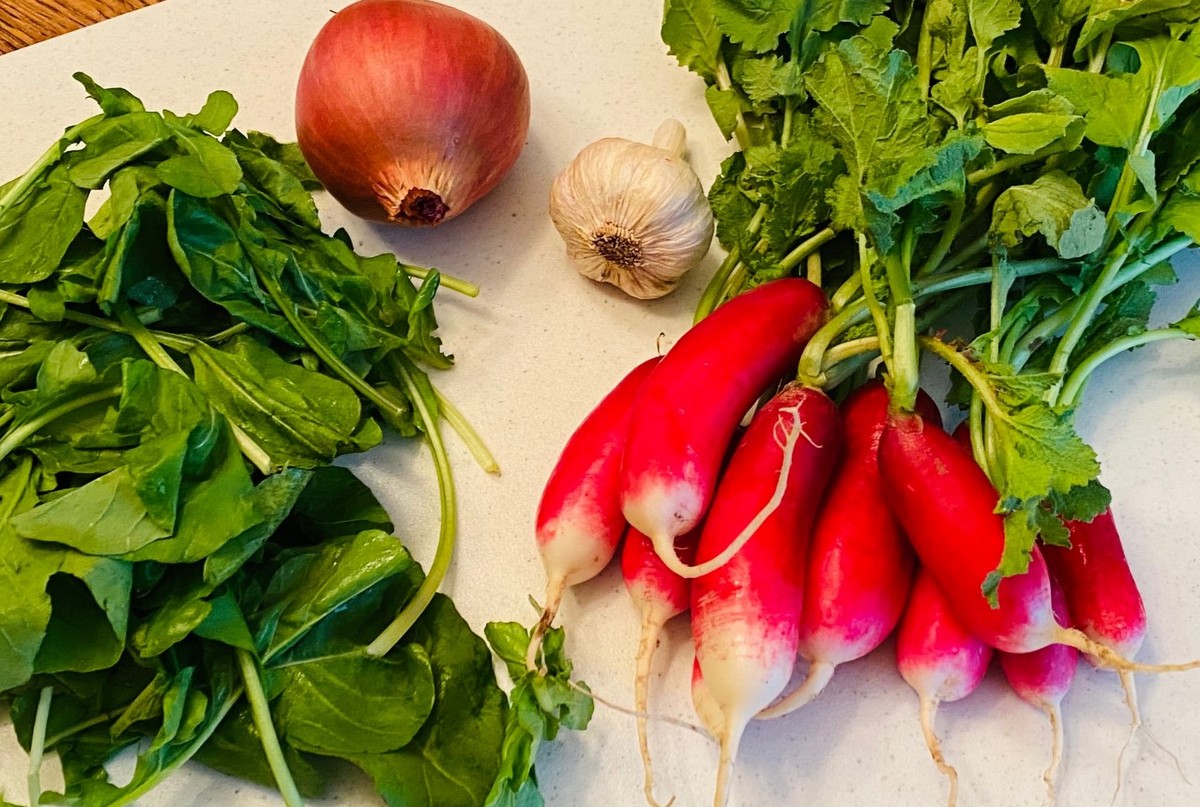
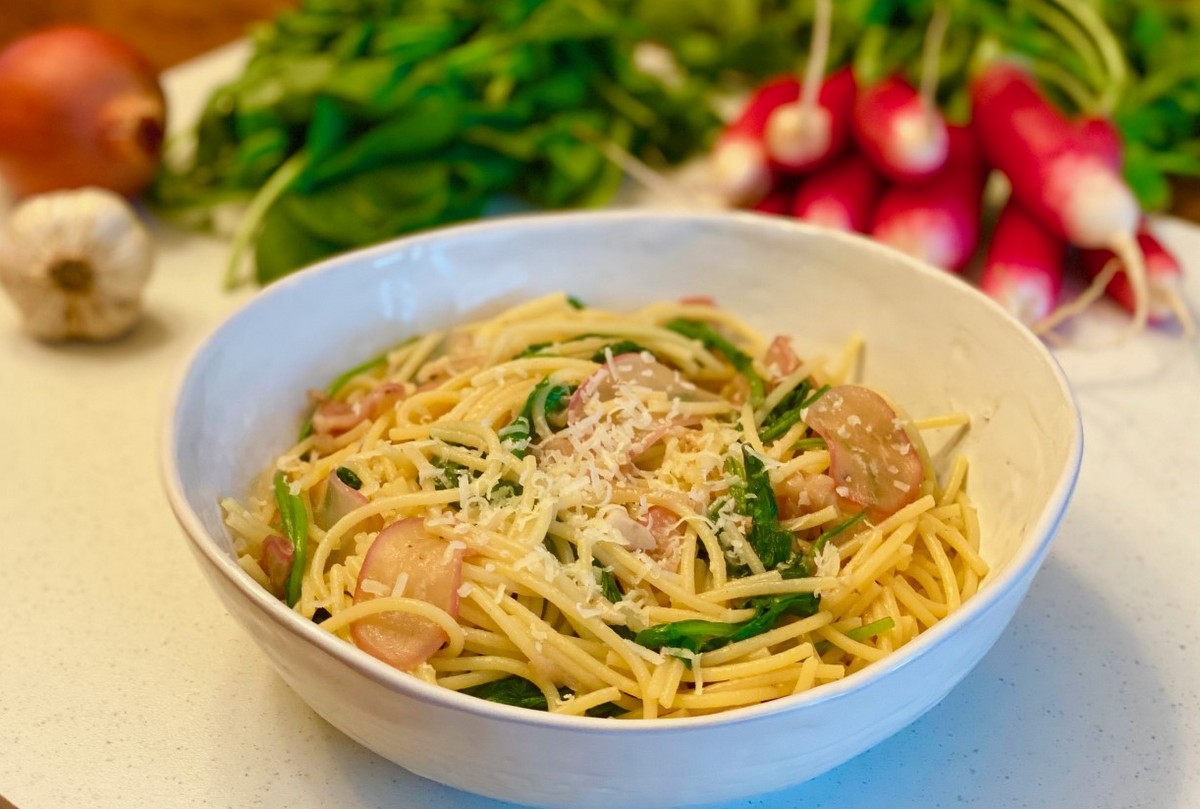
The arugula from the farm is one of my favorites!  Its mild peppery flavor is divine and I wanted to showcase it in this week’s recipe.  Combining the arugula, red onion, and the French breakfast radishes in a simple, but unbelievably tasty pasta dish was what I dreamed of.  This recipe came together just as I imagined and really showcases the radishes and arugula in a unique way.  Enjoy this flavorful dish alone or with a grilled or roasted protein.

Pasta with Arugula and Radishes

Ingredients:
1 lb pasta *
2 tsp sea salt, divided
3 Tbsp olive or avocado oil
½ large red onion, thinly sliced **
6-8 French breakfast radishes, thinly sliced **
3 large cloves garlic, finely chopped
½ tsp black pepper
½ lb arugula
5 Tbsp parmesan cheese (plus more for garnish)

*I used spaghetti, but you can use whatever pasta you choose.
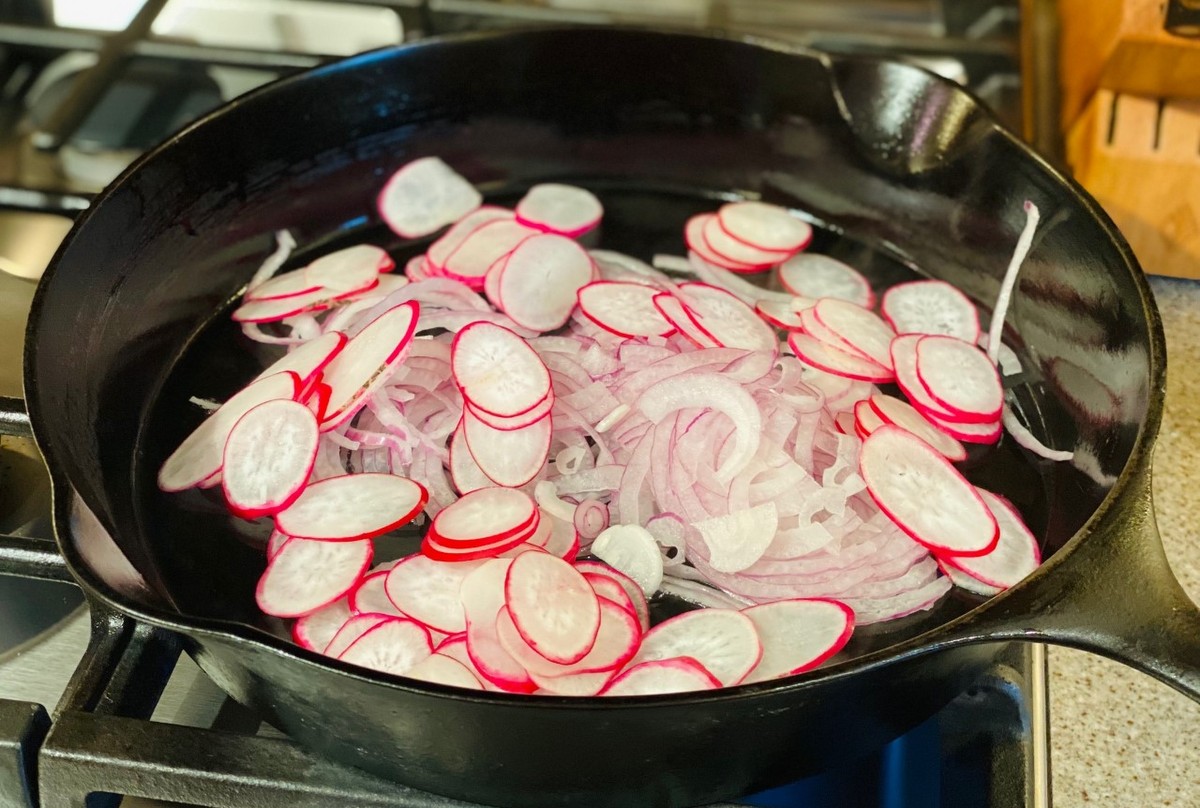
**I used a mandolin set on the lowest setting to get thin, even slices.

  • Prep all ingredients before starting to cook anything. Wash, slice, and chop all produce.
  • Bring a large pot of water to a boil. Add 1 tsp salt.
  • Once water has come to a rolling boil, add pasta and cook according to package instructions.
  • While pasta is cooking, begin cooking the produce.
  • In a large sauté pan, heat oil. Add onions and radishes.  Cook on medium heat for 3-4 minutes.

  • Add garlic and cook for an additional 2-3 minutes. Stir constantly.
  • Remove ½ cup pasta water from large pot. Pour into sauté pan and mix well.
  • Add 1 tsp salt and ½ tsp pepper to the sauté pan. Cook for 1 more minute.
  • Place arugula in colander in sink. Drain pasta, pouring hot pasta water over the arugula to quickly wilt it.
  • Add drained pasta and wilted arugula to sauté pan. Mix well to combine.
  • Add parmesan cheese and toss to coat.
  • Garnish with freshly grated parmesan and serve immediately.

Recipe and photos by Stephanie Borzio.  Stephanie is a mom of three active boys and is an autoimmune warrior.  After battling her own health for several years, Stephanie found healing through food and lifestyle changes, including joining Blooming Glen Farm CSA of which she is a long time member.  She is a Board Certified Integrative Nutrition Health Coach who is passionate about sharing healthy living tips and real food recipes.  Instagram and Facebook: Tru You Essentials; Website: www.truyouessentials.com

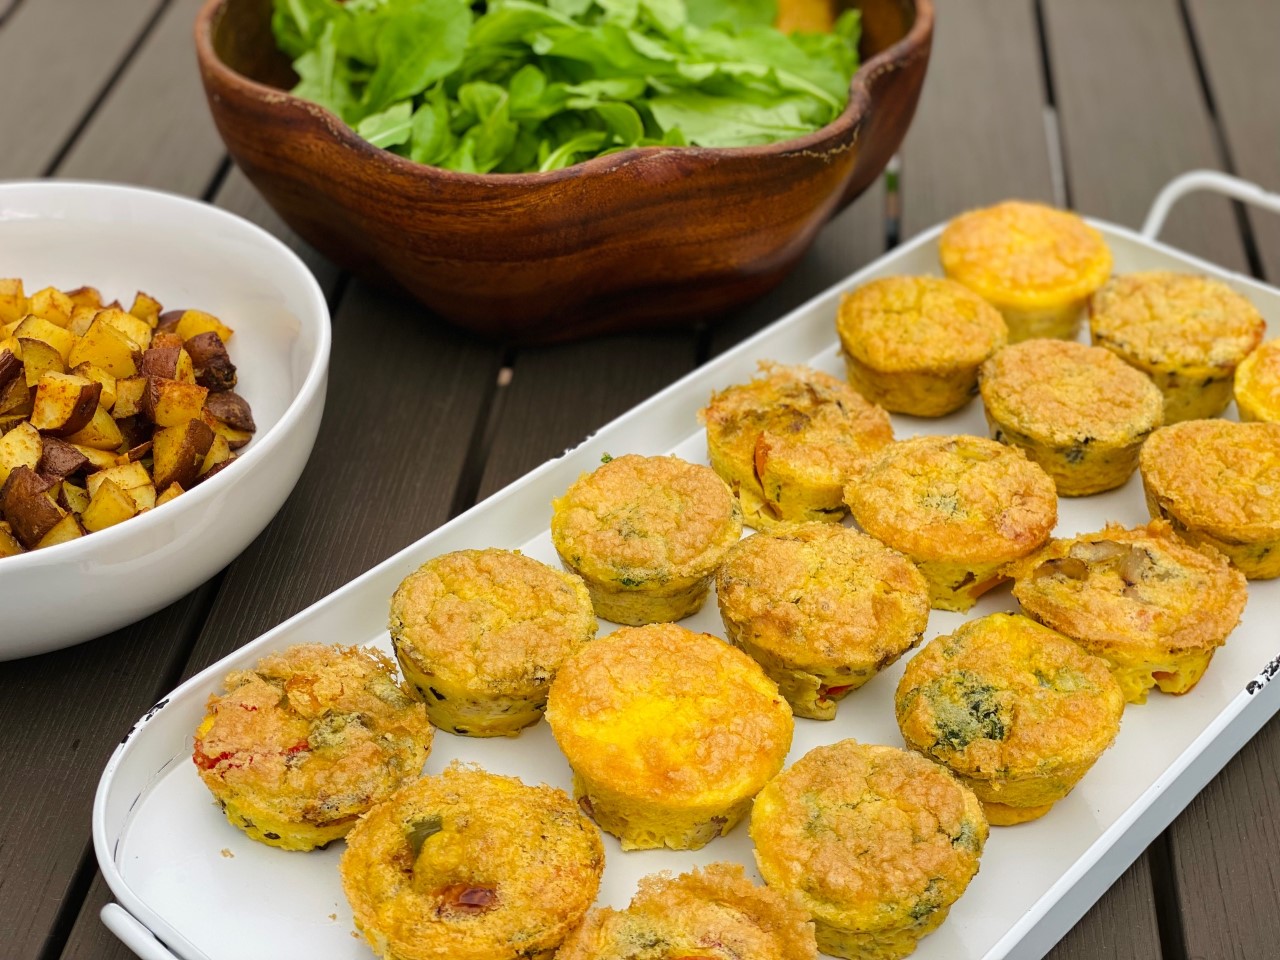
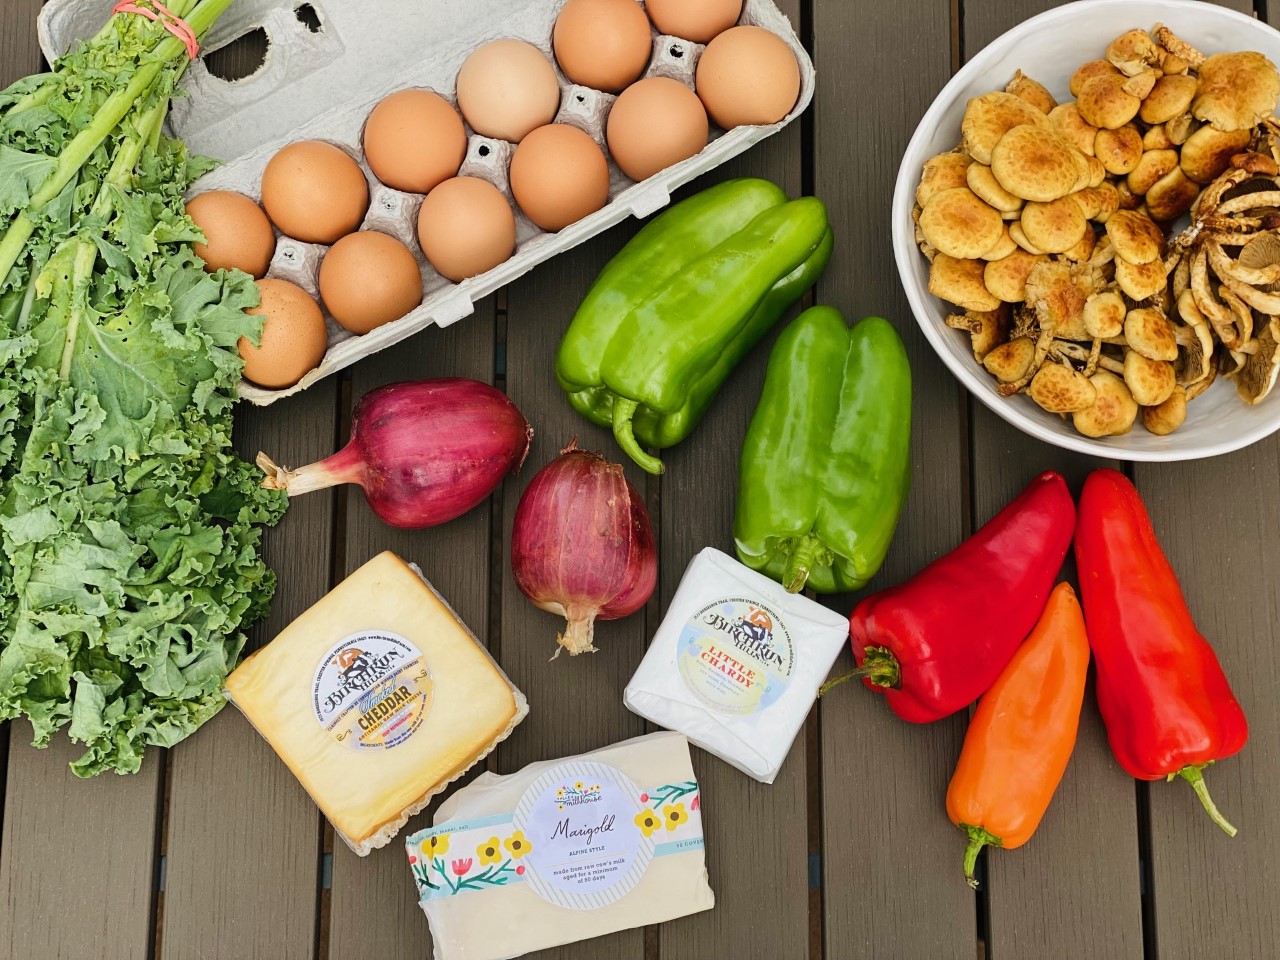
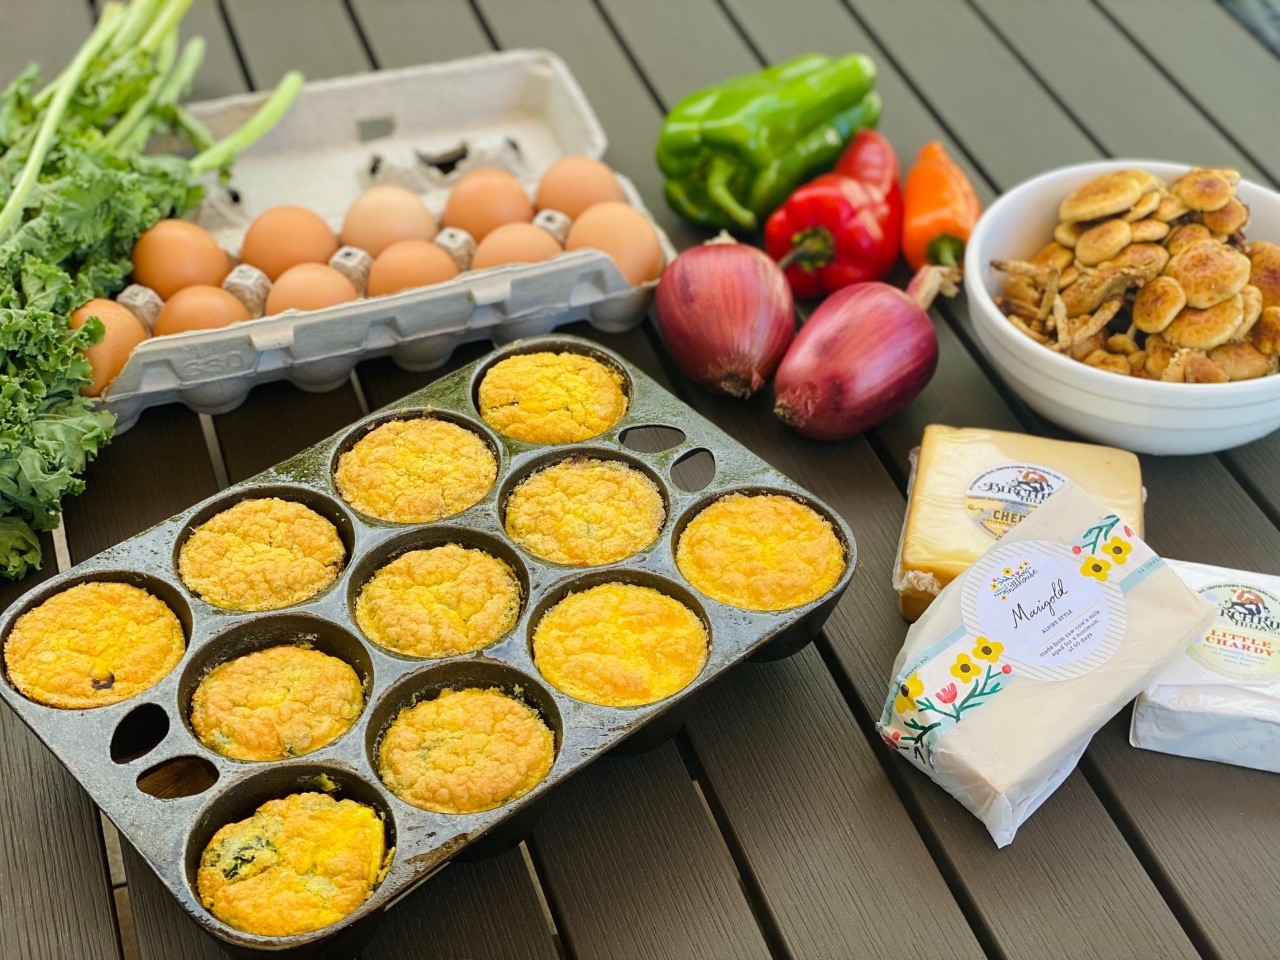
Having recipes that are versatile and can be changed throughout the seasons as produce changes is really helpful.  This recipe does just that.  Keep the base ingredients the same but change the add-ins depending on what you have at that time.  It’s also a recipe that can incorporate ingredients from other local farms- eggs from Deep Roots Valley Farm, cheese from Birchrun Hills Farm or Valley Milkhouse, and mushrooms from Primordia Farms.  Add those items to the variety of produce we get each week from Blooming Glen Farm and you can get really creative with these egg bites.

These scrambled egg bites also make a quick, but healthy breakfast if made ahead of time.  But- do not limit yourself to just breakfast.  The egg bites make a great addition to packed lunches, as an after school snack, or a main protein for dinner.

Scrambled Egg Bites

Ingredients:
10 eggs
2/3 cup cottage cheese
½ tsp sea salt
¼ tsp black pepper
¼ tsp paprika

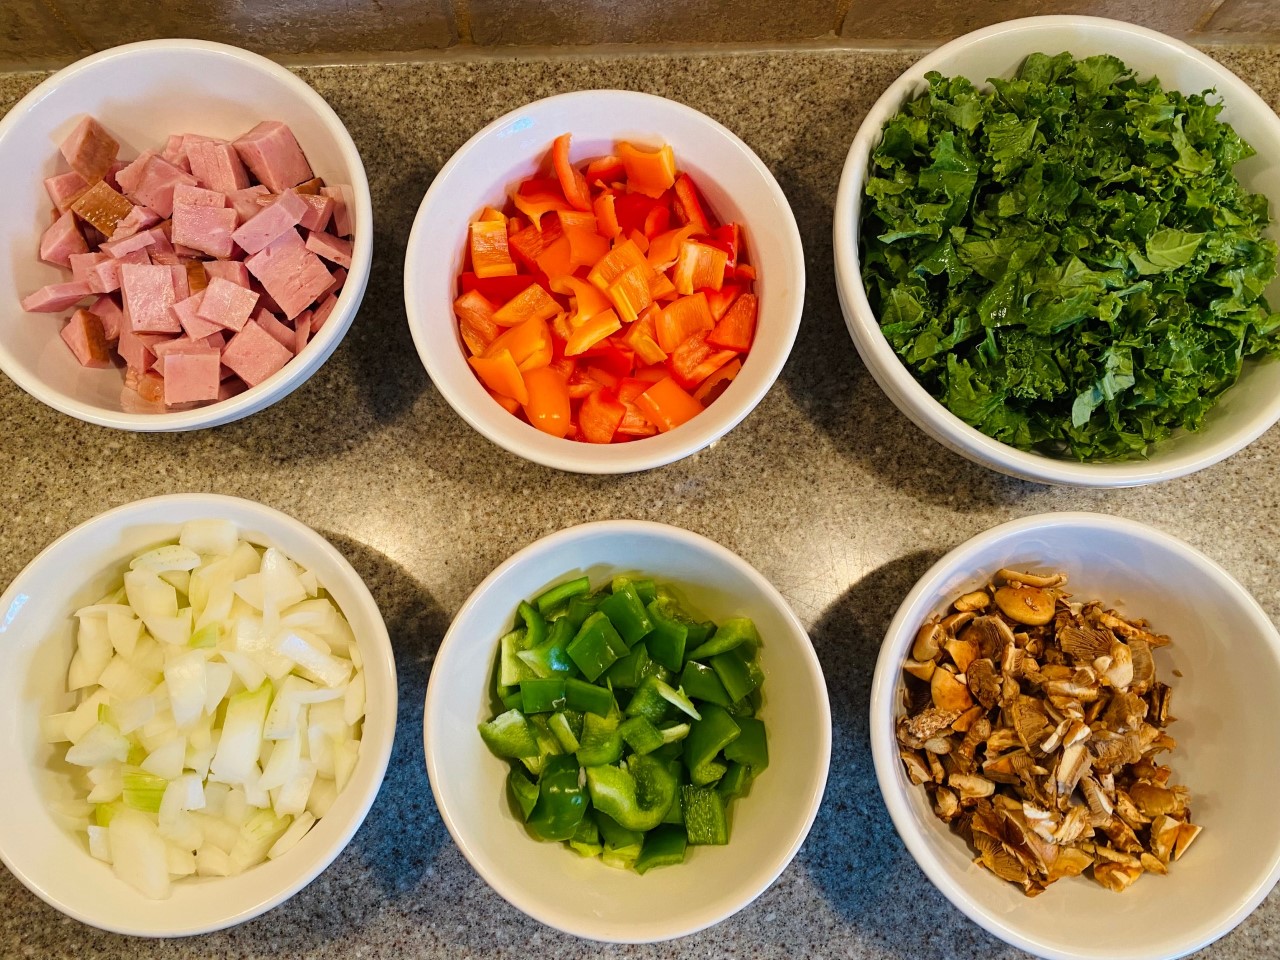
Add-ins: peppers, onions, mushrooms, zucchini, ham, bacon, cheese, kale, spinach, Swiss chard, potatoes, tomatoes, sausage, fresh herbs, etc.

  • Choose what add ins you will be using for your egg bites. Everything should be chopped and precooked.
  • Preheat oven to 325°F.
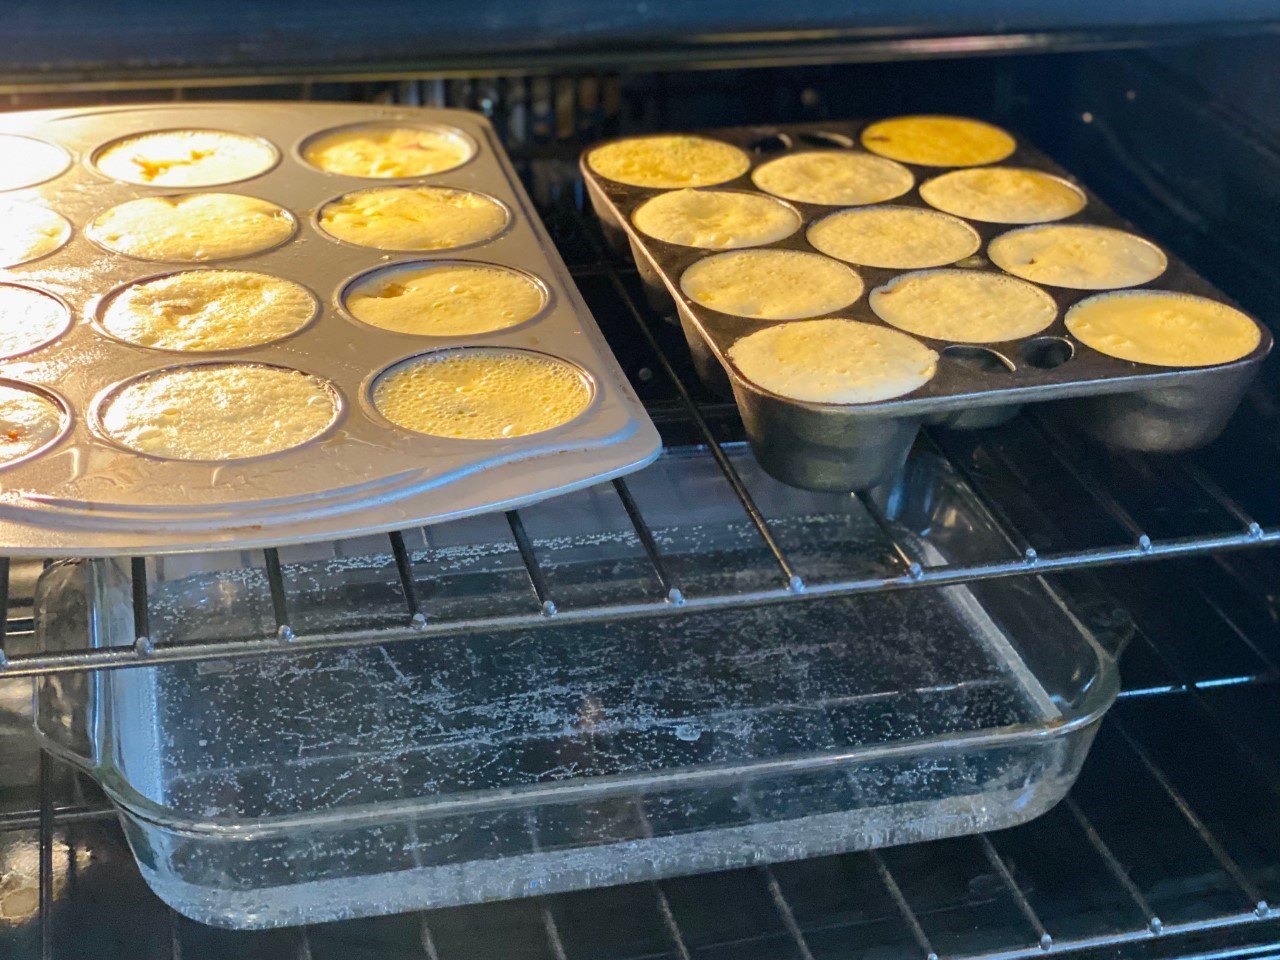
  • Place baking dish filled with water on lower rack of oven (this keeps oven moist and helps with even baking).
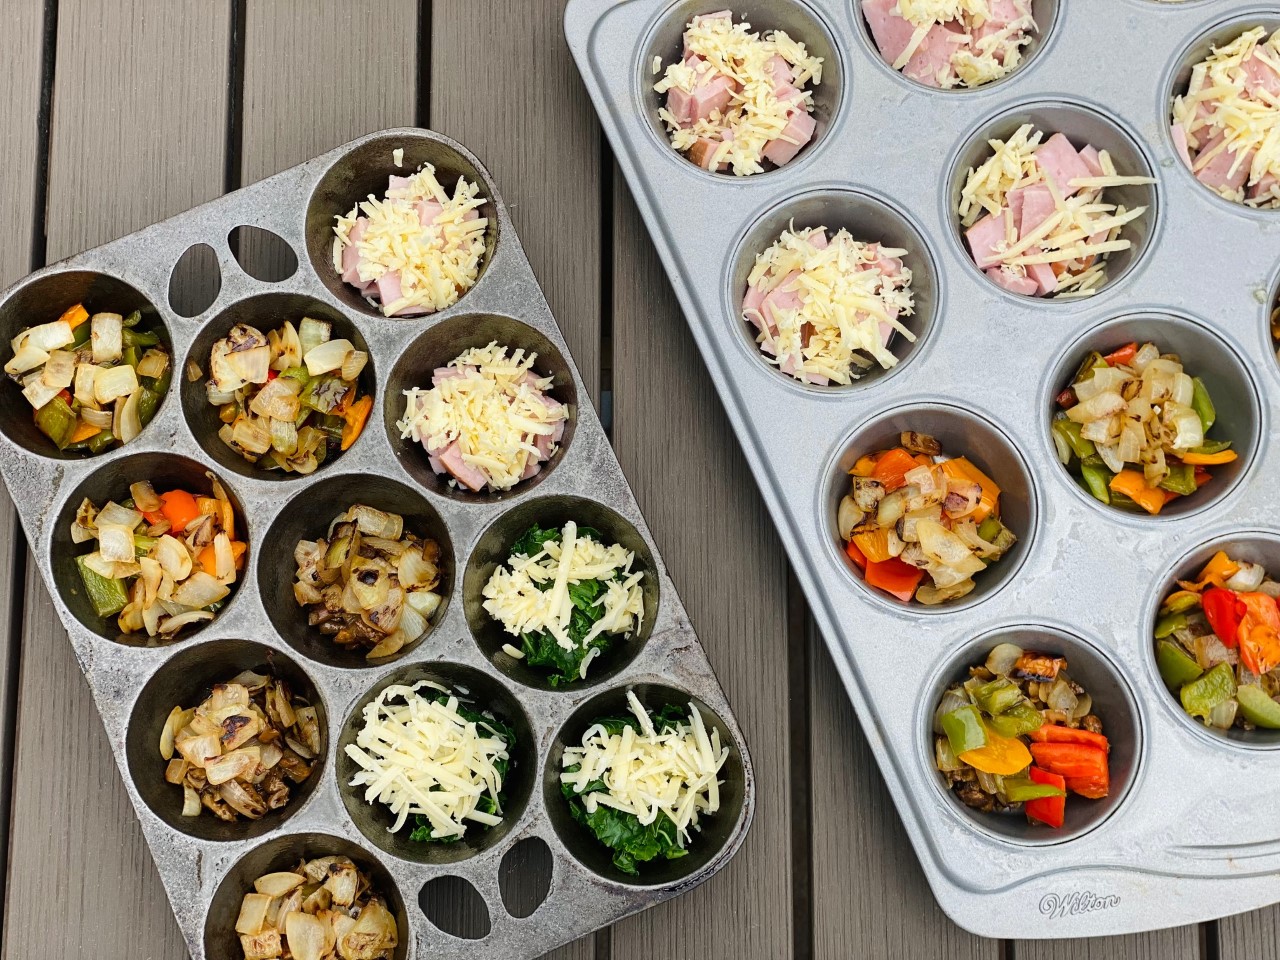
  • Grease muffin pan. You can also use silicon inserts, but you still want to spray them with oil.
  • Fill each muffin tin with about ¼ cup of add ins.

  • Combine eggs, cottage cheese, salt, pepper, and paprika in blender. Blend for 30-60 seconds until well combined.
  • Pour egg mixture into each muffin tin. You should have enough for a dozen egg bites.
  • Place muffin pan on top rack of oven and bake for about 25 minutes. Egg bites should be set in the center when done.

  • Let egg bites cool for 5 minutes before removing from muffin pan.
  • Enjoy as breakfast, lunch, or dinner!
  • Store leftovers in the refrigerator or freeze to preserve longer. Reheat in oven or microwave.

Recipe and photos by Stephanie Borzio.  Stephanie is a mom of three active boys and is an autoimmune warrior.  After battling her own health for several years, Stephanie found healing through food and lifestyle changes, including joining Blooming Glen Farm CSA of which she is a long time member.  She is a Board Certified Integrative Nutrition Health Coach who is passionate about sharing healthy living tips and real food recipes.  Instagram and Facebook: Tru You Essentials; Website: www.truyouessentials.com

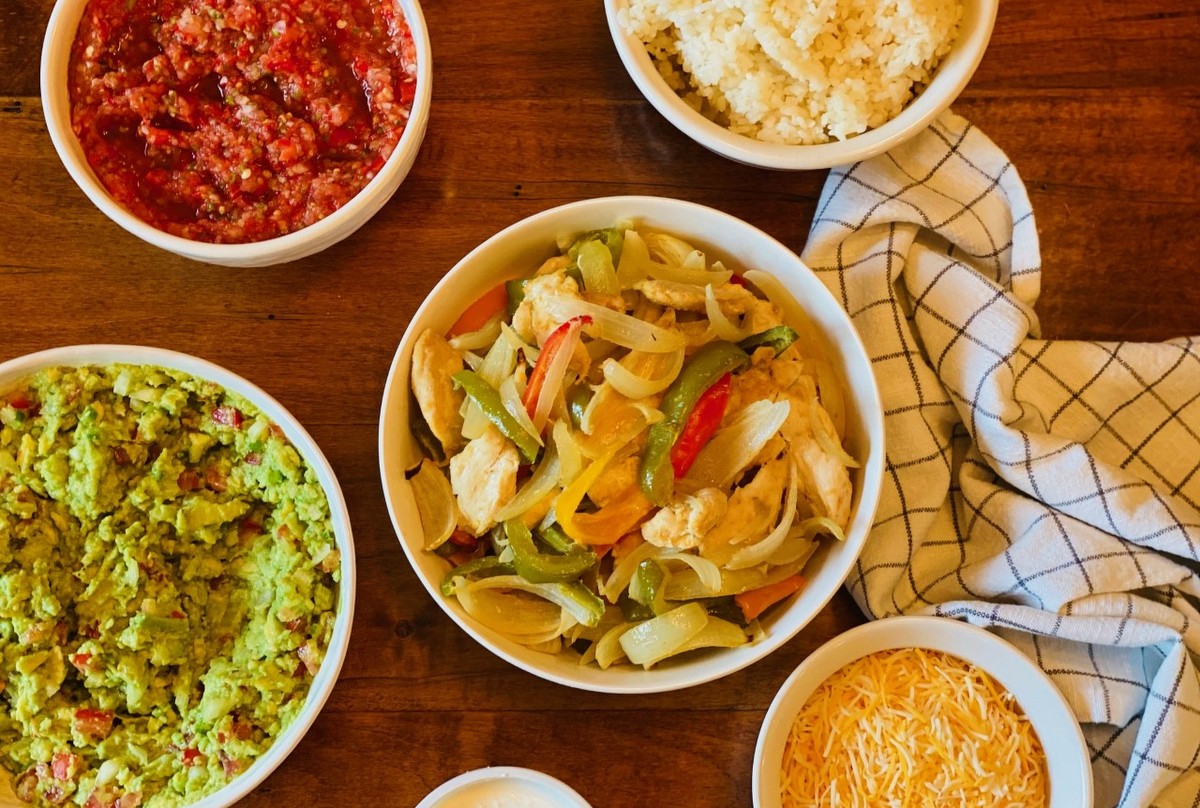
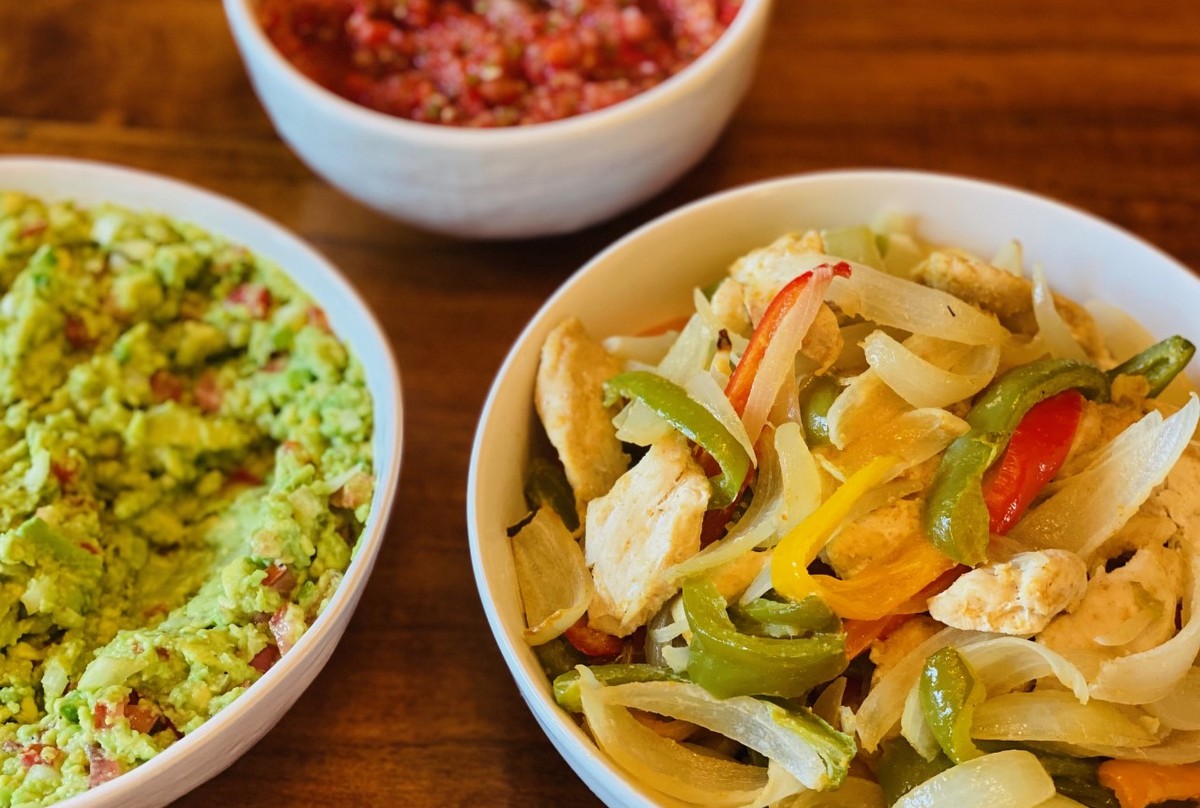
The fall is typically a time where we shift into new routines.  We juggle school, work, children’s activities, and sporting events.  As a family of 5, we often find ourselves moving in different directions, but still enjoy eating together at least a couple of times a week.  This meal is full of flavor and is fast and easy, so it’s perfect for a quick, but healthy dinner.  I actually like to double the recipe so that we have leftovers throughout the week for lunches.

Sheet Pan Fajitas

Ingredients:
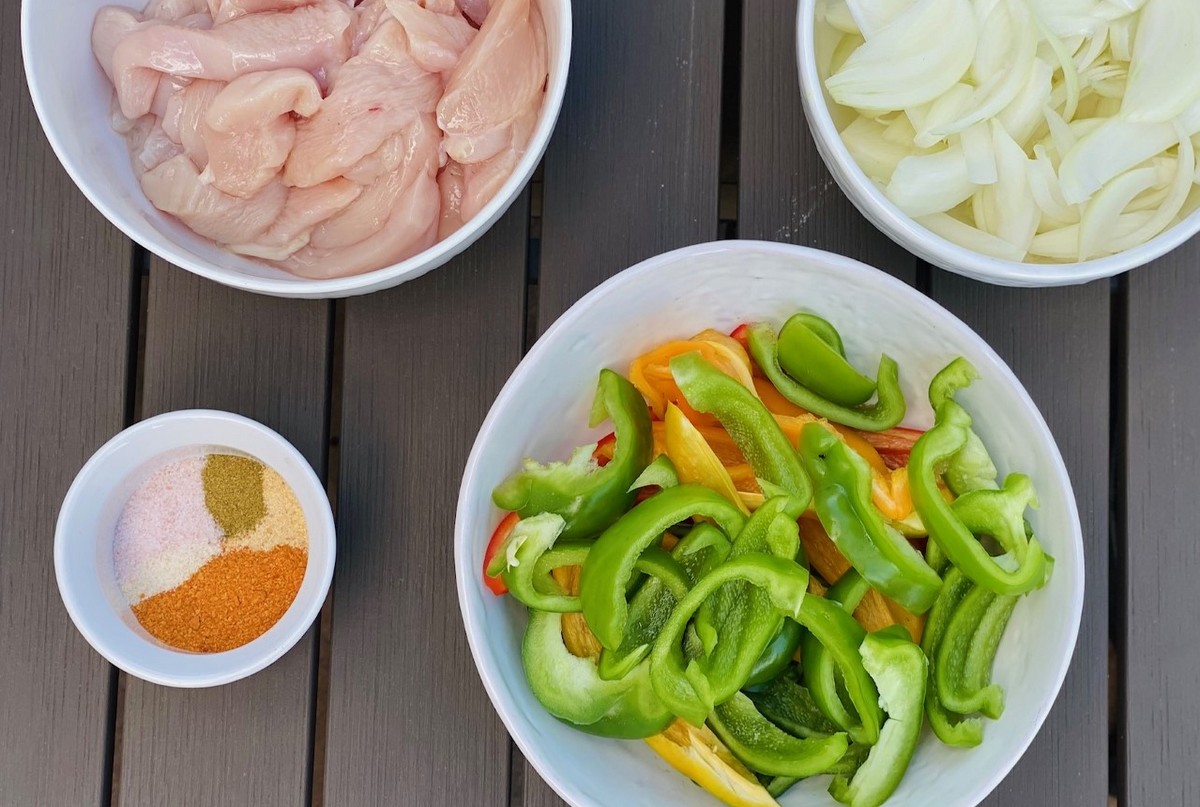
1 ½ lbs boneless chicken breasts, thinly sliced
2 onions, sliced
4 peppers (green bell peppers or sweet peppers), stem/seeds removed and sliced
3 Tbsp olive or avocado oil
2 tsp chili powder
1 tsp onion powder
1 tsp garlic powder
1 tsp sea salt
¼ tsp ground cumin

  • Preheat oven to 375°F.
  • Place sliced chicken, onions, and peppers in large bowl. Add oil and toss to coat.

  • In small bowl, mix all of the spices. Sprinkle over chicken and vegetables.  Mix well to evenly distribute.
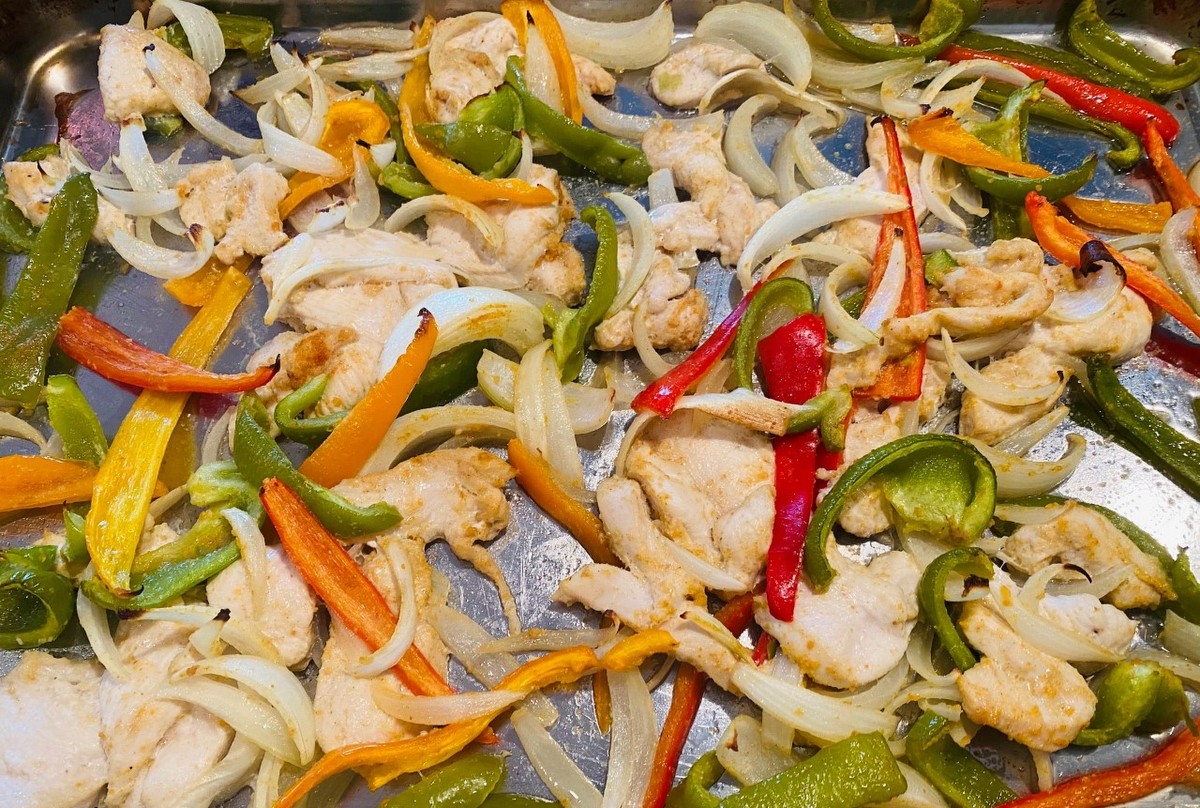
  • Place on large baking sheet.
  • Bake for 25 minutes.

  • Serve in wraps or on top of rice. Top with homemade salsa (see recipe for End of Summer Salsa), guacamole (see recipe below), sour cream, and shredded cheese.
  • Store leftovers in the refrigerator for up a week.


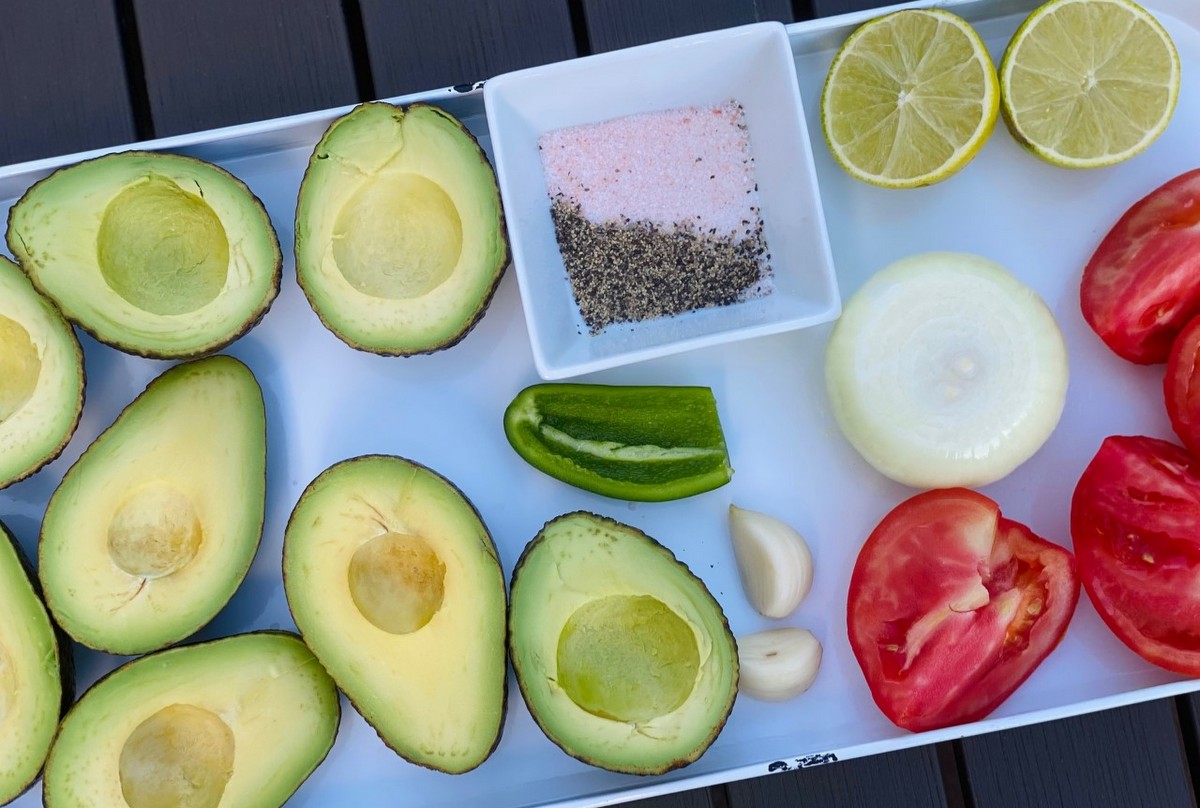
Guacamole
4 ripe avocados
1 lime, juiced + 1 tsp zest
1 tsp salt
½ tsp black pepper
½ jalapeno, seeds/membranes removed and finely chopped
½ medium onion, finely chopped
2 cloves garlic, crushed
1 medium tomato, seeds removed and finely chopped
1 Tbsp fresh cilantro, finely chopped (optional)

Scoop the avocado pulp into a large bowl.  Mash with a fork.  Add lime juice, lime zest, salt, and pepper.  Mix well.  In a small bowl, combine jalapeno, onion, garlic, tomatoes, and cilantro (if using).  Add to avocado mixture and fold in.  Serve with fajitas, tacos, nachos, or just with chips or veggies.


Recipe and photos by Stephanie Borzio.  Stephanie is a mom of three active boys and is an autoimmune warrior.  After battling her own health for several years, Stephanie found healing through food and lifestyle changes, including joining Blooming Glen Farm CSA of which she is a long time member.  She is a Board Certified Integrative Nutrition Health Coach who is passionate about sharing healthy living tips and real food recipes.  Instagram and Facebook: Tru You Essentials; Website: www.truyouessentials.com

As we navigate through the month of September, we begin to see a shift in the harvest.  The last of the cherry tomatoes are being picked and the summer squash has been replaced by spaghetti squash.  Just as the farm shifts to the autumn bounty, at home we are shifting to new schedules and routines with the kids going back to school.

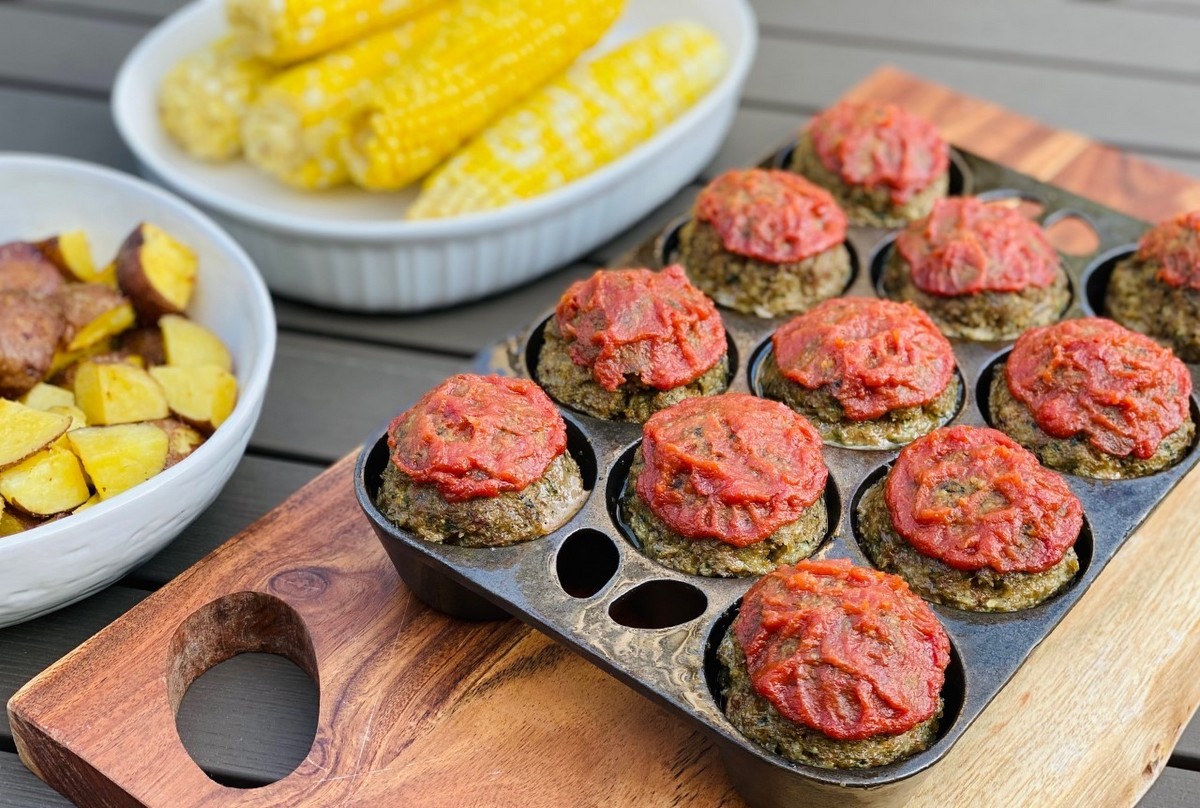
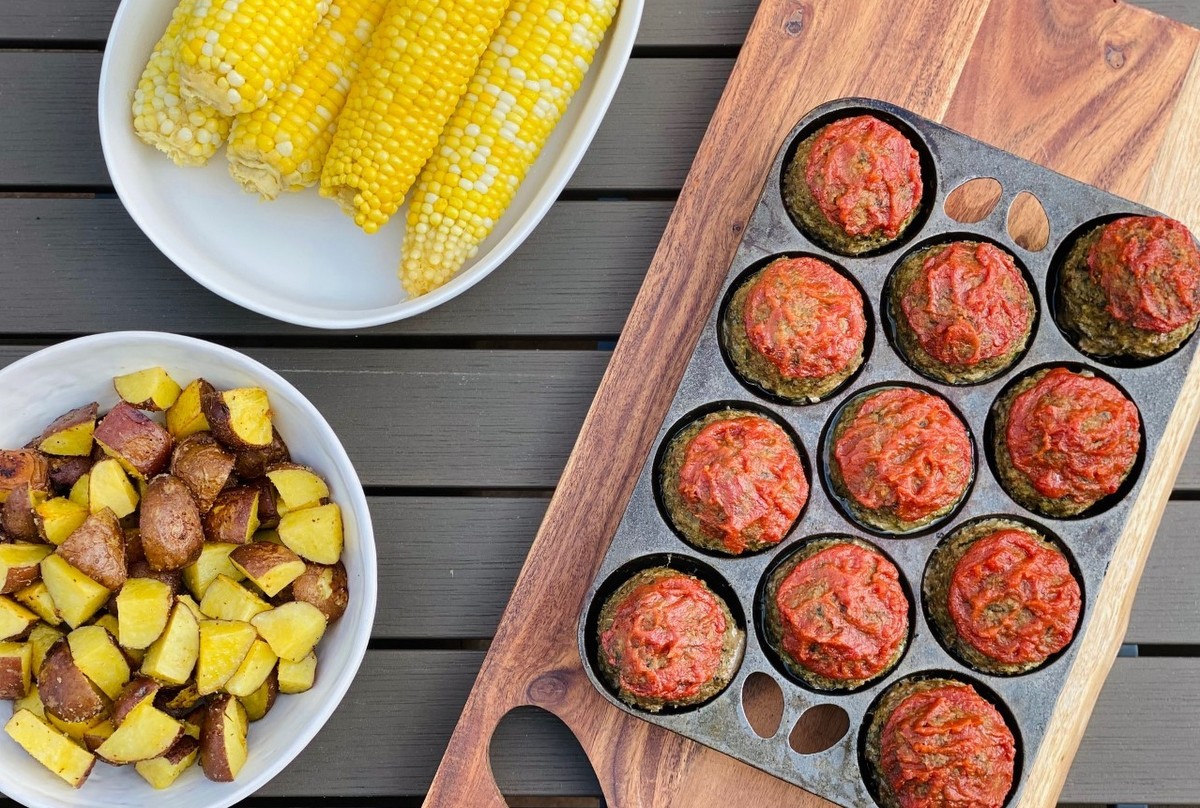
It’s the back to school shift that inspired this recipe.  It is one that can be made in advance and quickly cooked for a fast, but nutritious dinner.  For those kids (or adults) that hate to eat their greens, this recipe is a great way to disguise them.  These meatloaf muffins can be served alongside some roasted potatoes or a mix of roasted or grilled vegetables.

Meatloaf Muffins

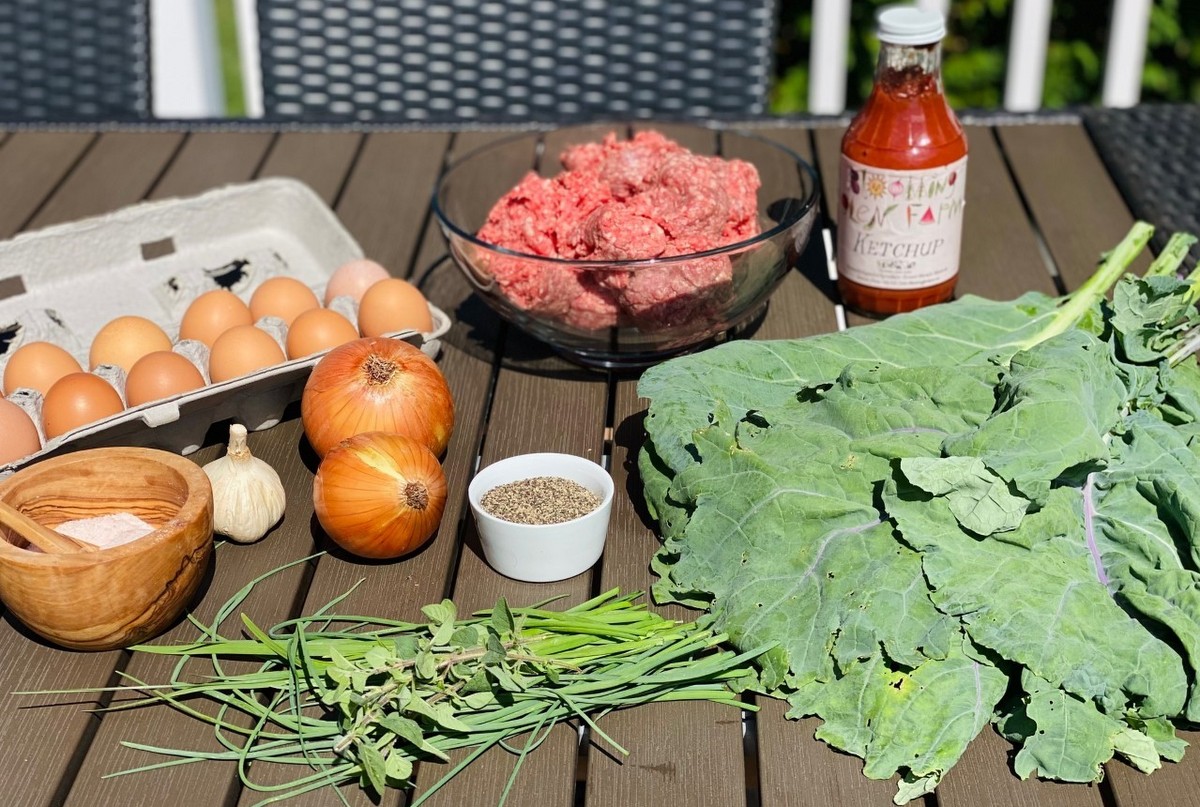
Ingredients:
2 cups greens, roughly chopped and inner rib removed (kale, collards, Swiss chard, etc.)
1 large yellow onion, roughly chopped
2-3 cloves garlic
2 Tbsp fresh herbs or 2 tsp dried herbs (chives, parsley, etc.)
2 lbs ground beef or turkey
2 eggs
1 tsp sea salt
½ tsp black pepper
2 tsp Worcestershire sauce (optional)
1 cup breadcrumbs

Glaze-
½ cup ketchup
1 ½ tsp spicy mustard
¼ tsp onion powder
¼ tsp garlic powder

  • Bring a medium pot of water to a boil.
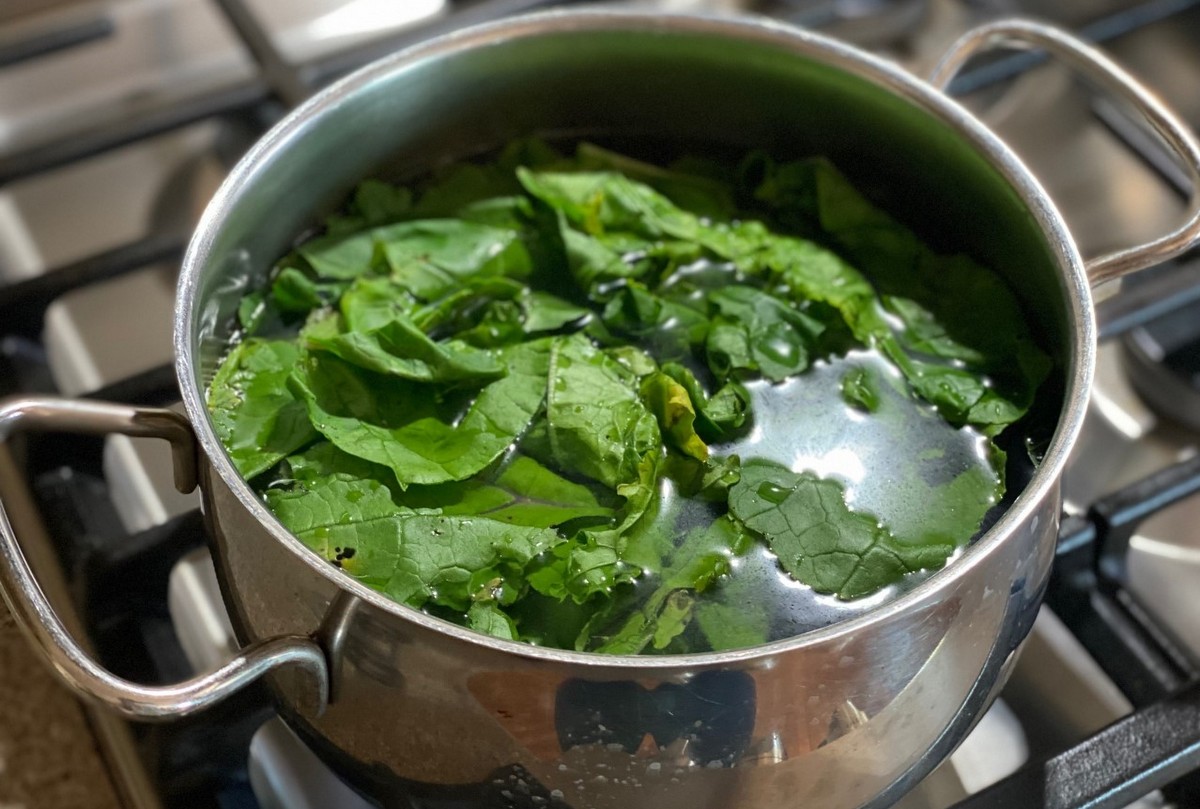
  • Place greens in water for 60 seconds and then remove with a slotted spoon.

  • Allow the greens to cool and squeeze excess liquid out.
  • Preheat oven to 375°F.
  • Combine greens, onion, garlic, and fresh or dried herbs in food processor. Pulse to chop.  Scrape sides and pulse again.  Continue to do this until all ingredients are well combined and finely chopped.
  • Place meat, eggs, salt, pepper, and Worcestershire sauce (if using) in large bowl. Add onion/greens mixture.  Mix well.  You can use a spoon, but I find it easier to just use my hands.
  • Add half of the breadcrumbs. Mix well.  Add the other half of breadcrumbs and mix well.
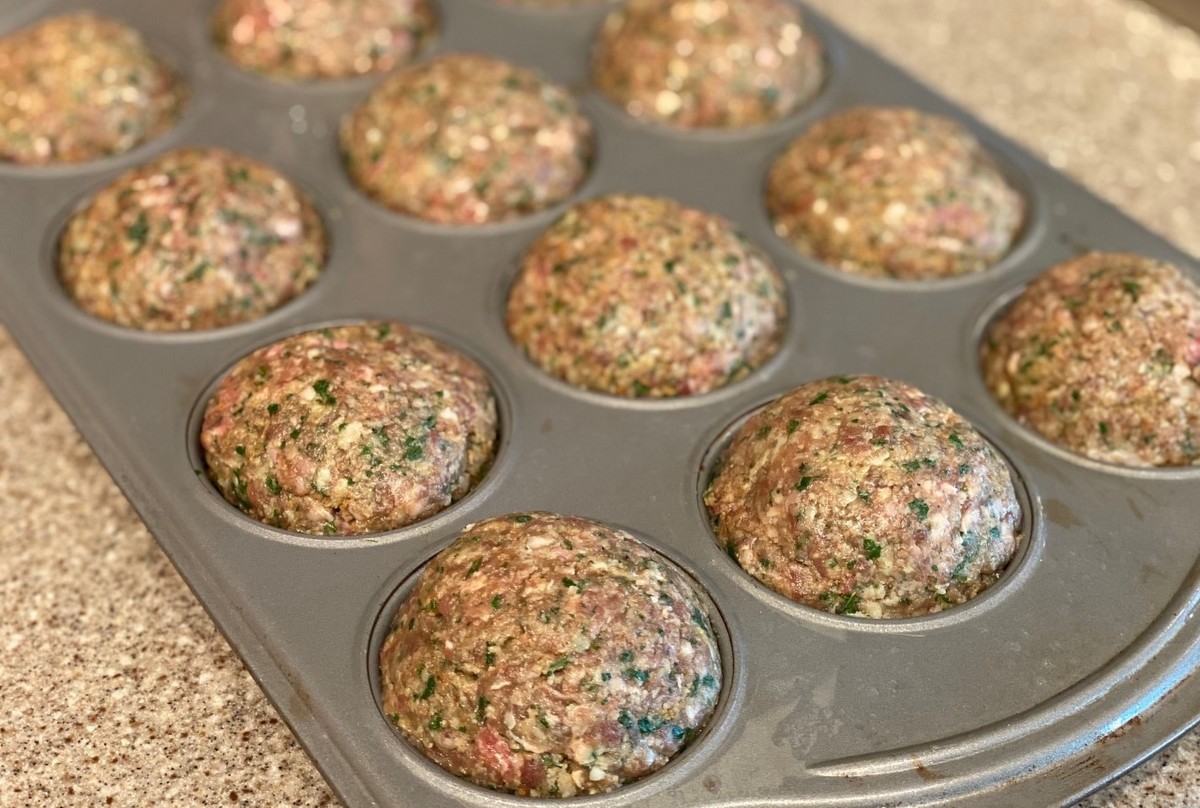
  • Grease muffin pan. Divide meat mixture into 12 servings and press into each muffin mold.  I found that a large ice cream scoop worked well for this job.
  • Place muffin pan on a cookie sheet in oven. This will catch any oil or grease that may run over and will save you clean up afterwards.
  • Bake for 20 minutes.

  • While muffins are cooking, make the glaze by mixing ketchup, mustard, and spices.
  • After the 20 minutes are up, remove the meatloafs from the oven and put the glaze on top of each muffin.
  • Return the muffin pan to the oven and bake an additional 10 minutes.
  • Remove from oven and serve while hot. Pairs well with roasted potatoes, mashed potatoes, or roasted/grilled vegetables.
  • Enjoy!

TO FREEZE- Before cooking, place muffin pan in freezer for a few hours.  Remove uncooked meatloaf muffins and place in plastic bag.  Return to freezer.  When ready to use, place frozen muffins in muffin pan and place in fridge to defrost overnight.  Cook as directed in above recipe.


Recipe and photos by Stephanie Borzio.  Stephanie is a mom of three active boys and is an autoimmune warrior.  After battling her own health for several years, Stephanie found healing through food and lifestyle changes, including joining Blooming Glen Farm CSA of which she is a long time member.  She is a Board Certified Integrative Nutrition Health Coach who is passionate about sharing healthy living tips and real food recipes.  Instagram and Facebook: Tru You Essentials; Website: www.truyouessentials.com
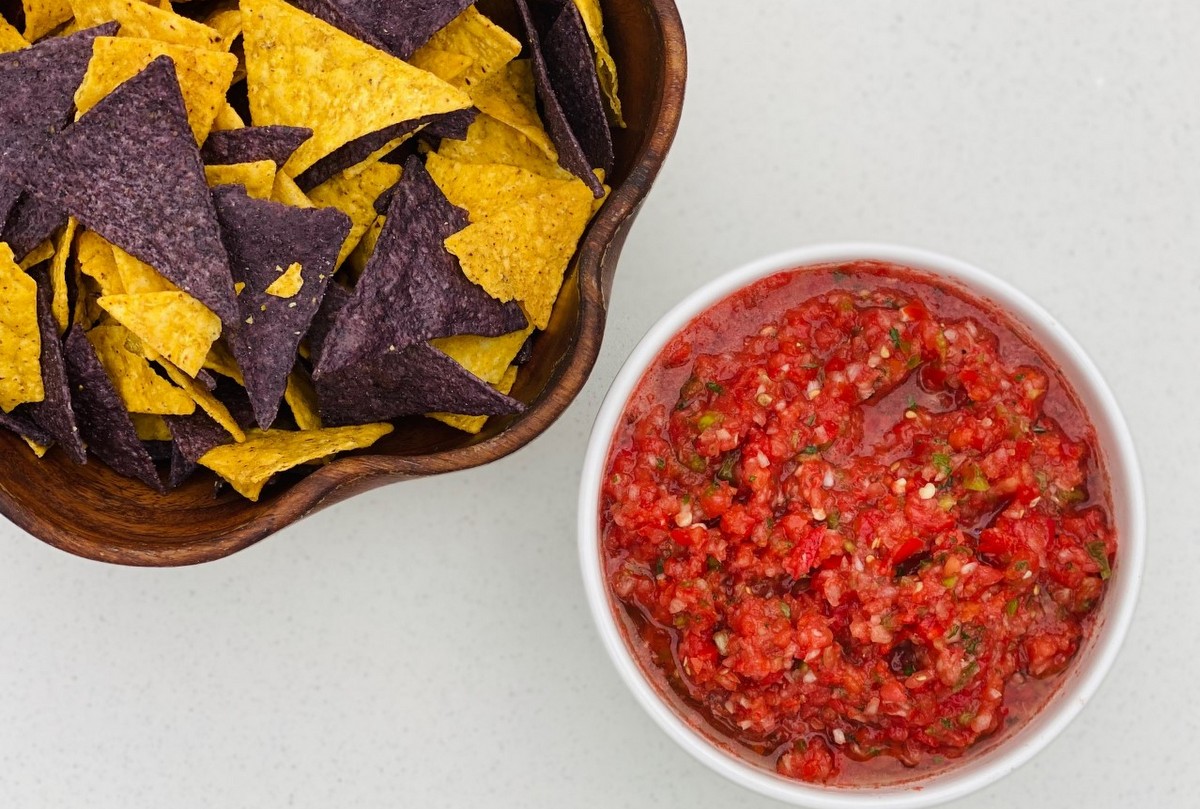
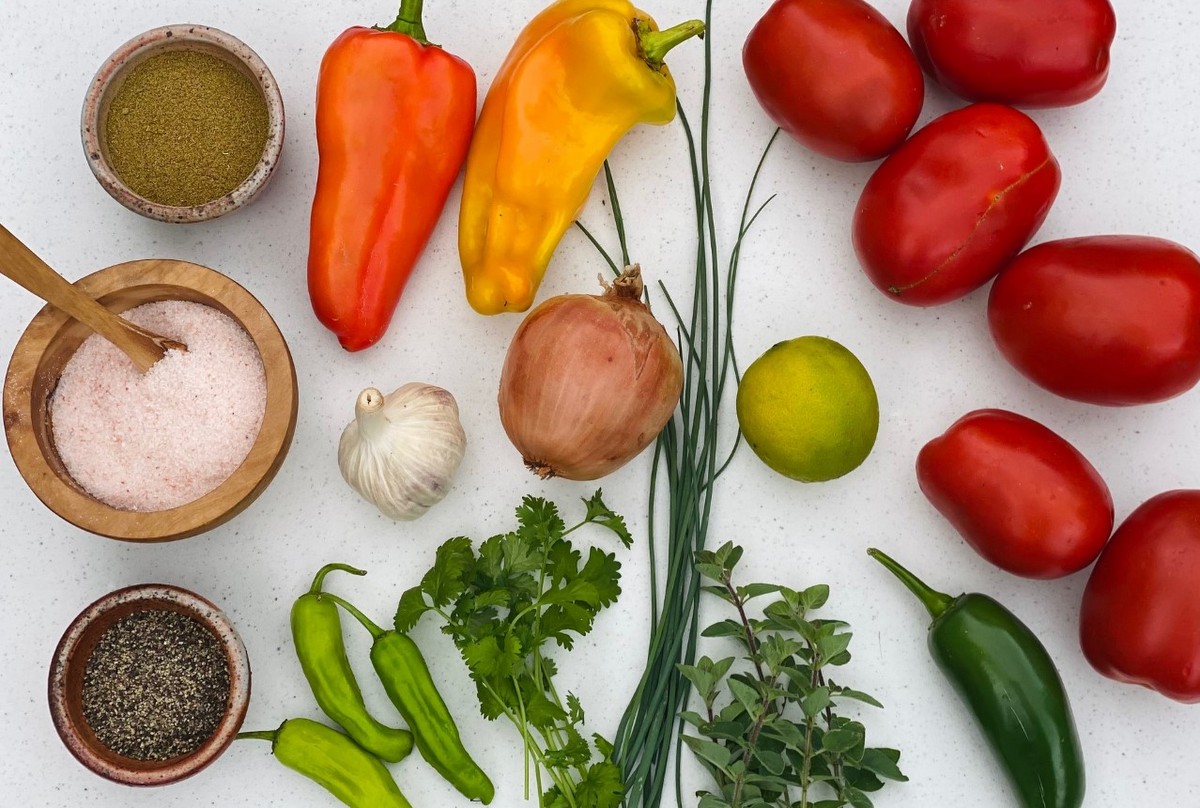
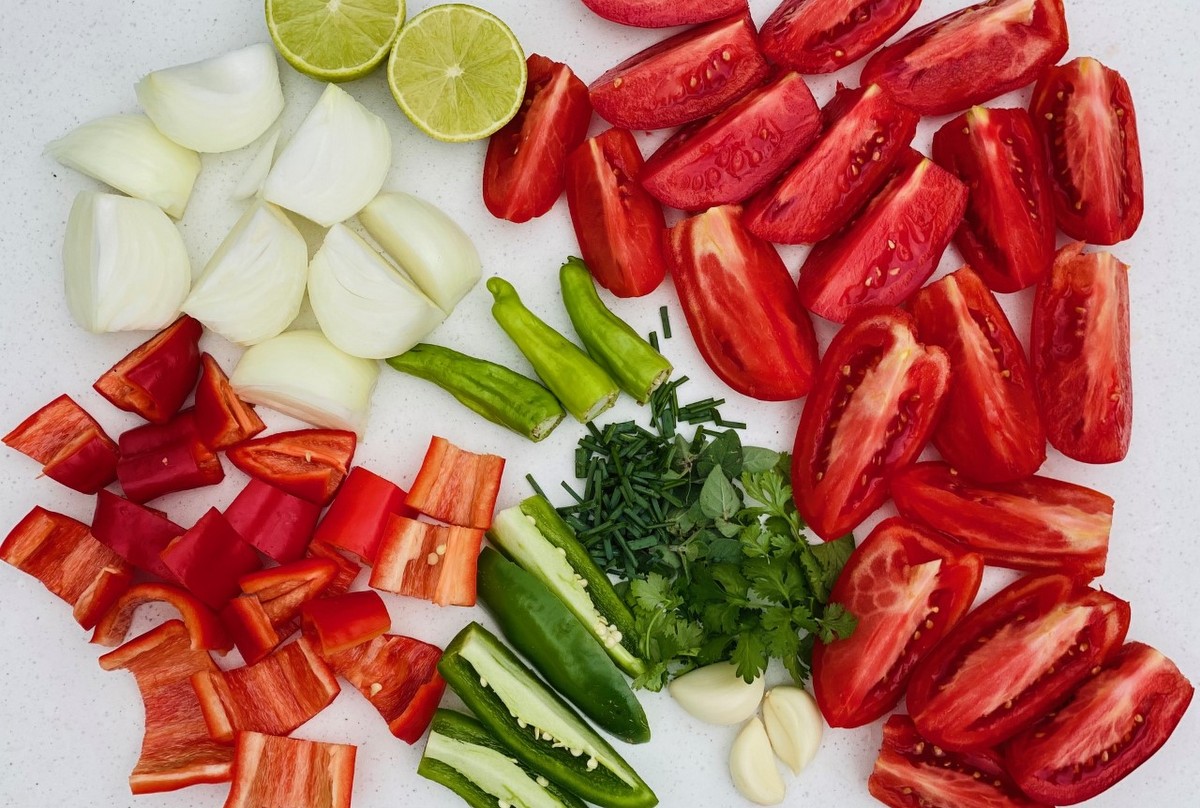
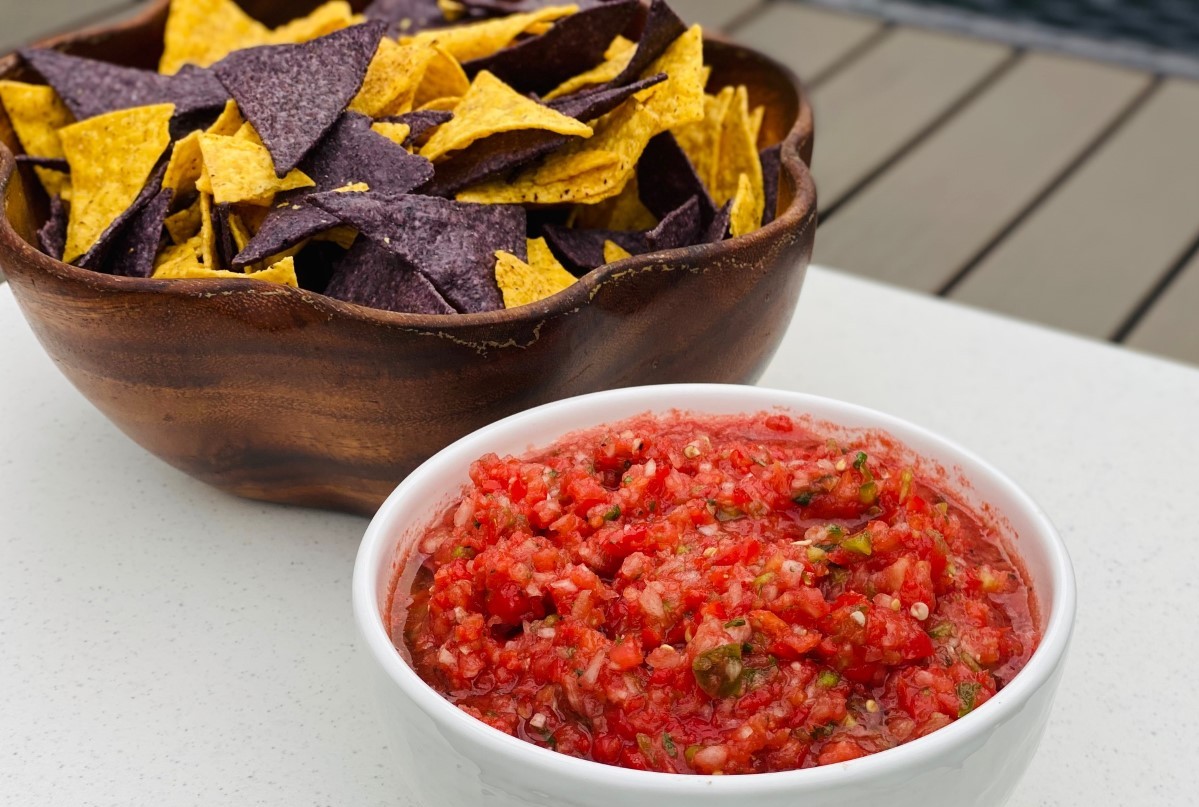
This time of year can be super busy as the kids go back to school and activities come back in full force.  It is always great to have recipes on hand that are quick and easy but full of flavor.  If they can be served as an after school snack, even better!  This recipe combines many of the share ingredients from this week- tomatoes, onions, garlic, sweet peppers, hot peppers, and shishito peppers.  Enjoy this end of summer blended salsa as a snack or as a topping for a Mexican inspired meal.

Easy End of Summer Salsa

Ingredients:
6 Roma tomatoes, quartered
2 yellow onions, peeled and quartered
1 hot pepper, halved
2 sweet peppers, seeded and roughly chopped
3-5 shishito peppers, stem removed
3 cloves garlic
3 Tbsp fresh herbs (cilantro, oregano, chives, etc.)
1 lime, juiced and zested
1 ½ tsp sea salt
¼ tsp black pepper
½ tsp cumin

  • Combine all ingredients in food processor. You can process in batches if your food processor is smaller.
  • Pulse to finely chop and mix well.
  • Serve with chips, with tacos or fajitas, on a breakfast wrap, etc.
  • Store in refrigerator for up to a week.

Recipe and photos by Stephanie Borzio.  Stephanie is a mom of three active boys and is an autoimmune warrior.  After battling her own health for several years, Stephanie found healing through food and lifestyle changes, including joining Blooming Glen Farm CSA of which she is a long time member.  She is a Board Certified Integrative Nutrition Health Coach who is passionate about sharing healthy living tips and real food recipes.  Instagram and Facebook: Tru You Essentials; Website: www.truyouessentials.com
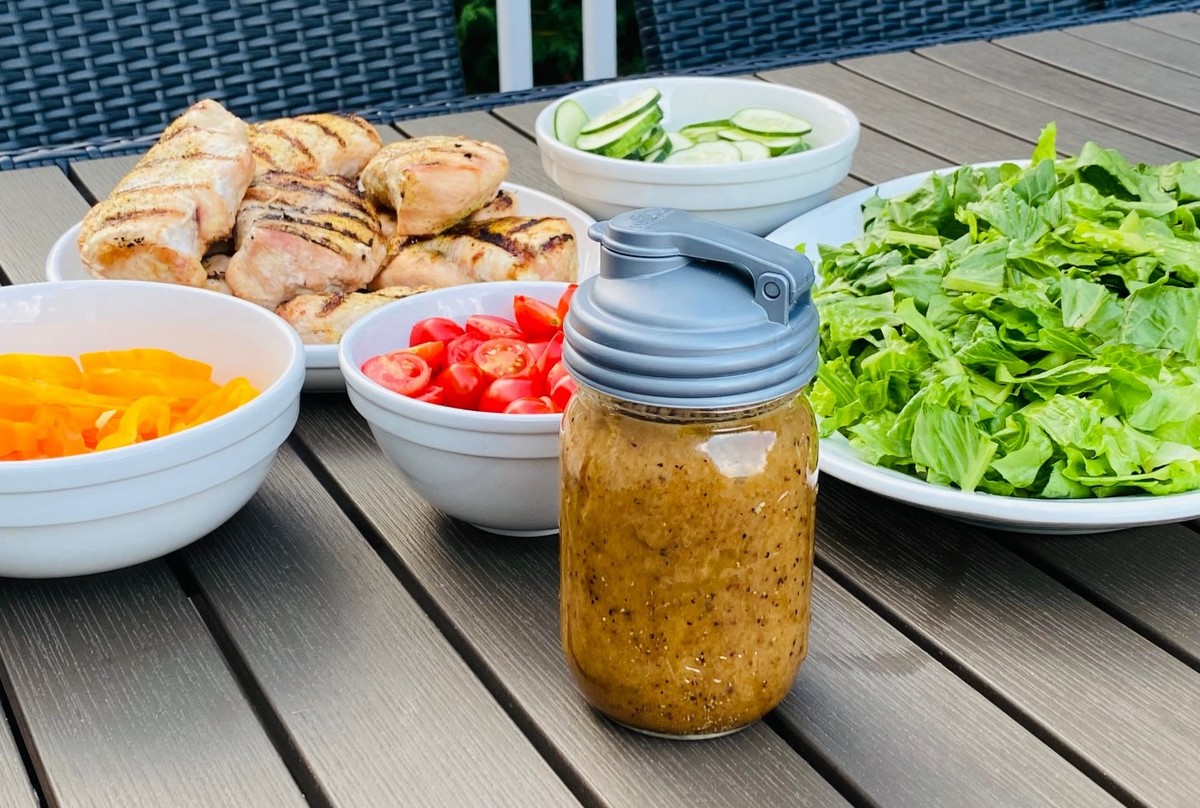
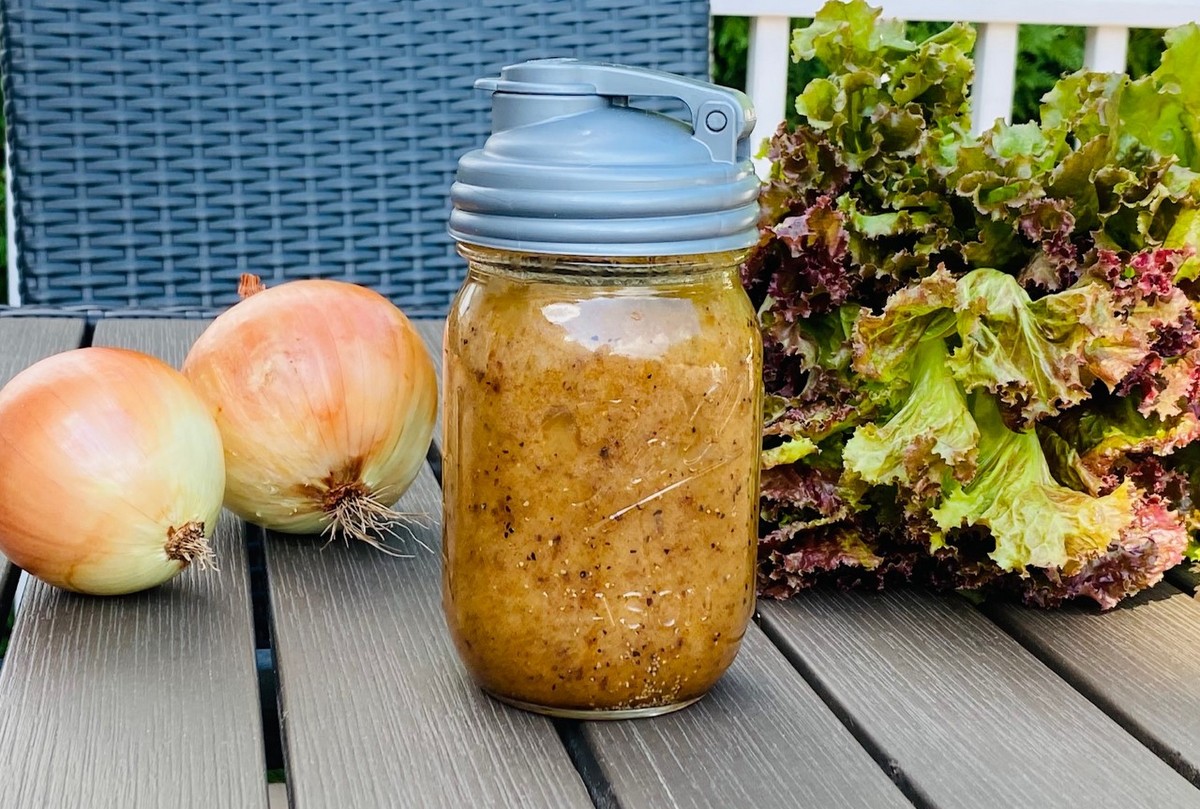
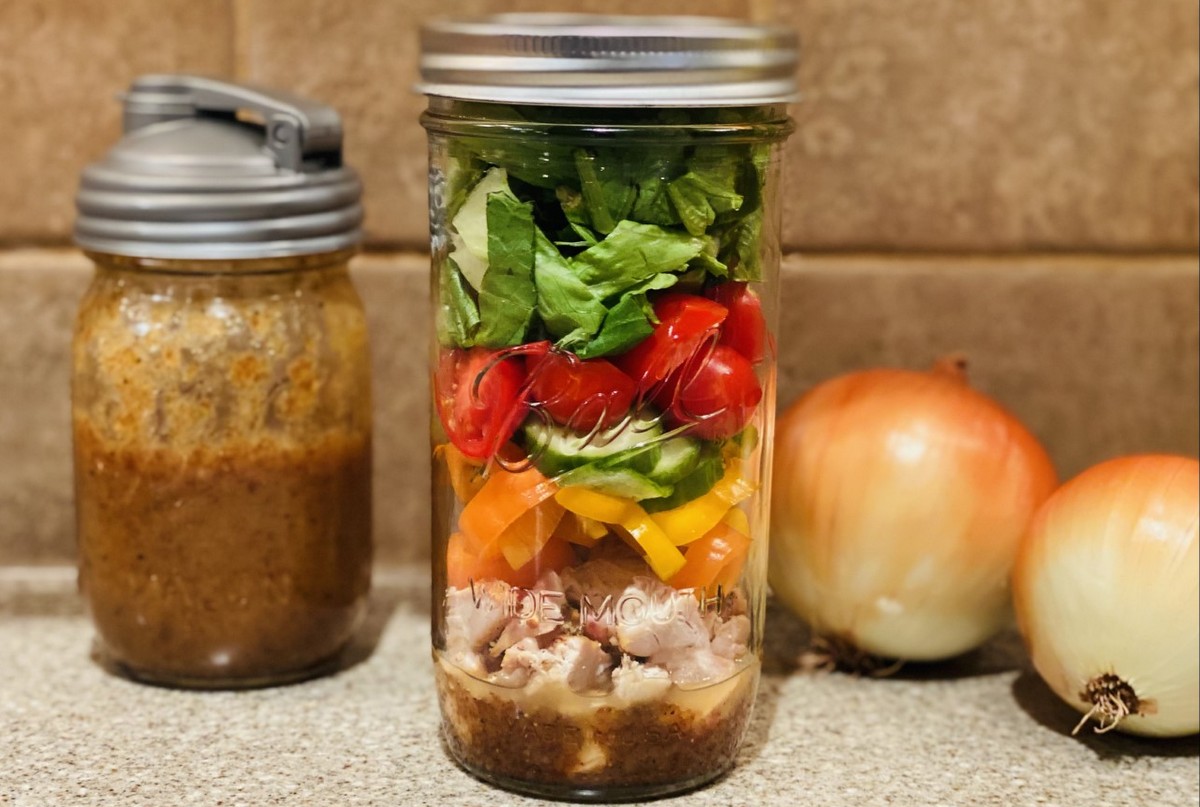
It’s been a great season for Blooming Glen Farm onions, and as a result we’ve been receiving them steadily in our shares for a few weeks now.  The star of this recipe is sweet onions. Caramelizing the onions enhances their flavor and adds a wonderful component to this salad dressing. As many of us fall back into a school lunch routine, playing around with different salad dressings can keep salads fun and fresh. Check out the farm’s “Salad in a Jar” Recipe Formula PDF. Don’t limit this dressing to salads though- it’s also great on burgers, wraps or grilled veggies.

Caramelized Sweet Onion Dressing

Ingredients:
Caramelized Onions-
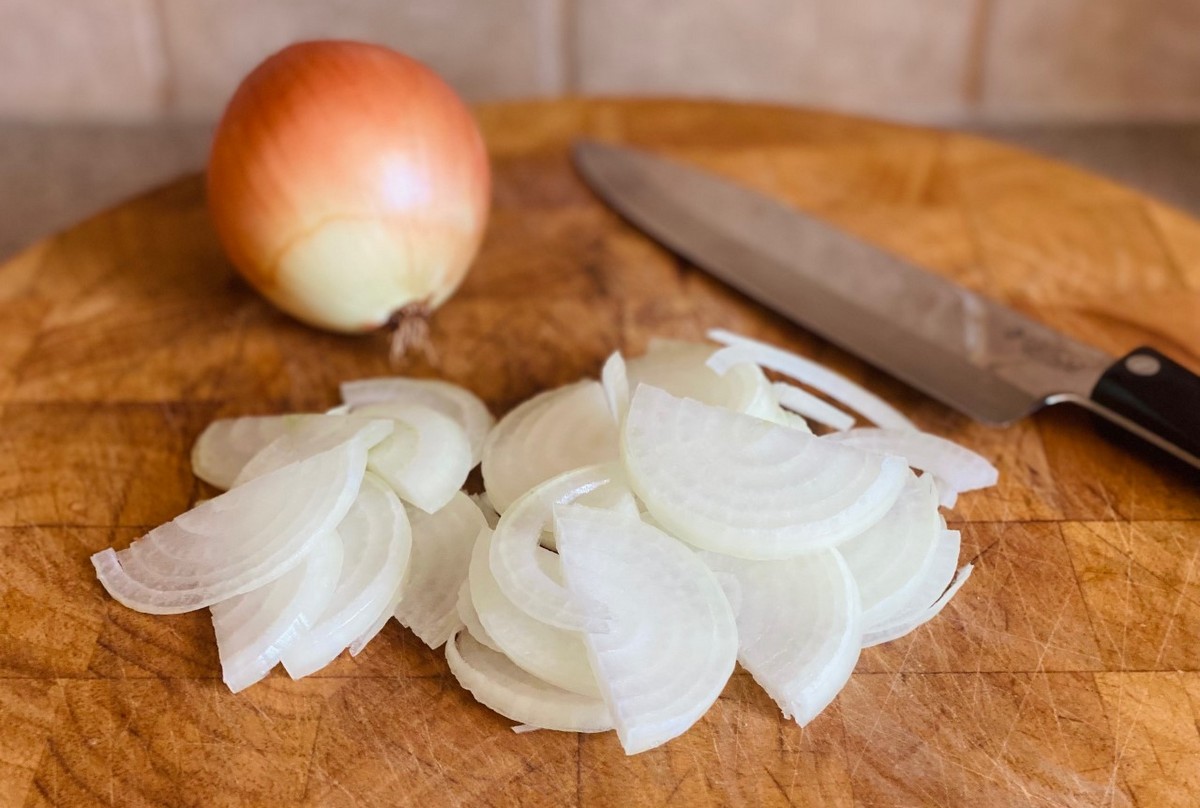
2 sweet onions, thinly sliced
2 Tbsp avocado oil

Dressing-
1 ¼ cups avocado or olive oil
2/3 cup vinegar (white wine, apple cider, or white)
¼ cup water
1 tsp sea salt
½ tsp black pepper

  • Heat 2 Tbsp oil in pan on stovetop.
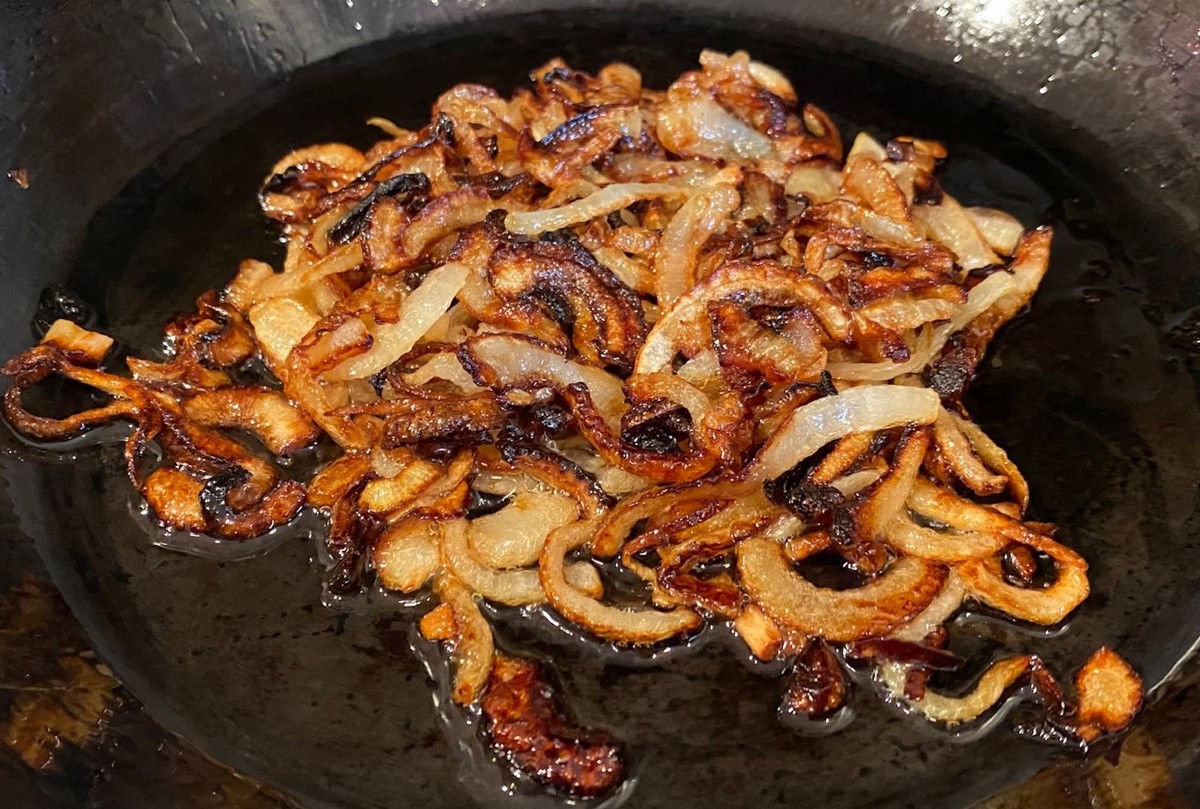
  • Add onions and stir. Cook for 15-20 minutes on medium to low heat.  Stir occasionally to evenly caramelize the onions.
  • Onions should be nice and golden when done.

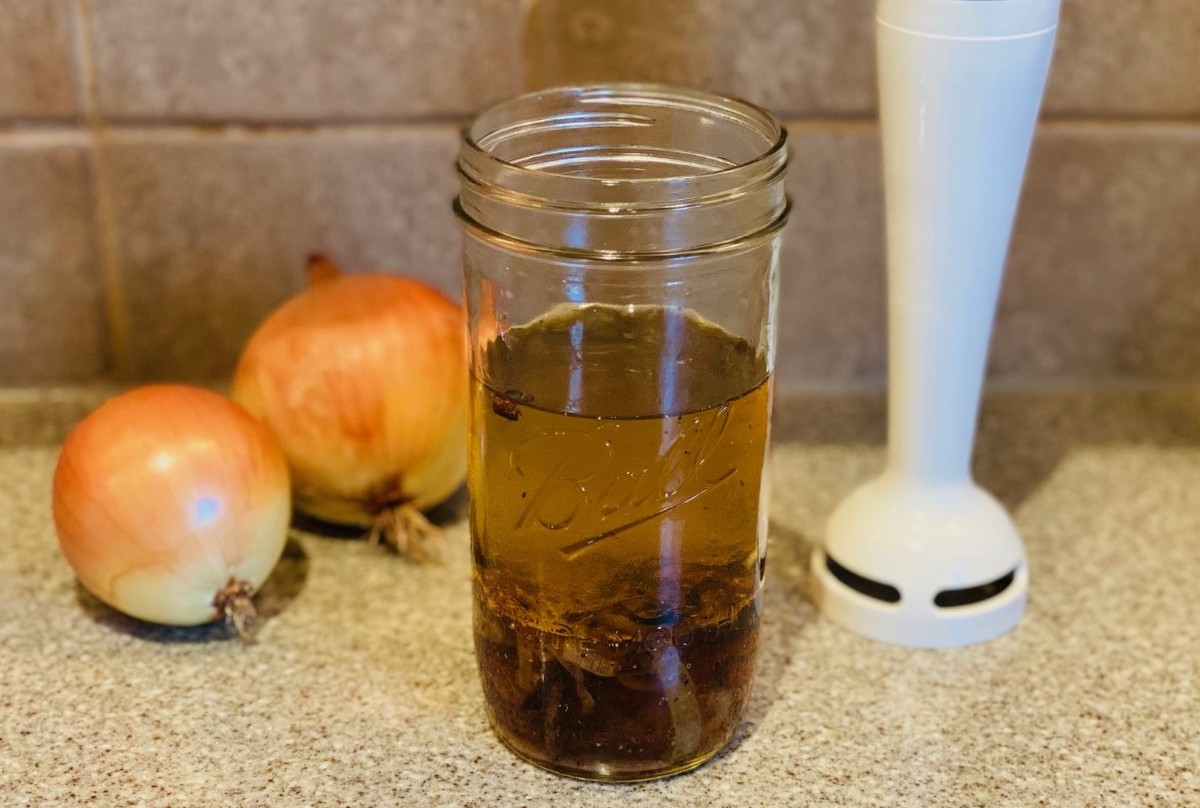
  • Combine caramelized onions and dressing ingredients in large mason jar.
  • Using immersion blender, blend the dressing.

  • Enjoy on salad, burgers, etc.
  • Store in the refrigerator.

*Works well as the dressing for “Salad in a Jar”, a fun portable lunch option (click for the PDF Recipe Formula).

Recipe and photos by Stephanie Borzio.  Stephanie is a mom of three active boys and is an autoimmune warrior.  After battling her own health for several years, Stephanie found healing through food and lifestyle changes, including joining Blooming Glen Farm CSA of which she is a long time member.  She is a Board Certified Integrative Nutrition Health Coach who is passionate about sharing healthy living tips and real food recipes.  Instagram and Facebook: Tru You Essentials; Website: www.truyouessentials.com
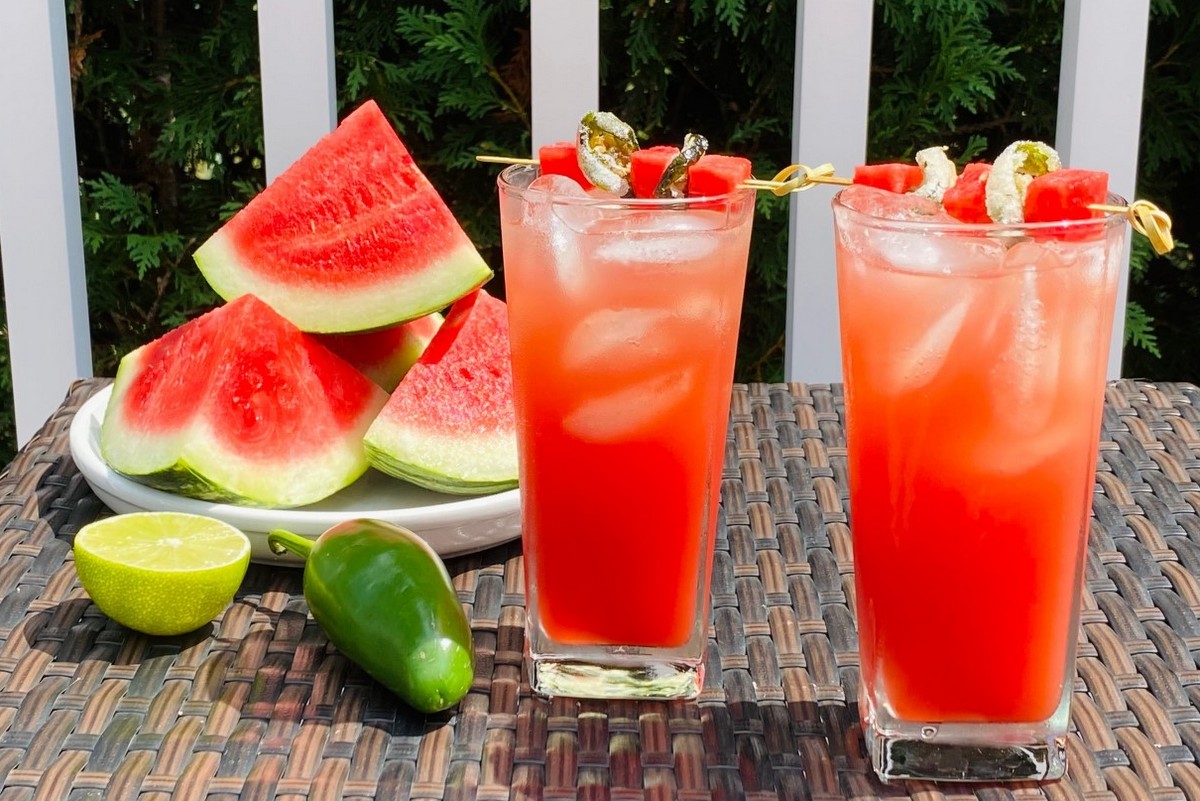
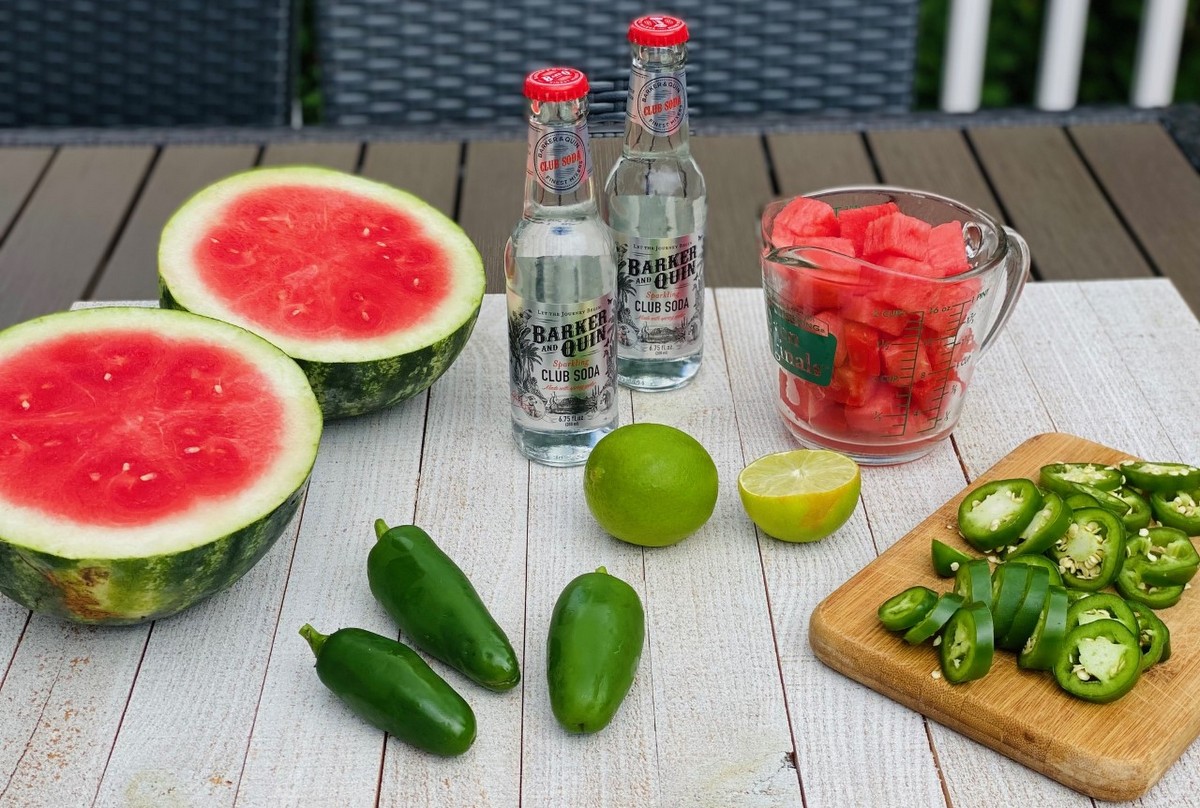
I have been dreaming of this recipe for a while and am so excited to finally be able to share it with you.  The sweet, juicy watermelon is combined with spicy jalapenos to create a perfect summertime punch!  It is a refreshing drink with a kick.  It can be made as is or spiked with your favorite alcohol.

Watermelon Punch

Ingredients:
4 cups watermelon cubes, seeds removed
8 Tbsp jalapeno simple syrup (recipe below)
4 Tbsp lime juice
1 cup club soda
Ice
Small watermelon cubes, for garnish
Candied jalapenos (recipe below), for garnish

  • Place watermelon cubes in blender. Blend until a juice is formed.
  • Strain to remove pulp. You should get about 2-2 ½ cups of juice when done.
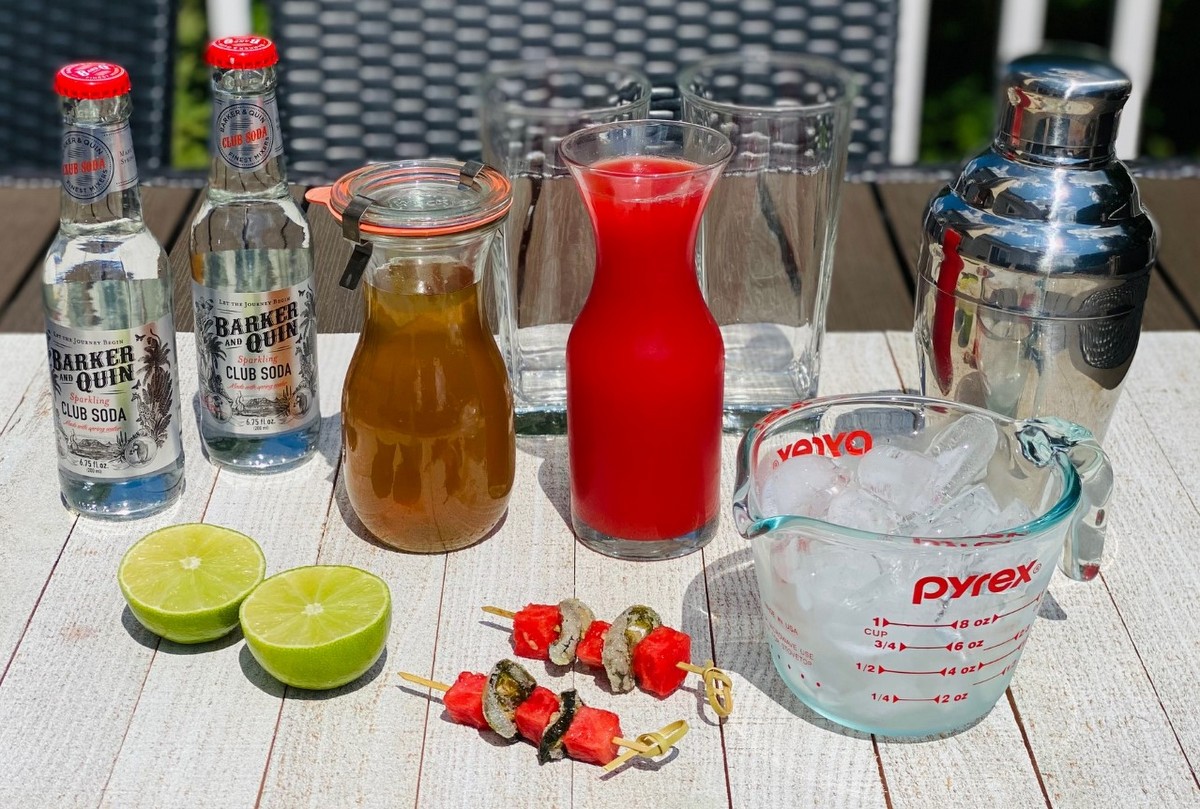
  • Combine watermelon juice with lime juice and jalapeno simple syrup. Gently stir in club soda and serve over ice.  This makes about 4 large glasses.  Garnish with watermelon cubes and candied jalapenos.
  • To make one drink, combine ½ cup watermelon juice, 2 Tbsp jalapeno simple syrup, 1 Tbsp lime juice, and ¼ cup club soda.

**Feel free to spike this punch with your favorite alcohol!

Jalapeno Simple Syrup-
1 cup water
1 cup sugar*
3 jalapeno peppers

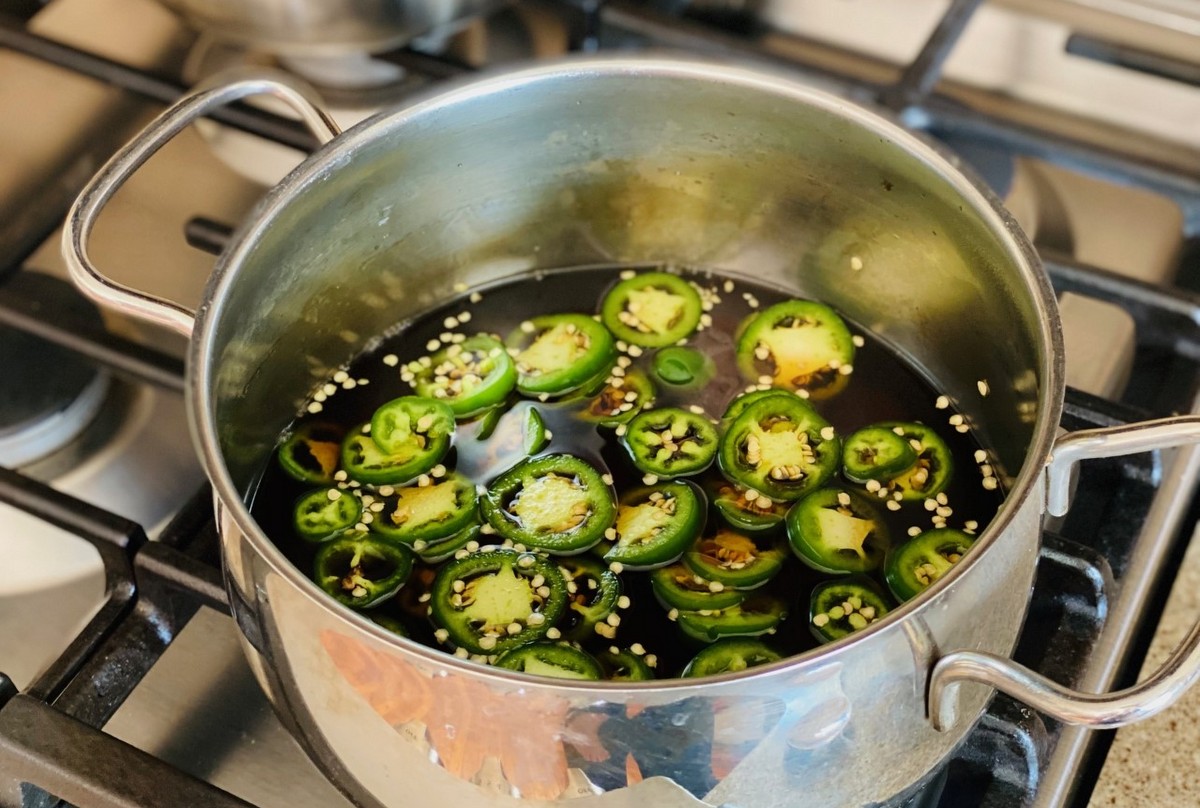
  • Slice jalapenos into circles about 1/8-1/4 inch thick.
  • Place water in small pot on stovetop. Bring to a boil.
  • Add sugar and sliced jalapenos. Return to a boil and then reduce to a simmer.

  • Simmer for 10 minutes.
  • Remove from heat and let sit for 1 hour.
  • Strain and store in glass jar in the refrigerator. Save jalapeno slices for candied jalapenos (recipe below).

*You can use any kind of sugar you prefer.  White sugar, raw sugar, coconut sugar, maple sugar, etc.  If you use stevia or a sugar replacement, you may need to adjust the quantity.  Refer to package instructions for sugar conversions.

Candied Jalapenos-
Leftover jalapenos from simple syrup
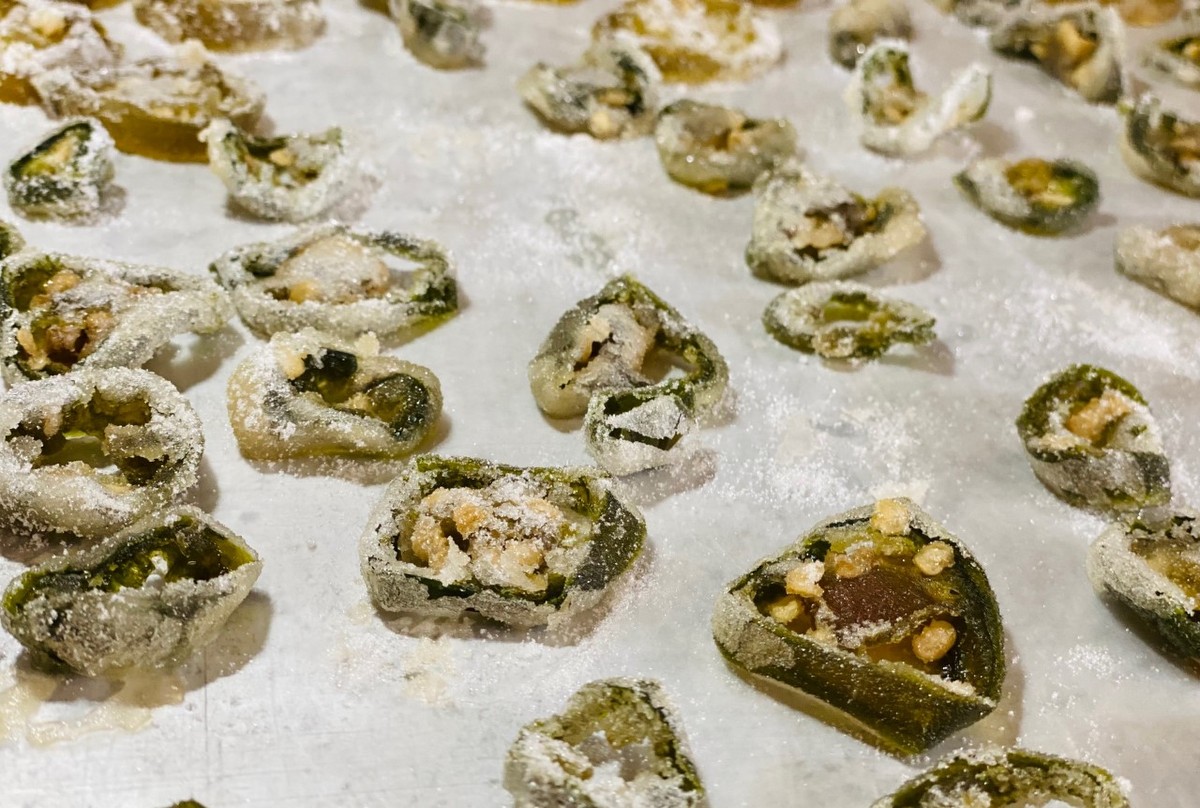
4 Tbsp superfine sugar (you can take regular sugar and grind it up even more in a coffee grinder)

  • Line baking sheet with wax paper.
  • Place sugar in a small bowl.
  • Take one jalapeno at a time and place in bowl. Coat with sugar and then place on baking sheet.
  • Continue to do this until all jalapenos are coated.

  • Allow to dry for a few hours.
  • Use for garnish or as a snack!

Recipe and photos by Stephanie Borzio.  Stephanie is a mom of three active boys and is an autoimmune warrior.  After battling her own health for several years, Stephanie found healing through food and lifestyle changes, including joining Blooming Glen Farm CSA of which she is a long time member.  She is a Board Certified Integrative Nutrition Health Coach who is passionate about sharing healthy living tips and real food recipes.  Instagram and Facebook: Tru You Essentials; Website: www.truyouessentials.com
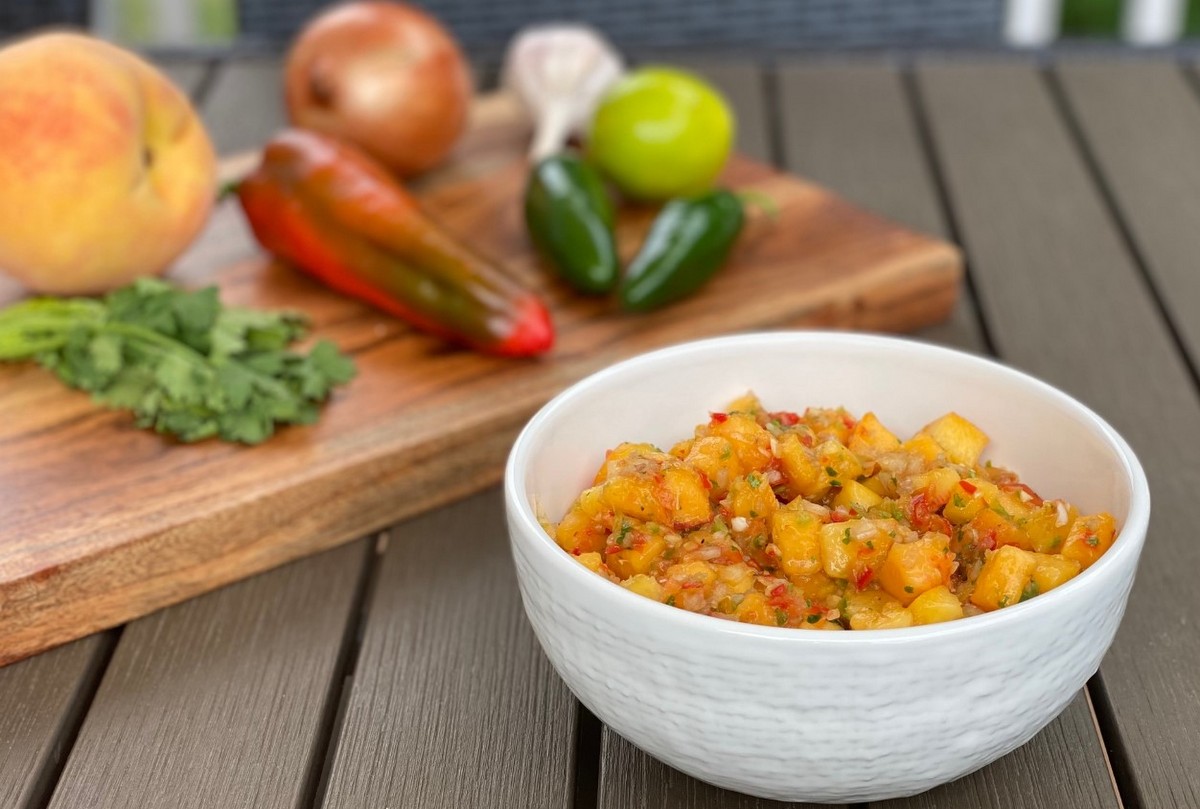
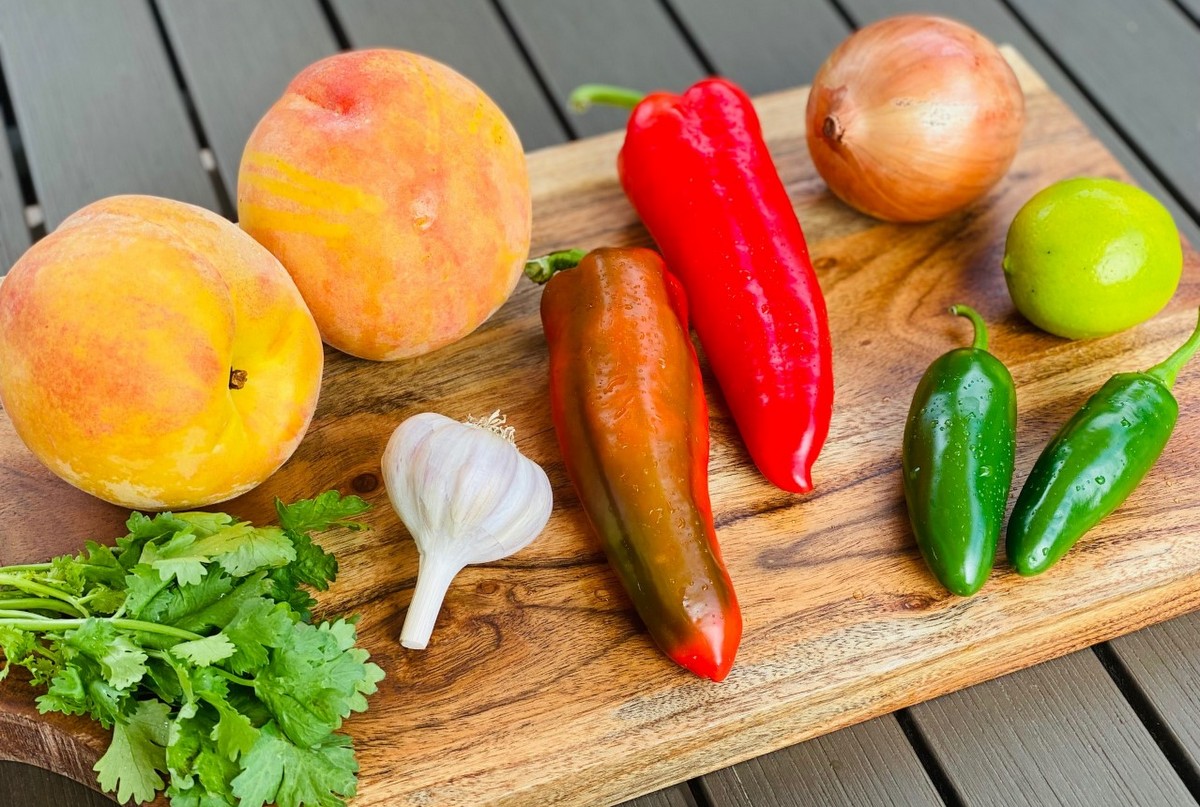
This recipe is inspired by a salsa my son and I enjoyed this summer.  We were determined to recreate it.  The beautiful, big peaches in the fruit share from North Star Orchard are the stars in this recipe.  But the jalapenos, sweet peppers, sweet onions, garlic and cilantro from the farm enhance the flavor and combine to make a delicious, summer treat.
Peach Salsa

Ingredients:
1-2 jalapeno peppers (stem, seeds, and membranes removed)*
3 cloves garlic
½ sweet onion, roughly chopped
1 sweet pepper (stem, seeds, and membranes removed)
2 Tbsp fresh cilantro
4 cups peaches, diced (skin can be kept on)
½ lime
1 ½ tsp sea salt
¼ tsp black pepper
1 Tbsp white vinegar

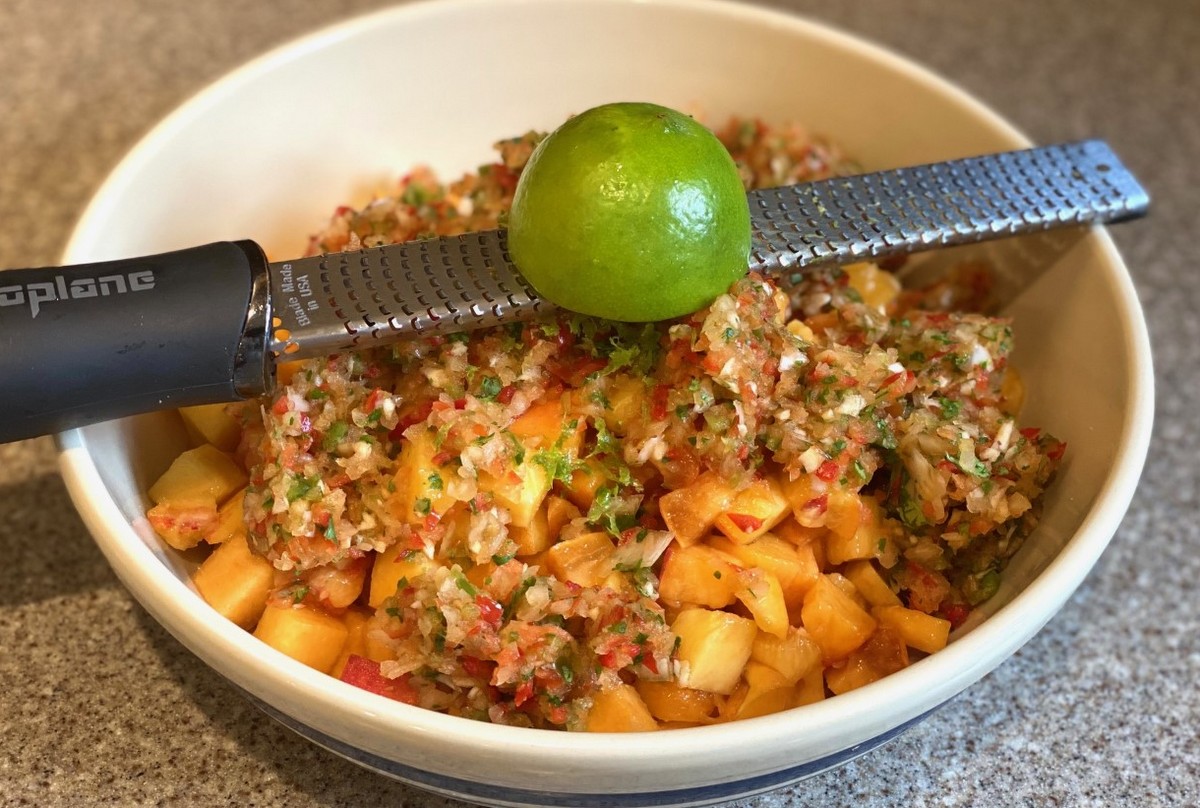
  • Place jalapeno, garlic, onion, sweet pepper, and cilantro in food processor. Pulse a few times and then scrape the sides.  Pulse again until well chopped and then place in a large bowl.
  • Add diced peaches to the bowl.**
  • Zest and juice the lime into the bowl.

  • Add salt, pepper, and vinegar to the bowl. Mix well.
  • Refrigerate for at least 15 minutes before serving.
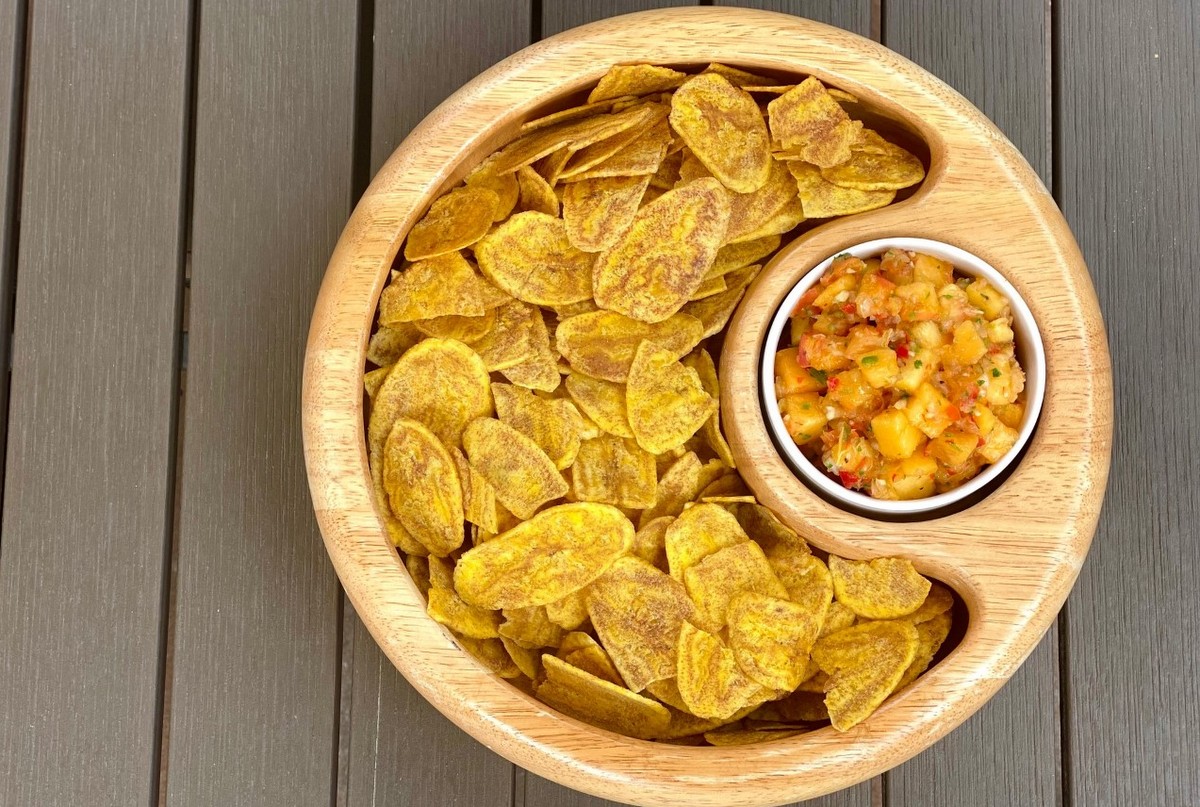
  • Can be served with chips or as a topping for a grilled protein. This salsa pairs really well with fish and pork.

*Use just one jalapeno if you want a mild salsa.  Go with two if you would like a spicier version.  For more spice, leave the seeds and membranes on! Or try a different hot pepper variety of your preference.

**You can also grill the peaches first for a sweeter roasted flavor! Just halve and brush with a little oil. Peach salsa is also delicious made with peaches and tomatoes. Experiment and see what you like!


Recipe and photos by Stephanie Borzio.  Stephanie is a mom of three active boys and is an autoimmune warrior.  After battling her own health for several years, Stephanie found healing through food and lifestyle changes, including joining Blooming Glen Farm CSA of which she is a long time member.  She is a Board Certified Integrative Nutrition Health Coach who is passionate about sharing healthy living tips and real food recipes.  Instagram and Facebook: Tru You Essentials; Website: www.truyouessentials.com