Recipes

OLYMPUS DIGITAL CAMERAOne of the most common barriers to health eating that I hear is time. Between family & friends, work & school, hobbies & activities, there just never seems to be enough time, does there?

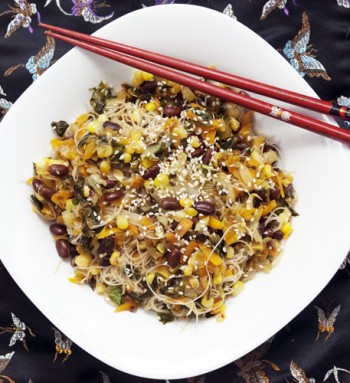
There are two tricks that I always recommend — and use myself: 1) A little meal planning & food prep each week, and 2) A repertoire of quick, simple, & adaptable recipes.  The Summer Veggie Noodle Bowl here serves double duty, playing a part in both of those tricks!  Prepare a big batch at the beginning of the week & reheat for lunches or dinners throughout the week, & when the seasons (or contents of your pantry) change, simply adapt the ingredients to what’s available.  Bonus: this dish taste great both hot & cold.

Summer Veggie Noodle Bowl

OLYMPUS DIGITAL CAMERA

Sauce
2/3 cup rice vinegar
1/2 cup tamari or liquid aminos
2 TBS sesame oil
3 TBS agave (or other sweetener)
6 gloves garlic, minced
1/2+ tsp crushed red pepper

Noodle bowl
1 package (~10 oz) brown rice vermicelli*
1 tsp sesame oil
1 cup onion, chopped
2 cups zucchini &/or summer squash, shredded or julienned
2 cups carrots, shredded or julienned
kernels from 2 ears of corn
1 head escarole, chopped
1 can (~1-3/4 cups) black soy beans**
Sesame seeds for garnish
* Or 1 package (~9 oz) whole grain soba noodles or 1 package (~8 oz) whole wheat angel hair pasta.  Or, change it to a whole grain bowl & use any whole grain (brown rice, quinoa, bulgur, etc.)
** Or shelled edamame, chickpeas, adzuki, other bean, or any other protein of your choice.

Directions
In a small bowl, whisk together the sauce ingredients until combined & then set aside.

Prepare noodles per package instructions, drain & stir in a small splash of sesame oil to prevent sticking.

Heat oil in a large skillet over medium-high heat. Sauté onions for 3-4 minutes, until translucent. Add zucchini, carrots, corn, escarole, & 1/3* of the sauce & sauté for 5-7 minutes, until heated through. Stir in beans & sauté another 5 minutes, until beans are heated & escarole is cooked down. Stir in noodles & 1/3* of the sauce. Cook for 2-3 minutes, stirring often, until everything is heated through. Garnish with sesame seeds & serve immediately.

* If you’re making a batch that will be reheated, reserve 1/3 of the sauce for reheating.  Otherwise, use 1/2 the sauce while cooking the veggies & 1/2 the sauce when stirring in the noodles.

gfg_head shot mPost and photos by Mikaela D. Martin: Blooming Glen CSA member since 2005, board-certified health counselor, and co-founder of Guidance for Growing, an integrative wellness practice in Souderton. Read more about healthy eating and living on her site, http://guidanceforgrowing.com!

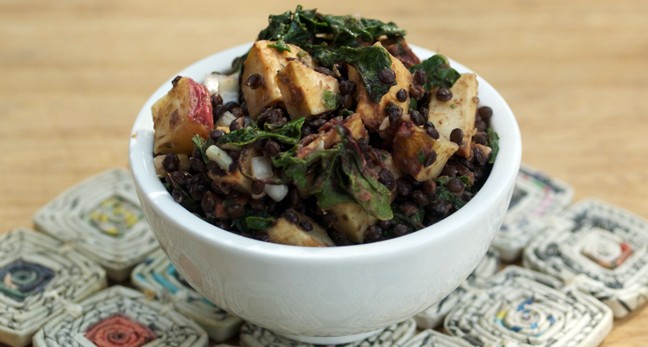
bg_blog lentil potato chard salad 2This versatile summer salad is not only packed with flavor & nutrition, but also uses several recent share ingredients.  We’ve talked about the healthy stuff in potatoes & Swiss chard here before; combining them with lentils, a good source of both plant-based protein & iron, allows this salad to stand in as a hearty side or a main dish.  Roasting the potatoes & chard brings a smokey flavor & unique texture that contrasts perfectly with the raw ingredients. Note: this is a good time to roast some other veggies (beets & kohlrabi, fennel, peppers, eggplant, turnips, etc.) while you have the oven on!

Try serving this salad on top a bed of chopped spring greens, with a side of grilled string beans & your favorite protein, or topped with a fried farm-fresh egg.

Roasted Potato & Chard Salad with Lentils
bg_blog lentil potato chard saladIngredients
1 cup black, green or brown lentils (black pictured)
6 potatoes (~1-1/2 lb), cut into cubes
3+ cups Swiss chard, roughly chopped
Salt & pepper
Grapeseed or other high-heat cooking oil
3 spring onion bulbs (~1/3 cup), finely diced
1 fennel bulb (~1/3 cup), finely diced — or try celery
1-2 clove green (or other) garlic, minced
3 TBS lemon juice
2 TBS Dijon mustard
1 TBS olive oil
1/2 cup fresh herbs, finely chopped (optional)

Method
Preheat oven to 400-degrees.

In a medium pan, bring lentils, water, and ~1/2 teaspoon salt to boil. Simmer the lentils until tender, ~20 minutes. Drain and put aside

Meanwhile, toss potatoes with a little grapeseed oil & a sprinkle of salt & pepper, then place on a single layer on a cookie sheet. Roast until tender & lightly browned, ~20 minutes. Repeat with Swiss chard, roast until wilted & drying, but not crispy, ~10 mins.

In a large bowl, combine the onion, fennel or celery, garlic & lemon juice, then allow to sit for a few minutes. Whisk in mustard & olive oil. Season to taste with salt & pepper.

Add lentils, potatoes & herbs to the bowl & toss to combine. Serve warm or chill until ready to serve.

gfg_head shot mPost and photos by Mikaela D. Martin: Blooming Glen CSA member since 2005, board-certified health counselor, and co-founder of Guidance for Growing, an integrative wellness practice in Souderton. Read more about healthy eating and living on her site, http://guidanceforgrowing.com!

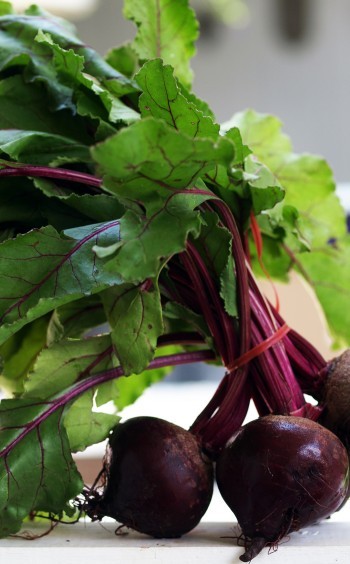
BeetsBeets are a staple veggie at the farm, making an appearance both at the beginning & end of the season each year. Like many root vegetables, beets have lots of vitamins & minerals, including those that help grow red blood cells (folate) & those that that help build sturdy & strong bones (manganese). Also like many root vegetables, much of the nutrition in beets lives in or near the skin, so skip the peeler & simply scrub them clean before eating.

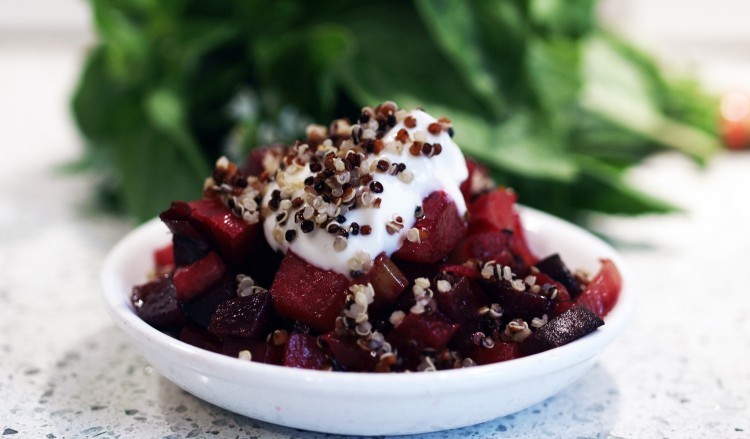
Enjoy beets raw & cooked: Use slices of raw beets in a veggie dip or hummus, or dice them up small & add them to a green, grain or pasta salad. Use a grater to shred raw beets for slaws or to use in breads, muffins & even cookies! Of course, the sweetest way to eat beets is by roasting them. The simple recipe below combines beets with another CSA staple, kohlrabi. You can serve this dish as is, or use it as a base for a more hearty meal:

  • Serve chilled & topped with cooked quinoa & plain yogurt (pictured below)
  • Mix in chickpeas or black soy beans
  • Use as a pita filling with hummus
  • Top with plain yogurt or sour cream & minced chives
  • Serve on top of a chopped green salad
  • Combine with a cooked whole grain (brown rice, bulgur, farro, etc.)
  • Top with sunflower or sesame seeds

Roasted Beets & Kohlrabi with Fennel
BeetsIngredients
8 beets
8 kohlrabi
3 fennel
1-1/2 tablespoons grapeseed or other high-heat cooking oil
salt & pepper

Method

Preheat oven to 400-degrees. Trim tops off beets, scrub clean & dice. Trim, peel & dice kohlrabi. Slice fennel bulbs & stems, up to fronds. Toss beets, kohlrabi & fennel with a bit of grapeseed oil, salt & pepper.

Place vegetables in a baking dish, cover & bake for 25 minutes. Sprinkle with a little more salt & pepper, stir, recover & return to the oven. Bake until just tender, about 20 more minutes.

gfg_head shot mPost and photos by Mikaela D. Martin: Blooming Glen CSA member since 2005, board-certified health counselor, and co-founder of Guidance for Growing, an integrative wellness practice in Souderton. Read more about healthy eating and living on her site, http://guidanceforgrowing.com!

We are thrilled to introduce you to plant based nutrition educator Kris Keating. Kris has joined us at Blooming Glen on Tuesday and Thursdays to prepare lunch for our hungry farm crew. It’s no small task to feed 14 field weary farmers- I advised her to approach it like she was feeding a team of athletes. And what wonderful meals we have enjoyed so far! Kris, founder of the Soleil Kitchen, is a chef with a focus on fresh organic whole foods. Kris is excited to be a part of Blooming Glen Farm and to continue her mission of putting healthy plant based cuisine ideas within reach of the local community. She will be sharing some of her wonderful recipes (and stunning photos) with you through this blog and hopefully doing some demos and tastings during CSA pick-ups as well.

Kohlrabi and Radish Salad

image1

Ingredients, Serves 2 entree or 4 appetizer
1 head green leaf lettuce, chopped
1 medium kohlrabi, julienned (or 2 small)
2 carrots, julienned
4 radish, sliced finely
2 tbs dried cranberries
A few fresh dill sprigs

Toss all ingredients together in large bowl except radish, cranberries, and dill. Divide evenly among two/four plates and garnish with sliced radish, cranberries, and fresh dill sprigs. Pair this with the creamy lemon-garlic dressing and you have a colorful and delicious salad with a unique blend of farm-fresh flavors and textures.

Note: An easy and quick way to julienne your vegetables at home is by using a handheld mandoline. Kyocera makes an inexpensive and good quality mandoline that can be purchased on Amazon.com for less than $25.

Creamy Lemon-Garlic Dressing

Ingredients, Makes about 4 servings
1 cup water
1/4 cup cashews
2 tbs tahini
2 tbs fresh lemon juice
2-3 dried dates
1 tsp apple cider vinegar
2 cloves garlic (or 1 tsp granules, or 1 stalk green garlic)
1/2 tsp sea salt
Pinch of tumeric (for color)

Blend until smooth using a high-speed blender. Store leftovers in a sealed glass container in the fridge for up to 5 days.

Note: If you do not have a high-speed blender, you can soften the dates and cashews by soaking them in 1 cup of water overnight. You can then prepare your dressing in the morning using a standard blender.

Photo and recipe by Kris Keating, plant based nutrition educator, detoxification specialist and raw food chef and instructor.

As a certified Raw Food Chef and Instructor from Living Light Culinary Arts Institute in Fort Bragg, California, Kris incorporates a creative blending of culinary art and raw food nutrition into her meal preparations. She has a special knack for transforming simple whole foods into tasty dishes that are not only minimally prepared but beautifully presented as well. Kris enjoys creating recipes that inspire people to return to eating more fresh plant-based and embrace the valuable connection between cuisine and health. For consultations, classes and more, check out her website, Kris Keating Consulting or follow her on her Facebook page where she will also be posting her delicious recipes from the farm.

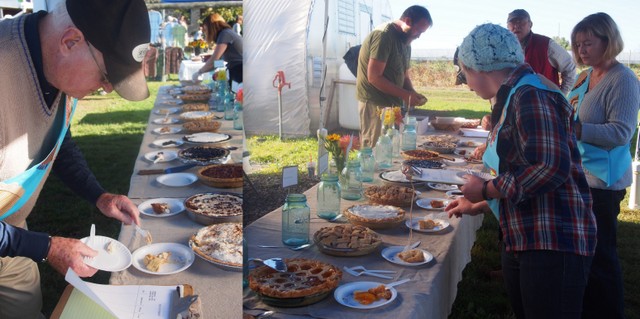
Blooming Glen Farm’s 5th annual pie bake-off contest dished up some real winners- namely the 100 plus people who got the chance to taste the 14 delicious pie entries. Whether your taste ran to classics like apple and blueberry, or standards with a twist like peach cranberry, honey bourbon pecan, or sweet potato with ginger whip cream, or you prefer fridge pies like chocolate mousse with salty peanut caramel or blueberry dream, or maybe you like to be adventurous with the more unusual banoffi pie or spicy mexican hot chocolate, there was something for everyone.
2014-10-102

Our judging panel went ahead of the eager crowds and evaluated the pies on taste, appearance, crust and texture and awarded their top three choices (actually top four, since they had a tie for third). Our first judge was Susan Kahn from Bucks County Cookie Co. Susan’s cookies and delectables are a Wrightstown farmers market favorite. Susan will be opening a brick and mortar bakery in just a few months in Doylestown behind Cross Keys Diner, so keep an eye out! New to the judge panel this year was Rosemary Vaerth, a graduate of the Art Institute of Philadelphia Baking and Pastry program, and a veteran of the gluten-free and vegan baking scene in southeastern PA. Lastly, Farmer Tom’s father, also Tom Murtha and affectionately referred to as Pop, came back to judge for a second year, contributing his expertise from over 80 years of pie eating enjoyment.
OLYMPUS DIGITAL CAMERA

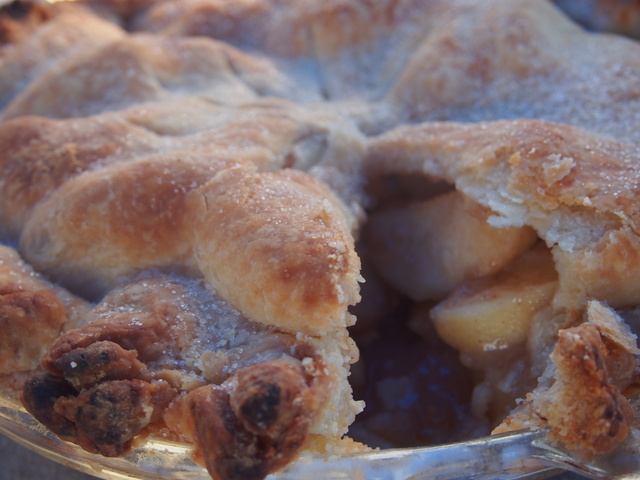
Apple Pie
by Angelina and Adrian Arias with the help of their dad, Angel Arias
Judges Vote: First Place

Angel Arias- “I was a professional chef for over 11 years, but never much of a baker. Usually my wife is the baker at home. I now just enjoy making culinary creations for my family and friends, but most of all for my kids! My daughter Angelina (7) and son Adrian (4) help their mother each week to pick up the vegetables at the farm. Angelina who is starting to have a passion for all things organic and farm related, was super excited about the Harvest Fest, and even more so that there was going to be a pie contest. She told her brother about it and they both asked me to help make a pie to enter -since their Mommy was out town for the weekend.

So we went to the local orchard to pick our apples and made 2 pies on Saturday. The kids were so serious about it –that when their friends came knocking on the door for them to play, they sent them away on their very own, and went right back to working on the pies-very dedicated little chefs –if I must say so myself!”
OLYMPUS DIGITAL CAMERA

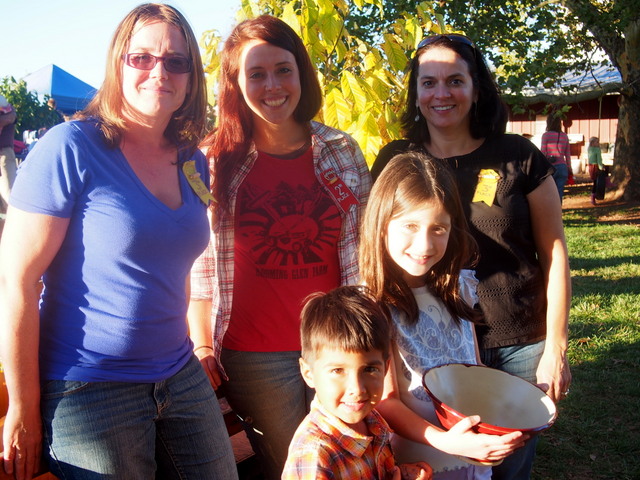
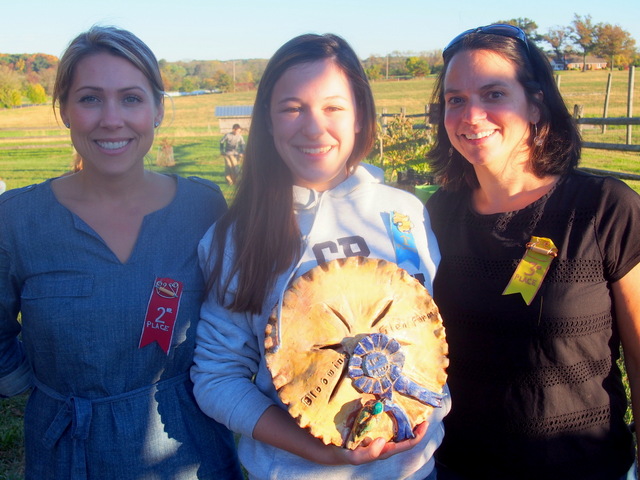
Judges Vote winners, Julie Thomas, Lexi Berko, Bernadette Rodrigo, and Adrian and Angelina Arias.

“When I asked them what their favorite part was when making the pie- ‘My favorite part was putting decorations on the top crust!’ said Angelina. ‘My favorite part was slicing the apples with the apple slicer!’ said Adrian.”

“I also asked them how they felt when they announced that they were the winners. ‘I feeled weird and fast because I was running!’  – Adrian. ‘I felt weird, excited, nervous, surprised and shy all at the same time. I felt wowed-out!’ -Angelina.”

Pie Crust Ingredients
3 cups all-purpose flour
1 ½ teaspoons salt
3 Tablespoons granulated sugar
1 cup Lard
1 egg
1 teaspoon white vinegar
5 tablespoons water

In large bowl combine flour, salt, and sugar- mix it well, add lard cutting it until mixture resembles cornmeal. In a small container mix egg, vinegar, and water. Add it to flour mixture, stirring it with a fork. Cut dough in half, make 2 balls and wrap them with plastic wrap. Keep in the refrigerator while making pie.

Pie Filling Ingredients
8 apples peeled and sliced (I used Empire apples)
½ c. granulated sugar
½ c. brown sugar
zest of 1 lemon chopped fine
juice of 1 lemon
¼ teaspoon nutmeg
¾ teaspoon cinnamon
½ c. coconut oil
3 tablespoons all-purpose flour
¼ c. water

In a large bowl combine apples, white and brown sugar, lemon zest and juice, nutmeg and cinnamon.

In a small sauce pan heat coconut oil at medium temperature- once oil is completely melted, whisk in flour to make a paste then add water, mix it well and add it to apple mixture.

Roll out one of the pie crusts put it on the pie dish. Add apple mixture. Roll out second crust cover pie.

Bake at 425 degrees for 15 minutes and then reduce temperature to 350 degrees and bake it for an additional 35 to 40 min.
 OLYMPUS DIGITAL CAMERA

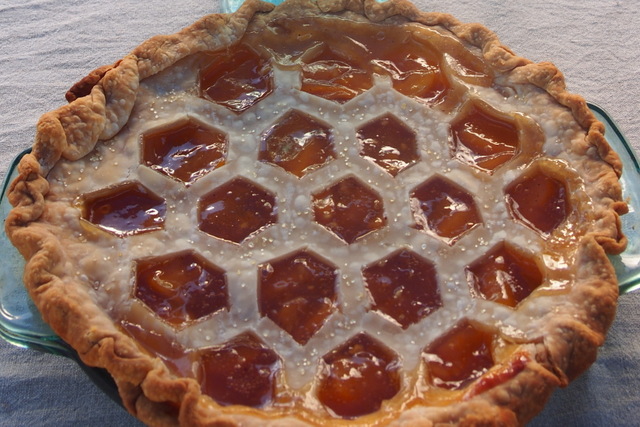
Honey Ginger Peach Pie
by Lexi Berko
Judges Vote: Second Place

Lexi Berko- “I chose to bake this particular pie with ingredients that were very local, both the ginger and honey coming directly from Blooming Glen Farm. My partner and I are the resident beekeepers at BGF and with a surplus of both ginger and honey, I thought they would make a perfect pie pair. This pie was a hit among the yellow jackets and judges buzzing about the pie tasting table and it made me very thankful for the endless labor put forth by our honeybees! (And they inspired my beecomb design of the top crust.)”

Pie Filling Ingredients
5 large, ripe peaches or 7 medium (or 5 to 6 cups of frozen sliced peaches)
1 cup wildflower honey
3 tablespoons peeled and finely chopped fresh ginger 
juice of half a lemon (about one tablespoon)
big pinch of powdered ginger
pinch of nutmeg
pinch of cayenne pepper
pinch of salt
Frozen Pillsbury pie crust

Combine honey and fresh chopped ginger in a small saucepan and heat on low for 20 minutes. While the honey is warming up, pit, peel, and slice the peaches so they’re about 1/4 inch thick. Put the slices in a large bowl and squeeze the lemon over them. Add the powdered ginger, nutmeg, cayenne pepper, and salt. Pour the heated honey and fresh ginger over all. Mix gently until the honey and spices are evenly distributed, then taste and adjust sweet, spice, and lemon as needed.

Roll out the top crust. Retrieve the bottom crust from the refrigerator. Pour the filling into your bottom crust. If there is too much liquid to fit in the pan with the peaches, fill the pan not quite to the rim with juice and set the rest of it aside. Smooth the filling into a mound with your hands. Place the top crust over the filling. Trim off any excess dough and fold an upstanding ridge. Cut large steam vents. Bake on 425 degrees for 10 to 15 minutes until the crust is blistered and blond. Rotate the pie 180 degrees to assure even baking, then lower the temperature to 375 degrees and bake for another 50 to 60 minutes until the crust is golden and the juices start to bubble slowly at the edge — possibly longer if you’ve used frozen fruit. Cool on a wire rack for at least an hour before serving.

2014-10-101

Lemon Blueberry Meringue
by Bernadette Rodrigo (last year’s grand champ in both categories for her Cherry Pistachio Pie and 2012 second place winner with her Almond Pear Pie with a Raspberry Glaze)
Judges Vote: Third place, tie
People’s Choice: Third place

Bernadette Rodrigo- “This pie was inspired by our recent trip to Maine. Lemon seemed like a natural complement to the sweetness of the berries and the meringue adds the wow factor.”

Pie Crust Ingredients (makes 2)
2 ½ cups flour
1/3 cup sugar
½ pound butter cubed (2 sticks)
3 egg yolks
¼ cup ice cold water

Mix flour and sugar in a large bowl. Cut in butter to resemble coarse meal (pea size pieces). In a small bowl beat egg yolks and add water. Add wet ingredients to dry ingredients and stir with a fork until evenly distributed. Dough will be crumbly. Turn out onto counter and press the dough to form a ball, then divide in 2 and form 2 discs. Wrap each disc in plastic wrap and refrigerate.

Pie Filling Ingredients
3 cups of blueberries (wild Maine berries, available frozen in markets)
¼ cup flour
½ cup sugar
1 tablespoon butter

Pre-heat oven to 400 degrees. Mix first 3 ingredients in a bowl then spread evenly in raw pie shell. Break the butter into small pieces and sprinkle over berries.

Roll out one pie crust and prepare pie pan. Bake until fruit bubbles in the middle, about 45 minutes.

While pie bakes mix one 15 ounce can of condensed milk with ½ cup fresh squeezed lemon juice. Reserve in refrigerator.

Meringue Ingredients
5 egg whites
½ teaspoon vanilla
¼ teaspoon cream of tartar
3 tablespoons sugar
pinch of salt

Beat eggs until frothy. Add next two ingredients. Continue to beat adding sugar a little at a time. Stop when stiff peaks form.

When pie is baked and cool, spread reserved lemon mixture over the top. Cover entire pie with meringue and bake at 375 degrees about 10 minutes or until browned. Best served cold.
OLYMPUS DIGITAL CAMERA

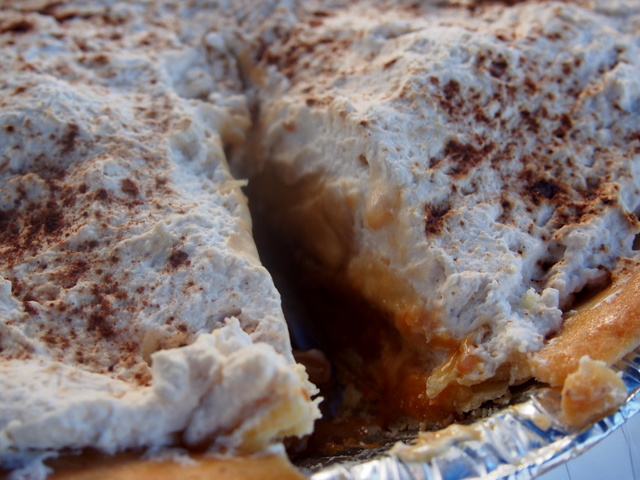
Banoffi Pie
by Julia Thomas
Judges Vote: Third Place, tie

Julia Thomas- “I love baking at home, particularly in my big red Aga stove that stays on all the time in the winter…typical British farmhouse! I’m a bit of a freestyler when it comes to cooking and I love it when I pull ingredients together from my fridge/ freezer and cupboards to create something new and exciting. That’s why I love Blooming Glen farm so much… you never know what you will get and what will inspire you.

However, one recipe I always follow exactly is Banoffi pie! It  is hugely popular in the UK, but often varies on its base and the ingredients. I was lucky enough to learn this recipe over 25 years ago from the original creator, as I worked with him at the Hungry Monk restaurant and this version is by far my favorite.”

Sweet Shortcrust Pastry Ingredients
(
Bakers Note: my recipe below makes enough for 2. You can leave out sugar for regular pastry and add more flour + a tablespoon of iced water)
350g plain flour
120g powdered sugar
250g butter
1 tablespoon crisco
Pinch of salt
1 egg
Egg white for glazing

In food processor whizz together flour, salt and sugar for a few seconds and then add in the butter and crisco in small pieces. Crack in the 1 whole egg and pulse till it makes a ball. Wrap in plastic and put in freezer to rest for about 20 mins or in the fridge for about 45mins. Roll out on a floured surface and line your pie tins, trim off excess dough. Prick with a fork on bottom of pastry case to make air hole. Chill in fridge again for 10 mins. Line with parchment paper and dried beans or ceramic baking beans  to weigh it down and cook at 350F for about 20 mins. Remove parchment paper and brush pastry with egg white. This seals it and stops you getting soggy pie. Return to oven for 5 mins.  

Pie Filling Ingredients
1 tin condensed milk – previously boiled for 3 hrs (covered in water unopened)  – you can do several tins at once and then keep in your pantry indefinitely. Be careful not to boil dry as they will explode and not to open the cans when hot either – you will get burned! This makes a delicious toffee filling, you can keep it as a standby and then make this dessert in a hurry or emergency.
5 Bananas
1 pint whipping cream
1 teaspoon instant coffee  – crush to powder
1 tablespoon powdered sugar
1/4  teaspoon cocoa powder

Whip the the cream with the instant coffee and powdered sugar until thick and smooth.

Spread the toffee over the base. (You can use the back of a spoon dipped in hot water to help spread it or warm the toffee a little first. Cool off once spread in fridge if necessary, so cream won’t melt.

Peel and then cut in half lengthwise the bananas and lay them on the toffee. 

Finally spoon and spread the cream over the top and sprinkle over the cocoa powder from about 14″ high so that it is a nice fine covering.

OLYMPUS DIGITAL CAMERA

Chocolate Caramel Pecan Pie
by Josie Gilmore
People’s Choice: First Place

Josie Gilmore: “I’m currently a junior at Council Rock High School North and my favorite subject is chemistry. I have never made a pie before, but I have taken some cooking/baking classes and worked at my mom’s cooking camps every summer since I was 9. I chose to make a chocolate caramel pecan pie because I really love pecan pie and wanted to incorporate some more delicious flavors into the recipe. I’m really excited to have won this contest and I can’t wait to try and defend my title next year!”

Prepare your favorite crust for a 9-in pie pan

Pie Filling Ingredients
2 large eggs
2/3 cups sugar
½ cup light corn syrup
4 teaspoons unsalted butter
¾ teaspoons vanilla extract
23 caramel squares
1 cup heavy whipping cream
1 tablespoon butter, unsalted
¼ cup semisweet chocolate chunks
1 cup pecans, chopped small
more pecan halves for decoration on top

Preheat oven to 350 degrees. Roll out pie dough onto a lightly floured surface to about 1/8 inch thick. Wrap dough around rolling pin and place onto center of pie pan (I used a disposable aluminum pan). Press dough up sides and trim extra dough around edges, flute edges.

In a large bowl, whisk eggs, sugar, corn syrup, 4 teaspoons melted butter, and vanilla, set aside. Sprinkle chocolate chunks evenly over bottom of tart shell.

Place caramels, cream and 1 tablespoon butter in a microwave safe bowl and heat until caramel is melted, stirring every 20 seconds. Stir chopped pecans into caramel. Pour caramel mixture over chocolate chunks, spread evenly. Pour egg mixture over caramel filling. Arrange pecans on top however you like.

Place pie on a rimmed baking sheet. Bake 45-60 minutes, until filling is set. If pecans begin to brown too quickly, place a tent of aluminum foil over top. Remove from oven and let cool before serving.

Baker’s Note: I used extra pie dough to cut out pumpkins and stars, baked them separately for 10 minutes and used for decoration.
OLYMPUS DIGITAL CAMERA

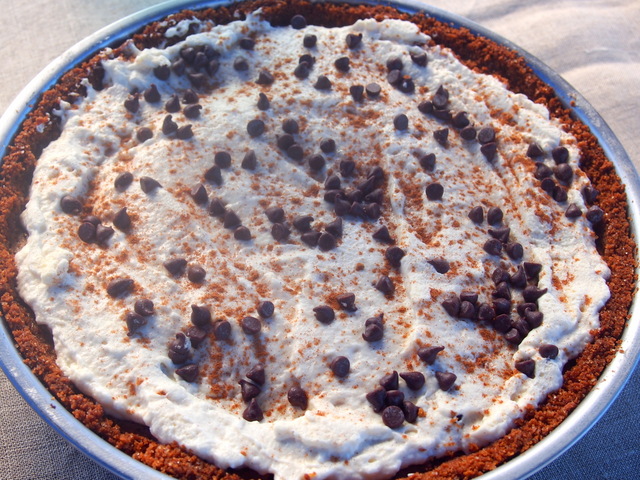
Mexican Hot Chocolate Pie
by Michelle Guerriero (2012 Pie Champ with her Maple Custard Pie with Candied Bacon, and 2011 second place winner with her Orange Marscapone Pumpkin Pie)
People’s Choice: Second Place

Michelle Guerriero- “I recently made some Mexican hot chocolate for my family, which I make by simmering milk with a dried chili pepper, then adding melted chocolate and cinnamon. It’s a lovely treat as the weather turns cool, and anything with cinnamon is a winner in my house. This is what inspired my Mexican Hot Chocolate Pie. My first attempt at the pie was a little spicy, so I had to make a mild version. When steeping the chili pepper, don’t overdo it! It can creep up quickly! Or you could omit the chili pepper altogether.”

Pie Crust Ingredients
12 graham crackers
5 tablespoons melted butter
1 tablespoon cinnamon
4 tablespoons sugar (optional)

In food processor, pulse all ingredients together until crumbly. Press into pie pan and bake for 12 minutes on 350. Remove and wait to fill with filling.

Pie Filling Ingredients (modified from recipe found on cooks.com)
1 stick (1/2 cup) softened butter
2 cups brown sugar
3 whole eggs
1 teaspoon Mexican vanilla (regular is just fine)
1/2 cup half & half
1 tablespoon cinnamon
1 small dried chili pepper 

Whipped Cream
1 cup heavy cream
1 teaspoon cinnamon
1/2 teaspoon Mexican vanilla

In a mixer with a whisk, combine softened butter, brown sugar, and cinnamon. Whisk until well combined and fluffy. Add eggs, one at a time, mixing approximately 1 min. between each egg. Mixture should be nice and fluffy. Stop until it is time to add next ingredients. 

In a small saucepan, combine half and half, vanilla, and dried chili pepper over medium-high heat. Bring mixture to a simmer (not boil!) and remove from heat. During the simmering is when you can play with the “heat” in your pie. You may only add the chili pepper for a quick minute, you may want to steep it longer. Taste the mixture until it is to your liking, then remove chili pepper. 

With the mixer going again, very slowly add the milk mixture to the bowl. Do not add too quickly or it will cook your eggs! 

Once combined, pour all ingredients into your pie crust and bake at 350 for 45-50 minutes, or until the middle of the pie jiggles a little, but the edges are firm. Remove and cool pie.

Make whipped cream if desired by whisking heavy cream, cinnamon and vanilla until soft peaks form. Add whipped cream, sprinkle of cinnamon and chocolate chips on top.
OLYMPUS DIGITAL CAMERA

tcheadshotPost and photos by Tricia Borneman, Blooming Glen farmer and co-owner. Tricia and her husband Tom have been growing together since 1996 and farming together since 2000. They started Blooming Glen Farm in 2006. Tricia is passionate about food, community, art and nature and the intersection of all four.


Autumn is my very favorite time of year. I am not a summer person and prefer shorter days and squash and beets over tomatoes, cucumbers and long hot days. I have been making soup every day for the past 10 years, so soup season means plenty of smooth no-brainer cooking. I love cooking from an effortless place of creativity. We will be featuring soups in the demos for the duration of the CSA season. 

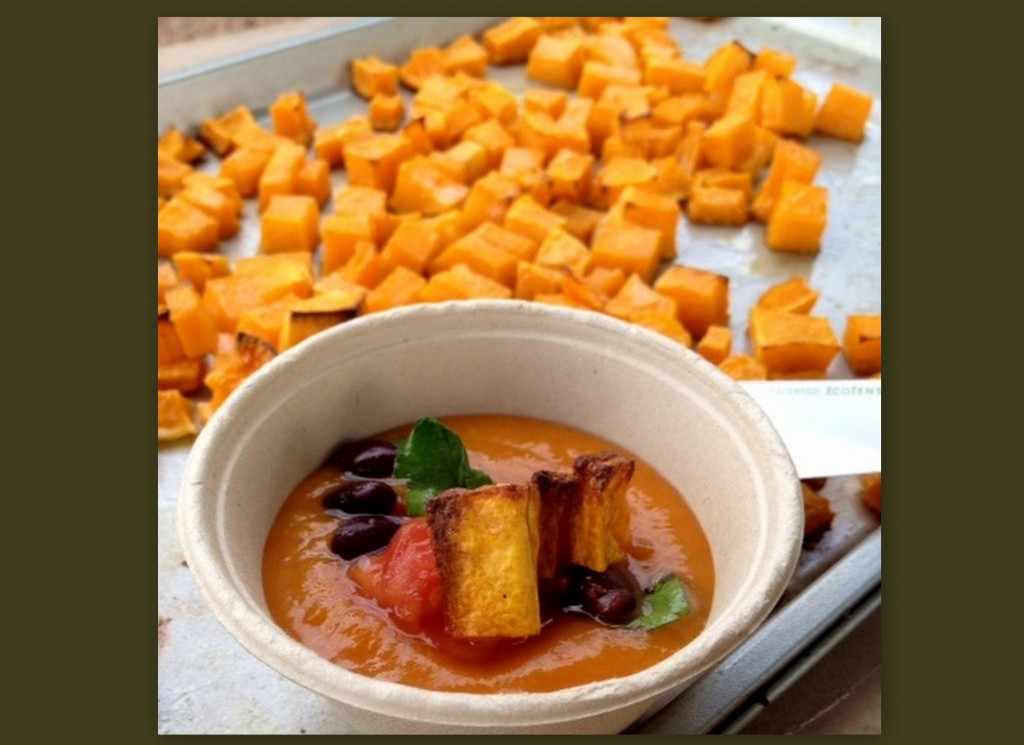
Last week’s demo recipe was a super easy soup and a great way to use up some of those tomatoes you may have hanging around. The recipe calls for tomato juice and chopped fresh tomatoes. Feel free to improvise with whatever tomato/ stock mix you have on hand. You can always add more water if the consistency is too thick. I served mine with black bean salsa and chunks of roasted squash, because I love black and orange together. I also think topping with fresh avocado, queso fresco, tortilla strips and cilantro would be awesome. I use either a immersion blender or Vitamix, the immersion blender being by far my favorite tool in the kitchen (sorry Vitamix). Thanks to everyone who visits me at my table. This has been an amazing experience of which I am so grateful!

Squash Chile Tomato Soup

Kristin1

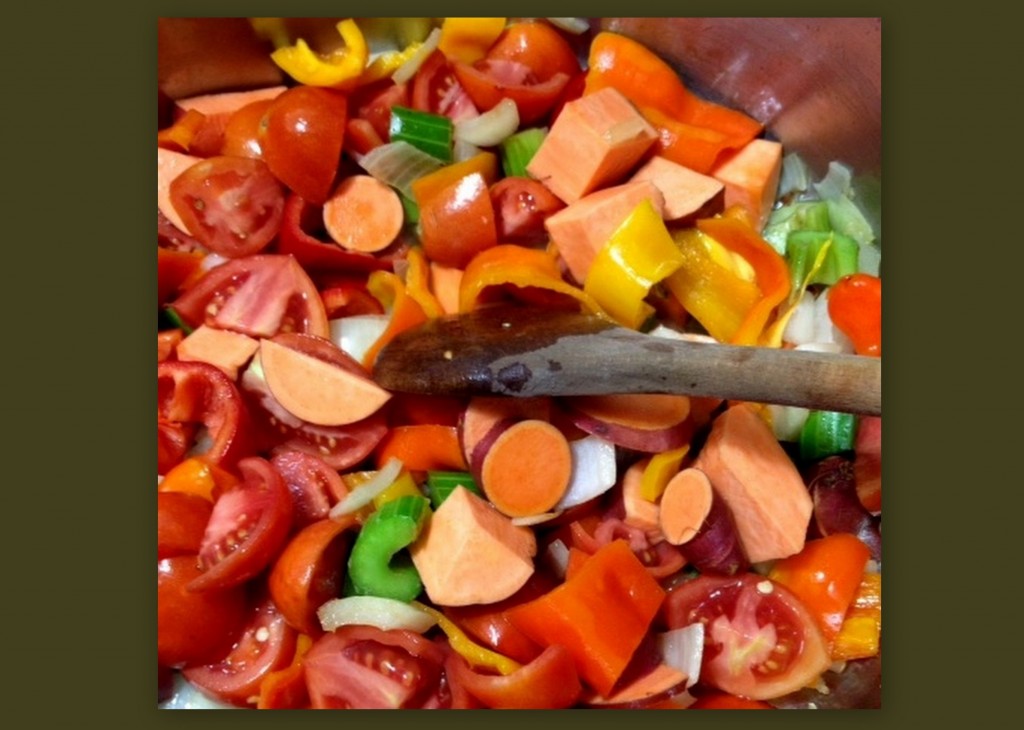
Ingredients
3 ribs celery, diced
2 onion, diced
2 cups pepper, diced
1 sweet potato, diced
2 cups fresh tomato, diced
1 kabocha squash, roasted and scooped from its skin (could also sub in a butternut or 2 delicata)
12 oz tomato juice
2 cups water
1/8 tsp tumeric
1/8 tsp curry powder
1/2 tsp cumin
1/2 tsp chile powder
1 tsp salt
2 dried ancho chiles soaked in 2 cups hot water (remove stems once softened )- add chile water to the soup too.

Kristin2

Sauté veggies in 2 tablespoons oil. Add liquids and seasonings, and simmer over medium heat for 30 minutes, until veggies are soft. Puree. Garnish. Enjoy!

OLYMPUS DIGITAL CAMERAPost and recipes written by Kristin Moyer, Farm Chef Educator at Blooming Glen Farm and passionate farm-fresh food advocate. Kristin cooks at The Perk in Perkasie, does private catering and serves on the Pennridge Wellness Committee, working to create edible school yards in Pennridge School District. Together with Blooming Glen Farm she hopes to someday start a Community Supported Kitchen at the farm.

Editing by Tricia Borneman, Blooming Glen farmer and co-owner.


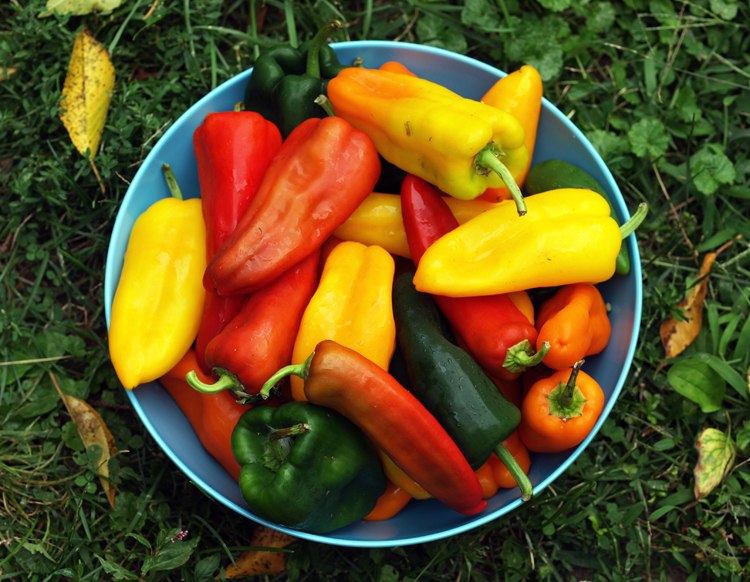
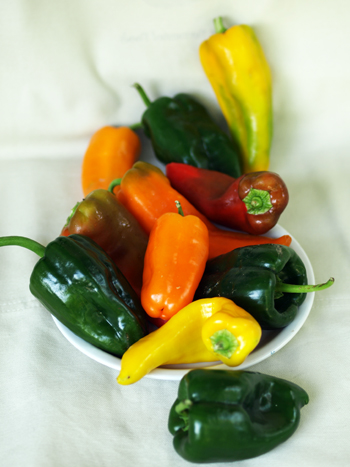
Are beautiful and bountiful sweet peppers taking over your fridge?  It won’t be long before they are a distant memory. Use the tips below to put them to good use now, and to preserve some of their summer flavor to enjoy during the upcoming fall and winter months.  Bonus:  Most of these tips and ideas will also work poblanos as well.

Peppers!Rockin’ raw peppers:  There’s nothing like the just-picked taste of farm-fresh peppers (and raw veggies have a special nutritional profile), but eating a side of sliced peppers at every meal can certainly get a little boring.  Try mixing it up by using peppers as the base for a veggie salad; this Summer Pepper Salad also takes advantage of the season’s cucumbers, while this one uses tomatoes.  Slice peppers thinly to add to wraps and sandwiches, or dice them up small for pasta and grain salads.  Gazpacho is a classic summer dish that you can always add extra peppers to.  You can also use raw peppers as the base for other cold soups, dips and dressings.

Peppers as a vessel:  Slice peppers in half, remove ribs and seeds, and then lightly steam or roast.  You can now use the pepper halves as a vessel in which to stuff all kinds of yummy eats.  We’ve posted a few stuffed pepper recipes here on the blog, including Freekah Stuffed Peppers, Poblanos and Mexican-style Quinoa and Green Pepper Dolmas.  I also love using eggs as part of a stuffing; this Baked Eggs in a Bell Pepper and Breakfast Stuffed Peppers use a whole egg cracked into pepper halves, while this Broccoli Quiche in Colorful Peppers uses an egg mixture.  Get creative with your stuffing fixins’ — just about any veggie, meat, grain or bean combination will work, so the possibilities are near endless!

Preserving peppers:  The no-fuss method to preserving peppers is to simply slice them into spears, place them on a cookie sheet in a single layer and place in the freezer until they’re frozen solid, and then transfer them to an airtight, freezer-safe container.  You can then use them in stir-fries, soups, sauces and other dishes.  Roasted peppers also freeze very well, holding their flavor and texture quite nicely; check out this method for roasting and freezing.  Roasted red peppers can be used on their own, or as an ingredient for soup, hummus, sauce, and pasta dishes.  And, of course, you can always make like Peter and pickle those peppers! 🙂

gfg_head shot mPost and photos by Mikaela D. Martin: Blooming Glen CSA member since 2005, board-certified health counselor, and co-founder of Guidance for Growing, an integrative wellness practice in Souderton. Read more about healthy eating and living on her site, http://guidanceforgrowing.com!

The summer has flown by and here we are again. September welcomes school lunches, hurried morning routines with little time to stop and smell the 3 course breakfast (ha! who has the time?!), and a dinner that often leaves me muttering “I’ll do better tomorrow”. Tis life and thank goodness for the farm and the bounty of veggies still rolling in the door. My Tuesday and Thursdays barely feel like work (don’t tell Trish and Tom)- the energy is vibrant. I remember thinking to myself when I was given the Chef Educator farm job that this was what my family finally needed to be in perfect health and happiness all day, everyday: veggies and fresh air everywhere. Wow! Life was certainly gonna be easier…….screeeeeech.

Here is where reality sets in. Life is rarely easy. Some days I wish I didn’t know that lunchables and pop tarts were a no-no. My job may be different but my kids are the same, and no amount of happy Mr. Sunshine is going to make them willingly eat kale or squash for breakfast. Let me introduce you to a little game I call Hide the Vegetable. I put them everywhere. Chop them, puree them, shred them, you name it. You can sneak them in pancakes, meatballs, salad dressing, even ice cream (avocado yum).

The biggest argument I run into is the white bread vs. the “what kind of bread was that” option. I pick my battles and to be honest now that they are are at school and open the lunchbox in the cafeteria to find the Mommy bread, I am not there to hear them complain. 🙂

I like to rotate my foods. Everything from grains, meat and veggies, not only to mix things up but because it reduces the chances of acquiring a food intolerance or allergy. I make a chart for my week and map out my meal plan. I am the worst ever shopper so I usually forget my list anyway but at least I have a mental note. This is the only way I find that I feel good about the meals I prepare for my kids.

Prepping the day of CSA pick up is ideal. Honestly though, I use most of the share either as a raw whole food as snacks or lunches with a dip or salad, or lightly steamed, blanched or roasted. I find the most pleasure comes from eating these foods in their natural state. A vinaigrette or fresh herb citrus blend is simple and delicious. The oven roasted tomatoes from Tricia’s tomato blog and her salad in a jar are gems!

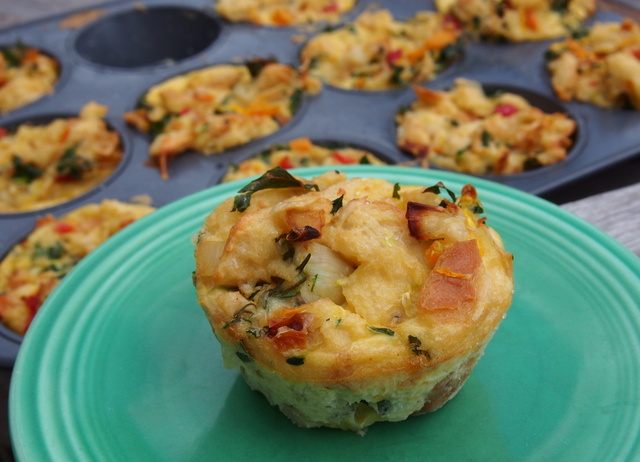
Last week we focused our demo on easy breakfast. I opted for a breakfast bread pudding muffin. Feel free to add whatever veggies, meat, cheese or herbs that your kids will eat. These can be individually frozen and reheated in the oven or a skillet.

Savory Breakfast Muffins 

OLYMPUS DIGITAL CAMERA

Ingredients, makes 12 muffins
6 eggs
2 egg whites whipped
1 loaf of bread – cubed – any kind you prefer
2 cups half and half
1 teaspoon salt
1 cup grated parmesan cheese
1 cup cheddar
1 zucchini grated and squeezed dry
1 onion minced
2 -3 ribs kale chopped fine
3 sweet peppers
2 oven roasted plum tomatoes
fresh rosemary to taste

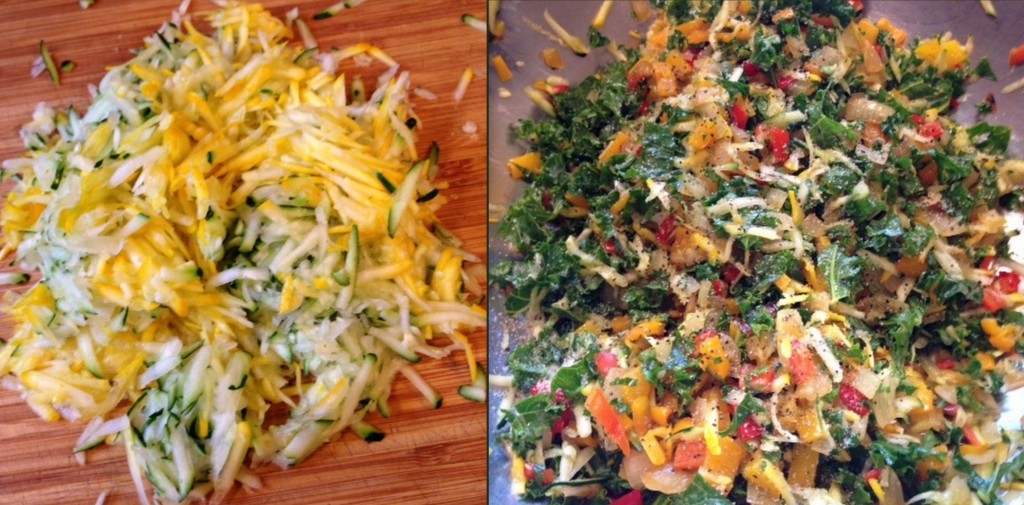
Preheat oven to 350. Sauté onion and peppers and set aside in a bowl to cool. Beat whole eggs and half and half in a separate bowl, add salt and black pepper. Grate the zucchini. Wring out the moisture in a towel and add to the onion mix along with the chopped kale.

Kristin

In a very large bowl toss together the bread with the cheese and herbs to really get them happy together. Fold in the veggies and the whipped egg whites. Put a level scoop into greased muffin tins and bake about 25 minutes or until golden and set in the center.

OLYMPUS DIGITAL CAMERA

OLYMPUS DIGITAL CAMERAPost and recipes written by Kristin Moyer, Farm Chef Educator at Blooming Glen Farm and passionate farm-fresh food advocate. Kristin cooks at The Perk in Perkasie, does private catering and serves on the Pennridge Wellness Committee, working to create edible school yards in Pennridge School District. Together with Blooming Glen Farm she hopes to someday start a Community Supported Kitchen at the farm.

Photos and editing by Tricia Borneman, Blooming Glen farmer and co-owner.


The mason jar salad is portable, healthy, and my personal favorite- artistic. The idea has been popping up all over the web and I even spotted a mason jar salad cookbook at the bookstore in town. (Seriously- why didn’t I think of this first?) But there’s a reason people are excited about a meal in a jar. The appeal is truly the make-ahead convenience and as an added bonus for kids (ok, adults too), the fun factor. Put together these jars the night before, customize them slightly for different family members, then grab and go. Head off to school or work with a healthy farm fresh lunch!

OLYMPUS DIGITAL CAMERA

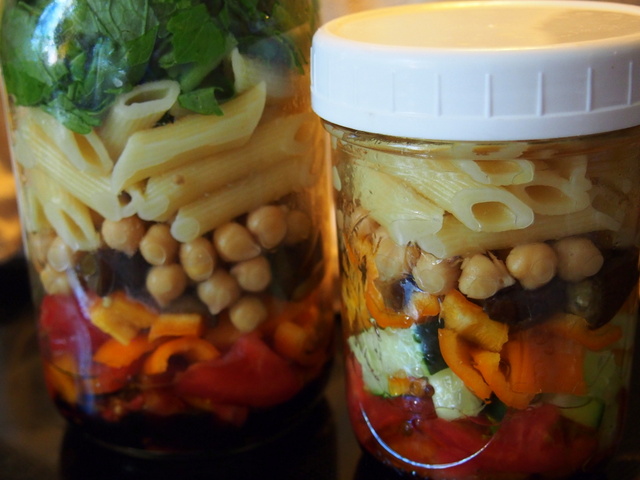
To avoid soggy salad dressing soaked greens, the trick is in the layering. Once you have a handle on the basic idea you can get as creative as you want. I made a pint size for my daughter and a quart size for me. But if you were pairing this salad with soup or a sandwhich, or looking for a light lunch, a pint size would be plenty big enough for an adult.

The first layer is the dressing. (Though I did skip this for my daughter’s first back to school lunch- she’s not a dressing kid, but yours might be.) Use a little less than 2 tablespoons for the pint, and between 3-4 tablespoons for the quart. Mine was a simple balsamic, olive oil and honey blend. Check out Chef Kristin’s previous recipe post for some other salad dressing ideas.

OLYMPUS DIGITAL CAMERA

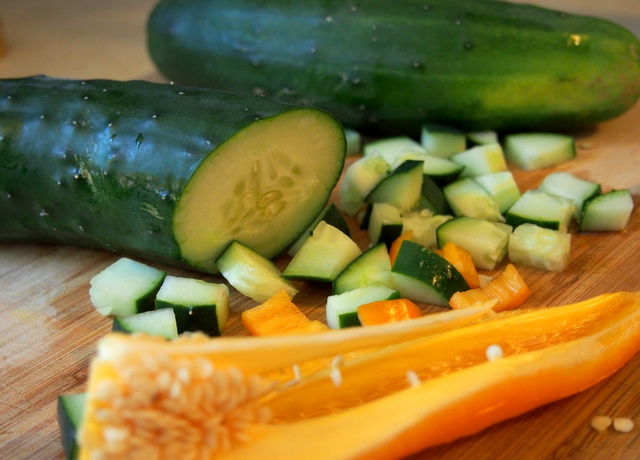
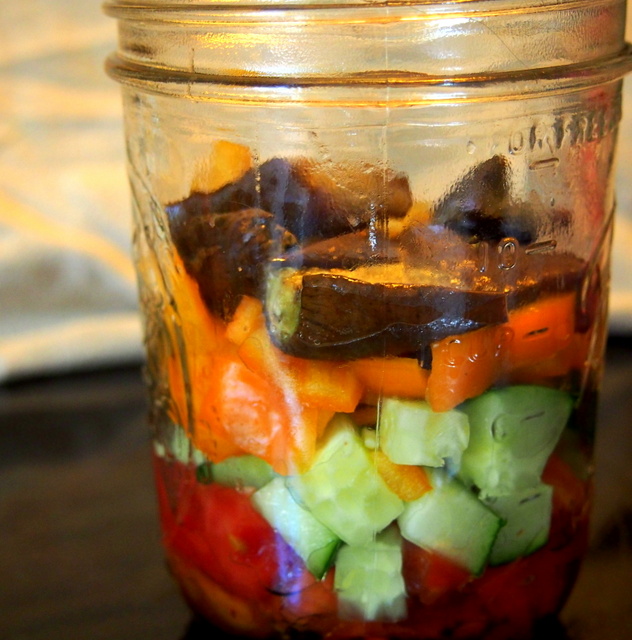
The next layer is the firmer vegetables- these will act as the barrier between the dressing and the rest of the salad. Put in something you don’t mind absorbing the dressing a bit- I did chunks of tomatoes, then diced cucumbers, followed by diced sweet peppers, and for my jar, the softer veggie came last, roasted eggplant. (The hardest part of this whole process is not making your layers too thick, and really packing them in there. I ended up with enough chopped veggies to make quite a few salads- not a bad thing- just make up some extra jars- they will keep in your fridge for a number of days.)

OLYMPUS DIGITAL CAMERA

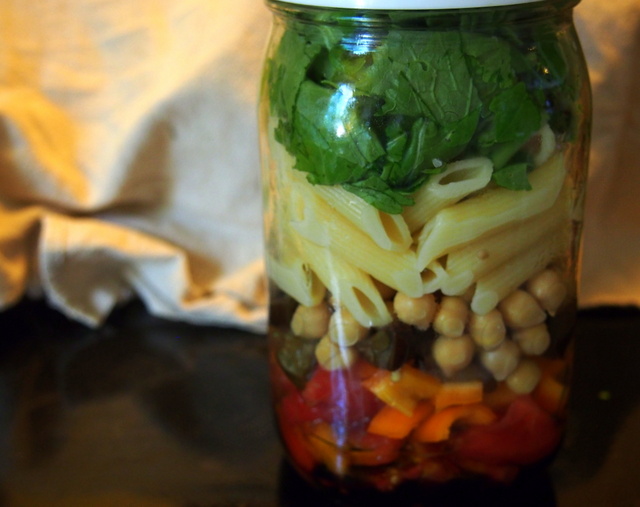
Next comes the grain/nut layer- I used chickpeas (organic- drained and rinsed from the can) and noodles. This layer could also be followed by a protein if you so desire- chunks of grilled chicken, hard boiled egg, or tofu. Check the fridge for those leftovers! For my daughter’s jar, I topped the noodles with diced cheddar cheese and called it done.

The final layer would be your greens- kale, spinach, raab, arugula- whatever is fresh and seasonal! My jar got a layer of packed broccoli raab. 

OLYMPUS DIGITAL CAMERA

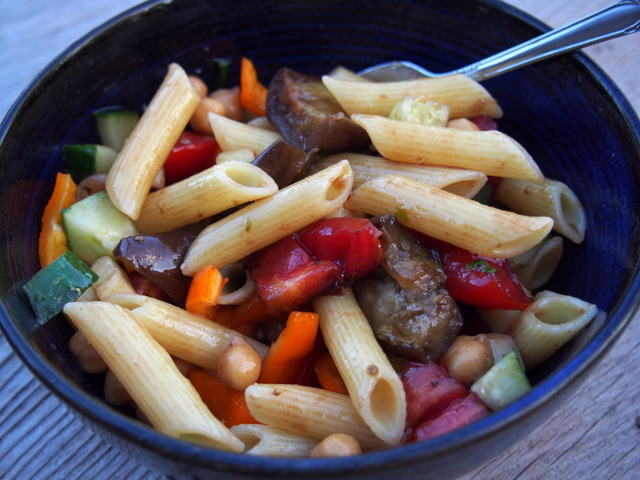
The morning of school I just grabbed my daughter’s jar out of the fridge, and sat it in a small plastic bowl in her lunchbox with a fork and an icepack. (It’s much easier to eat these salads out of a bowl- and the pouring in part really mixes all the layers up. Plus what 9-year old doesn’t want to feel part of the process?!). It was a hit! She came home with an empty jar and asked for another tomorrow. Score!

OLYMPUS DIGITAL CAMERA

I have mason jar salad ideas spinning through my head- I’m imagining a fresh tomato salsa, followed by rice and beans, then arugula or kale. Or what about a sweet yogurt dressing, a fresh fruit layer, quinoa then spinach? So many options! Experiment and share your ideas on our facebook page. Personally, I’m just thrilled to have a source of inspiration for those back-to-school lunches!

Post and photos by Tricia Borneman, Blooming Glen farmer and co-owner.


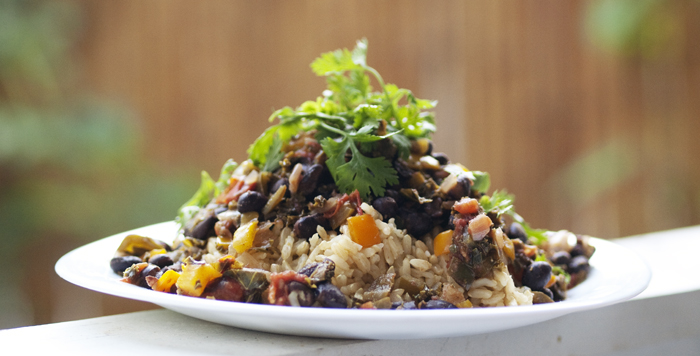
Rice & Beans PeppersFrom Cuban black beans with yellow rice to Indian ramjah (kidney beans) with basmati rice, rice and beans is a classic, versatile dish that’s found throughout most cultures around the globe. Rice and beans are hearty, inexpensive, and super adaptable, making them a worthwhile addition to anyone’s kitchen repertoire. The key to making this not only a belly-filling meal, but also a nourishing and nutritious one is using whole grains and loading up on veggies. The recipe below uses heart-healthy brown rice, and loads of Blooming Glen Farm-fresh veggies that are packed with vitamins and minerals. The black beans bring plant-based protein, making this a nice rounded and complete meal.

As with many recipes on this blog, the one below is very much open for alterations, depending on your particular tastes, what you have available in your pantry, and what veggies you may need to use up from your share.  I’ve added lots of peppers to this version, since they’re abundant right now. The poblano peppers add a tiny bit of heat, while the frying peppers bring in some sweetness.  Greens are always a good thing to add to your meals; using them here brings in a satisfying chewiness, perfectly complimented by the soft peppers and beans.  Corn would be a nice addition and so would zucchini — feel free to use up whatever vegetables you have on hand!  You can substitute pinto or other beans in place of the black beans. You can even skip the rice and serve the beans over baked or smashed potatoes (leave skins on) or another whole grain. Experiment and have fun 🙂

Recipe note: I make rice and beans by first getting the rice going in a rice cooker, then moving on to the prep and cooking of the beans.  In most cases, by the time the beans are done, so is the rice.

Rice & Beans

Rice & Beans

Ingredients
2 teaspoons grapeseed oil
1 medium onion, peeled and chopped (~1 cup)
3 garlic cloves, minced
1 tablespoon ground cumin
1 teaspoon oregano
1 teaspoon smoked paprika
4 poblano peppers, seeded and chopped (~1 cup)
4 sweet peppers, seeded and chopped (~1 cup)
1+ jalapeño pepper, seeded and chopped (optional)
1+ cup kale, chopped fine
2 large tomatoes, seeded and chopped (~2 cups)
2 15-oz cans black beans, rinsed and drained
1+ cup broth (No-Chicken Broth is good here)
2 teaspoons maple syrup
3 cups hot cooked brown rice*
Fresh cilantro (optional)
* I prepare rice for this recipe with broth, rather than water.

Method
Heat oil in a large skillet. Add onion and cook for a minute or two, until they begin to soften. Add garlic and spices, cook for one minute more. Add peppers. greens, and tomatoes, stir well, and cook until veggies are tender, about 8-10 minutes.

Meanwhile, mash 1/2-cup of the beans.

Add mashed beans, whole beans, broth, and maple syrup to the skillet. Turn up heat and bring to boil, stirring frequently. Reduce heat, cover and simmer 15 minutes, stirring occasionally. Uncover and simmer until reduced to desired thick consistency, about 5-10 minutes. Salt and pepper to taste. Serve over rice, topped with cilantro.

Post and photos by Mikaela D. Martin: Blooming Glen CSA member since 2005, board-certified health counselor, and co-founder of Guidance for Growing, an integrative wellness practice in Souderton. Read more about healthy eating and living on her site, http://guidanceforgrowing.com!