Recipes

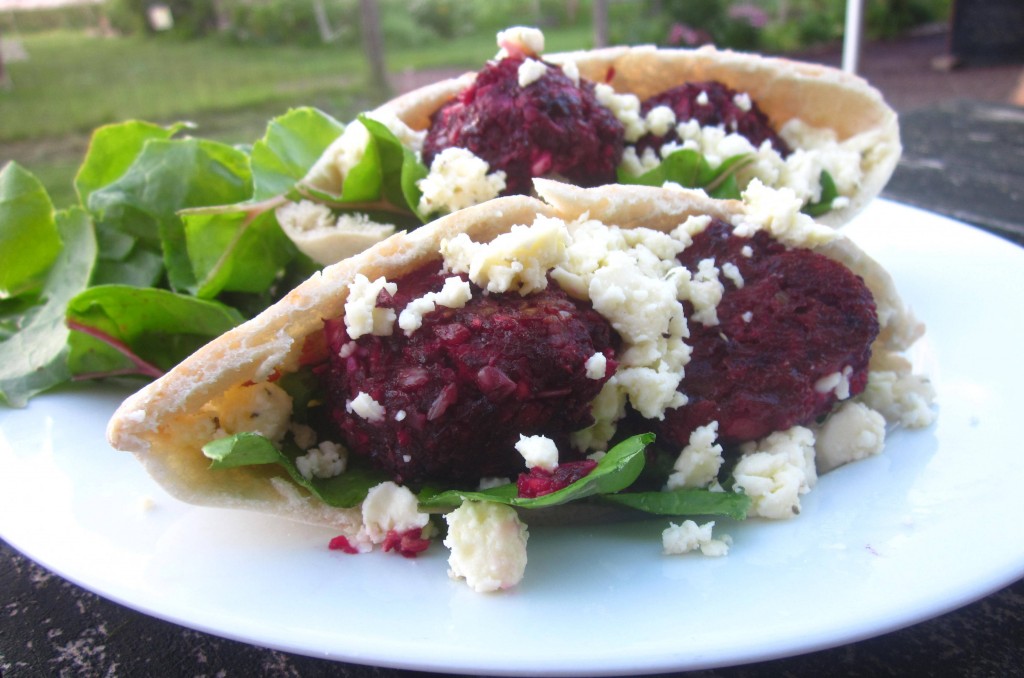
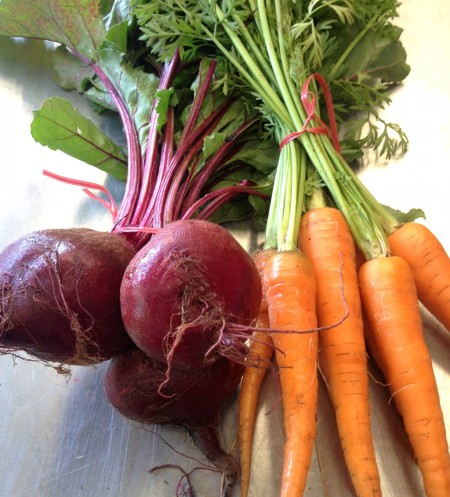
I’ve been making a beet burger recipe that was given to me by a farmer friend from Wisconsin for a few years now.  At first, I was pretty excited about it and looked forward to beet season just so that I could make the recipe again. But, after making it so many times it needed some new life. A kitchen experiment was in order. So, I decided to use the same general recipe for the burgers and pair them with some new flavors. I exchanged the bun and cheddar cheese for pita and feta crumbles.  The result was just was I was looking for: something refreshingly tasty, yet wholesome at the same time! If you like falafel as much as I do, this recipe is worth a try. It’s just a twist on more traditional Mediterranean meal.

Falafel Style Beet patties

4 medium size beets, peeled and quartered
3-4 medium carrots, chunked
1 large sweet spring onion, sliced
¼ cup sunflower seeds
2 Tablespoons all-purpose flour
2 medium eggs
1 Tablespoon olive oil
1 teaspoon salt
½ teaspoon black pepper

Preheat oven to 350 degrees. Combine the beets, carrots, onion, sunflower seeds and flour in a food processor and chop until a finely diced mixture is created. (If you don’t have a food processor you can finely grate the vegetable components straight into a bowl.)  Transfer mixture to a medium sized bowl and add eggs and salt and pepper. Mix thoroughly in order to coat vegetables in egg.

Next, use your hands to create golf ball sized rounds of the mixture, making sure to squeeze out the extra moisture as you go. You can squeeze it over the bowl or directly into the sink. (Be aware: your hands will take on a bright magenta color during this process, but it does eventually wash off!) Place the rounds on an ungreased baking sheet and bake for about 20 minutes or until tops become deep red in color.

For extra crispy beet patties, transfer the rounds into a warm skillet with 2 Tablespoons of olive oil for about 5 minutes, flipping once. You can skip this step if you prefer to just bake them. Serve patties with pita, swiss chard or lettuce, and feta. For more flavor you can add a sauce of ½ a diced cucumber, 3 sprigs of finely chopped dill, and 2 Tablespoons of yogurt. This recipe serves 4-5 people.

If you’re completely new to beet burgers, feel free to use the recipe for its original purpose by making the mixture into patties instead of balls. And, you can add shredded cheddar cheese (about ½ cup) right into the mixture to give it an even richer burger flavor. I would serve them on wheat buns with your favorite burger toppings.

Photos and recipe by Blooming Glen Farm apprentice Rebecca Metcalf.

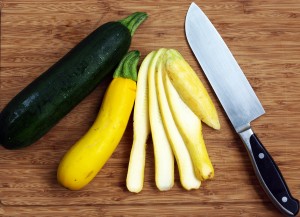
Grilled summer squashOne of my favorite parts of summer is the time we get to spend cooking and eating outside.  Grilling vegetables brings out a depth of flavor that just cannot be matched on the stovetop, and we’ve been taking full advantage of that with this season’s CSA share.  One of the best veggies to grill is summer squash and its partner, zuchinni.

Eating summer squash provides us with cancer-fighting antioxidant nutrients Grilled summer squashvitamin A, vitamin C and manganese. We also get a healthy dose of essential minerals magnesium and potassium, as well as copper. However, because many of these nutrients live in the skin of the squash, we need to make sure we leave it intact. Grilling summer squash allows us to do just that!

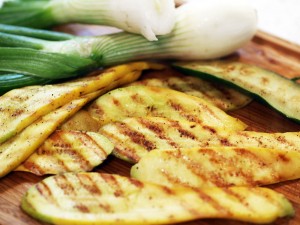
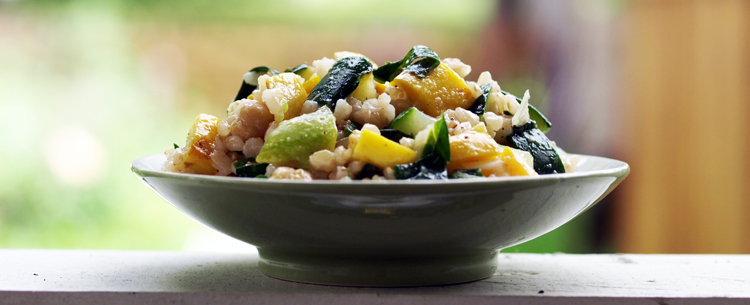
Of course, squash can be cubed or cut into disks for kabobs, but I really like it when its cut into planks and placed right on the grates of a hot grill. The recipe below calls for this method of cooking; give it a try and let us know what you think. I’ve paired the delicious and nutritious summer squashes with superfoods, brown rice and Swiss chard, and healthy plant protein from chickpeas. All that wrapped up into a summery salad suitable for a main dish or a side — that’s tough to beat!

Grilled summer squash

Grilled Summer Squash & Brown Rice Salad

Ingredients

1 cup brown rice
3-4 summer squash and/or zucchini, sliced lengthwise, about 1/4″ thick
5-6 leaves Swiss chard, stems completely removed (slice the stem out from between the two halves of the leaves)
1 can chickpeas, drained and rinsed
1/2 sweet onion and some of its greens, chopped

Dressing
2 tbs olive oil (or other oil of your choice)
1 tsp grated lemon zest plus 2 tbs juice
1/2 teaspoon agave
1/2 teaspoon salt
fresh herbs of your choice (basil works great here), chopped
additional salt and pepper to taste

Method
Cook the rice according to package directions.

Fire up your grill! Lay out the squash slices. Lightly spray each side with grapeseed (or other high-heat) oil, and then sprinkle with salt and pepper. Once the grill is heated, place the squash in one layer, cover and cook for ~3 minutes, until grill marks are apparent. Flip and cook another couple minutes, again until grill marks are apparent. Squash cooks very quickly on the grill and can become soggy (especially the larger ones) if left on too long, so be careful not to overcook. Remove from heat and let cool.

Blanch the Swiss chard in boiling water for 2 minutes, rinse in cold water and chop. Add chard, onion, chickpeas to a serving bowl.

Cut squash into a large dice and add to the bowl; you should have about 2 cups.  Gently stir in rice.

Combine the dressing ingredients in a small bowl. Mix well and then add to salad, stirring to combine everything. Adjust seasonings to taste.  Serve at room temperature, or chill.  This salad also make a great stuffing for tortillas or collard wraps.

Post and photos by Mikaela D. Martin: Blooming Glen CSA member since 2005, board-certified health counselor, and co-founder of Guidance for Growing, an integrative wellness practice in Souderton. Read more about healthy eating and living on her site, http://guidanceforgrowing.com!

This is the first in a series of recipes contributed by local chefs, inspired by the fresh seasonal vegetables of Blooming Glen Farm. Chef Kristin Moyer of Perkasie is excited to be part of a planning team focused on bringing a Community Supported Kitchen and Supper Club to the area.

Herby Yellowfin Tuna Loin. Grilled Sweet Spring Onions.
Perfect Blooming Glen Greens with a Carrot Ginger Beet Vinaigrette.

The dressing recipe calls for Beet Kvass which is a tangy fermented tonic. I chose to add carrots to the kvass as well, just for fun, although it is not necessary. Plan ahead a few days so you have this on hand for the recipe.
Take a 1 Quart mason jar and add enough unpeeled yet cleaned beets and carrots, chopped fairly small, to fill the jar 3/4 of the way. Add to the veggies 1 Tablespoon of sea salt for a quart sized jar. Fill with filtered water to top and lid it. Shake slightly to help dissolve the salt. Set it and forget it, in a warm spot for no less than 3 days. Strain out the liquid and you will have a beautiful nourishing tonic. Refrigerate and enjoy. Use some in dressing recipe below.

For the Dressing
Combine the following ingredients in a blender or food processor (Vitamix is KING):
4 fresh carrots
1/2 cup carrot/beet, or just beet, kvass
3 Tablespoons honey
1/4 cup sherry vinegar or any vinegar/citrus combo you like
1/4 cup extra virgin olive oil or any oil you prefer (walnut would be good)
1 inch knob of ginger
Juice of an orange
1/4 teaspoon sea salt

For the Tuna
Ask your fish guy for TUNA LOIN. 1 to 1 1/2 pounds is suitable for a family of four. It is super simple to handle. It will most likely come with the skin on one side and a dark red chunk down a portion of it. Do not be alarmed. Place it on your cutting board with the skin down. Slide the knife under the skin and roll away from the knife as you slice through between the flesh and the skin. It should be rather easy. The tuna is pretty resilient so don’t worry about damaging it. Now that the skin is removed, find the blood line (deep red portion) and cut that out! Take the clean and pretty tuna and place your hand on top to secure. Slice horizontally right through the center of the loin. Separate the top and bottom pieces and place them next to each other. Slice the bottom piece again long ways to create logs. You now have three long log-like tuna loins. Wasn’t that Easy?!

Now, heat 2 Tablespoons of peanut or safflower oil in a pan on medium high. You are going to sear each loin on every side so you want it pretty hot. Don’t try to move it too soon, it will stick. When it’s ready to release, it will.
*DO NOT COOK ALL THE WAY THROUGH. The aim is medium rare, so high heat to brown, then remove to a cutting board. Cool completely.

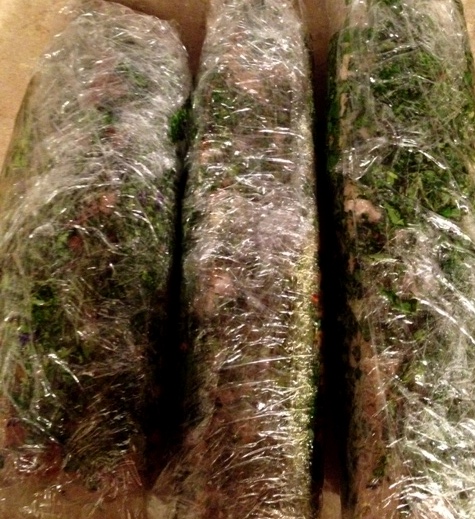
As for the herbs, I gathered a good handful of most herbs, plus the edible flowers, in the Discovery Garden at Blooming Glen Farm. De-stem and wipe with a damp towel, chop fine and set aside.
When the tuna is completely cooled, sprinkle each loin with oil, salt, pepper and the herbs to coat. Give them a nice massage.
Wrap individually in saran wrap and place in fridge for at least 6 hours.

To Compose the Dish
Toss your sweet spring onions in oil, salt and pepper, give them 5 minutes on a hot grill to char.
Any mix of lettuce, spinach, radicchio, chard, kale, arugula, etc…will do.
Super thin slices of carrot and cukes to taste.
A generous drizzling of the Carrot Ginger Beet Vinaigrette.
Top with sliced tuna and sprinkle with toasted sesame seeds. ENJOY!

My name is Kristin and I harbor a healthy obsession with food. It is with much gratitude that I joyfully create in the kitchen. Through creative expression I find health and vibrancy, sprung forth by a deep nurtured connection with my Source. The food we eat will also embody this life force, if the well from which it springs is one of Purity and Love. Every living thing longs for this connection and every vein of life holds within it the knowledge of its place in the energetic chain. I believe that the core principle of sustainability is simply nurturing each things innate ability to exist and perform to its purpose and potential. When I slice into a chiogga beet and lay my eyes on the rings of brilliance and color, I KNOW humility, my place in the grand scheme of thing, a pawn to that beet, a servant with a grateful heart flying high on a purpose driven life. Contact me at 215-804-6684 or holyleo1@verizon.net  for catering, or if you are interested in being part of the upcoming Community Supported Kitchen adventures! Happy Feeding!  
 
Recipe and last two photos from Kristin Moyer. Blog post edited and compiled by Tricia Borneman, Blooming Glen farmer and co-owner.

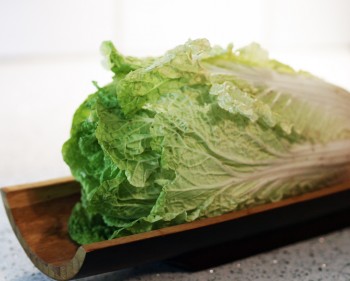
Napa CabbageThe delicate and pretty napa cabbage we found in our CSA shares this week regularly appears in East Asian dishes, from savory stir-fries to spicy Korean kimchi.  Napa is specifically a Chinese cabbage, comparable in flavor to bok choy and, of course, other cabbages.

Napa does have a milder flavor than the standard green and savoy cabbages, but still has all the nutrition those offer:

“[Cabbage’s] anti-inflammatory properties are stellar, thanks to the high content of an amino acid called glutamine. In addition to promoting the digestive process and intestinal health, glutamine has been shown to be useful in all sorts of treatments including burns and peptic ulcers. Because cabbage is a member of the cruciferous family, it’s also a great cancer-fighting food. Cruciferous veggies are high in indole-3-carbinol, a chemical shown to block the growth of cancer cells, as well as stimulate DNA repair in cells. Finally, a look at cabbage’s nutritional profile shows it as an excellent source of vitamins K and C, a very good source of fiber, manganese, folate, vitamin B6 potassium and omega-3 fatty acids, and a good source of thiamin (vitamin B1), riboflavin (vitamin B2), calcium, magnesium, vitamin A, and protein.”

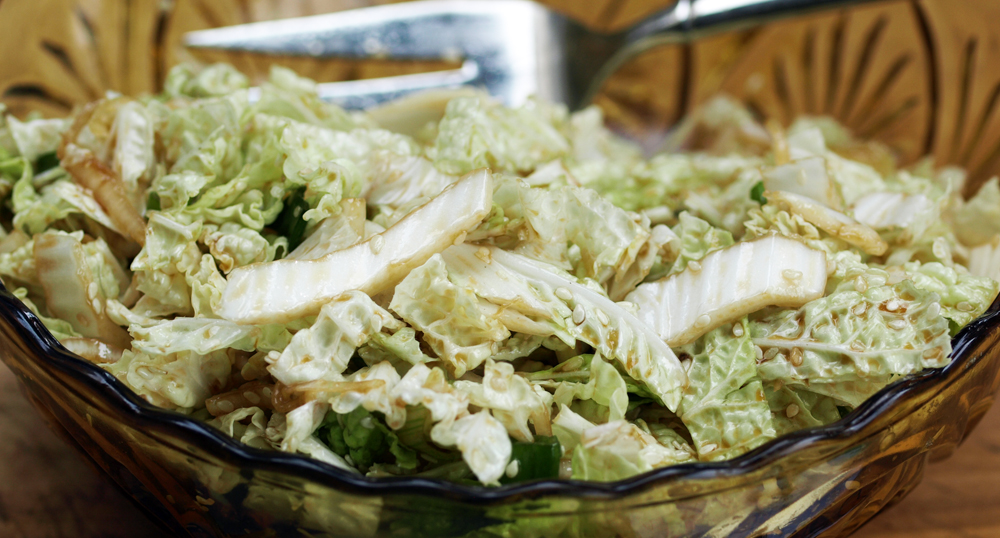
This time of year, when the days are getting hotter and the air is humid, I prefer using napa uncooked, in a refreshing slaw.  There are tons of flavor varieties to play with when it comes to slaws.  Use the recipe below as a base, and try adding other shredded veggies, nuts, seeds, and vinegars.

Sesame Napa Slaw
Sesame Napa Slaw
Ingredients
2 tablespoons sesame seeds
2 tablespoons sesame oil
1 tablespoon rice vinegar
1 tablespoon tamari sauce
1/2 teaspoon agave syrup
1 head napa cabbage, end trimmed, outer leaves removed, and chopped (about 4 cups)
2 green onions, with some of the greens, sliced thin
pepper, to taste

Method
In a bowl, mix the seeds, oil, vinegar, tamari and agave.  Add the cabbage and onion and toss, so that dressing coats the veggies. Pepper to taste and serve.

Post sources and recommended links:
Cabbages, from The Cooks Thesaurus.
8 Things to do with Napa Cabbage from She Knows.
Napa Cabbage: 5 Healthy Uses and Nutrition Facts, from Lunch Box Bunch.

Post and photos by Mikaela D. Martin: Blooming Glen CSA member since 2005, board-certified health counselor, and co-founder of Guidance for Growing, an integrative wellness practice in Souderton. Read more about healthy eating and living on her site, http://guidanceforgrowing.com!

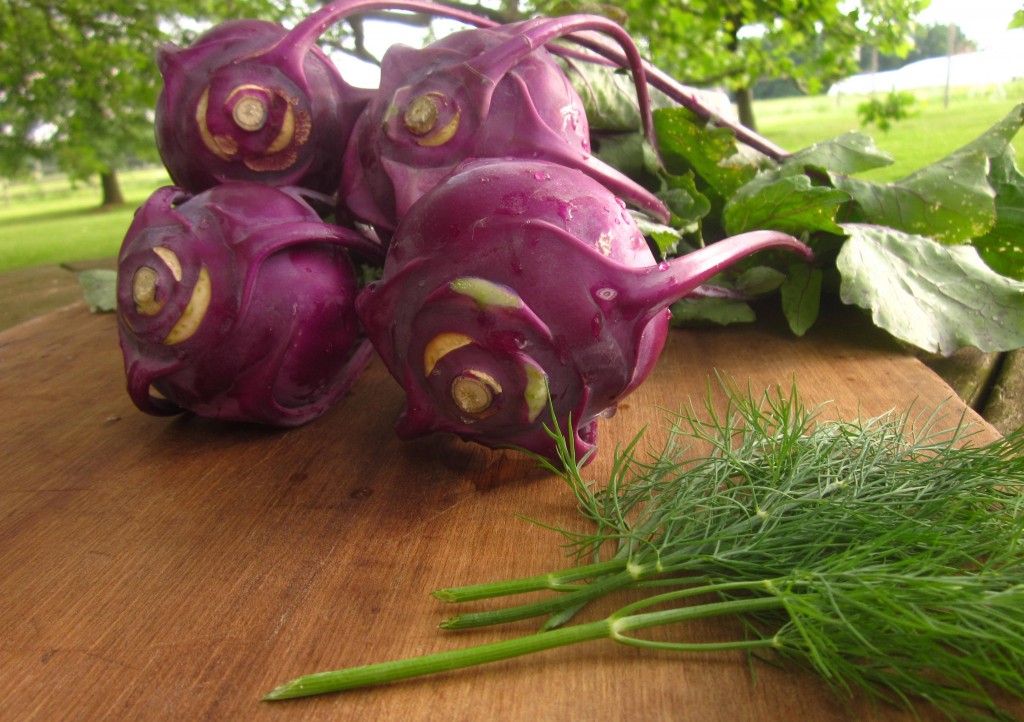
If you’re like a lot of our market customers and CSA members, you might find yourself puzzled as to what to do with that oddly shaped vegetable you picked up this week. On first glance it can be daunting to figure out how to even begin to use it. But kohlrabi, which comes from Eastern Europe and is the German name for ‘cabbage turnip’, is really just a strange looking sister to the cabbage family and can be used in many similar ways. You can eat the bulbs raw or cooked. Shred them into a salad with some lemon juice or substitute them for cabbage in your favorite coleslaw recipe. They are equally delicious cooked into a stir-fry or vegetable sauté.

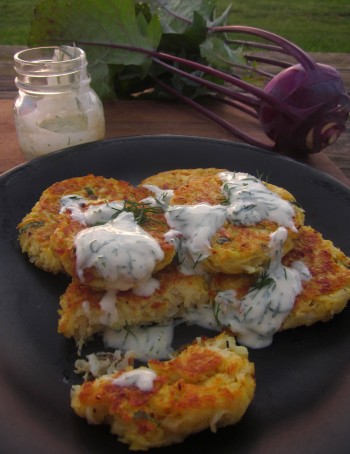
I’m new to kohlrabi myself. But, I’ve already found my favorite way to use it… in fritters! Mostly composed of ingredients you’ll already have in your cupboard or refrigerator, they are really simple to whip up and take very little time. You can use them as a side dish or for a lighter meal, pair them with a spring salad mix. However you use them, one thing is for sure, you’ll definitely remember them the next time kohlrabi season comes around!

Start by combining the following ingredients for yogurt dip and refrigerate 30 minutes before serving: 1/3 cup yogurt, 3 Tablespoons chopped fresh dill, 1 teaspoon lemon juice and salt to taste. *For a different sauce, you can replace the dill with cilantro and the lemon with lime juice, and add a bit of honey. Or try mint!

Meanwhile, peel and shred the 4 kohlrabi bulbs into a colander and sqeeze out excess moisture. In a separate bowl combine 2 beaten eggs, 3 Tablespoons dried bread crumbs, 1/4 cup chopped spring onion (you can add in some green garlic too if you have it), 1 teaspoon of salt, 1/4 teaspoon crushed red pepper and black pepper to taste. Add kohlrabi by the spoonful and mix until egg is coating the entire mixture. Heat 4 Tablespoons of olive oil in skillet until small bubbles appear. Form fritter mixture into two-inch balls and drop into skillet. Press gently with spatula to flatten. Cook for 5-7 minutes on each side, or until golden brown. Serves 4-6

Recipe adapted from: From Asparagus to Zucchini, A Guide to Cooking Farm Fresh Produce (3rd ed.). Photos and text by Blooming Glen Farm apprentice Rebecca Metcalf.

Green garlic stalkWoo hoo, another season has begun at Blooming Glen Farm! I’m sure you were as excited as I was about the first share of the year. Fresh strawberries, lots of greens (including gorgeous spinach), turnips, and green onions and garlic have been making their way into our meals all week.

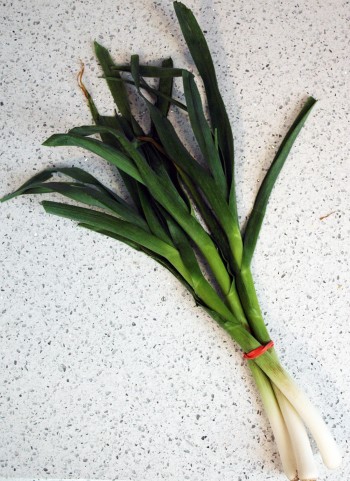
Green garlic is probably a crop that most of us aren’t too familiar with, but can do a lot for meals and nutrition. Green garlic is “baby” garlic, also known as spring garlic. Although it’s smell is as pungent as the mature bulb, the flavor is much more mild and can be enjoyed raw in salads, or cooked, where it sweetens up a bit. The greens can also be used, similar to how one would use chives. As far as nutrition, green garlic contains the same great benefits as garlic:

  • Allicin, a natural antibiotic that helps boost your immune system by blocking infections.
  • Iron, which keeps iron levels high in your blood stream, and ferroportin, a protein that transports iron from the inside of a cell to the outside of it.
  • Vitamin C, a super vitamin that can help with everything from weight management to cancer prevention.
  • Vitamin B6, which has been shown to help prevent heart disease.
  • Selenium, which support our cancer-fighting antioxidant system.
  • Manganese, another mineral that supports antioxidant efforts, as well as our “good” cholesterol (HDL).

Luck for us, there are lots of ways to utilize green garlic in the kitchen. Here are a few yummy recipes to add to your recipe box:

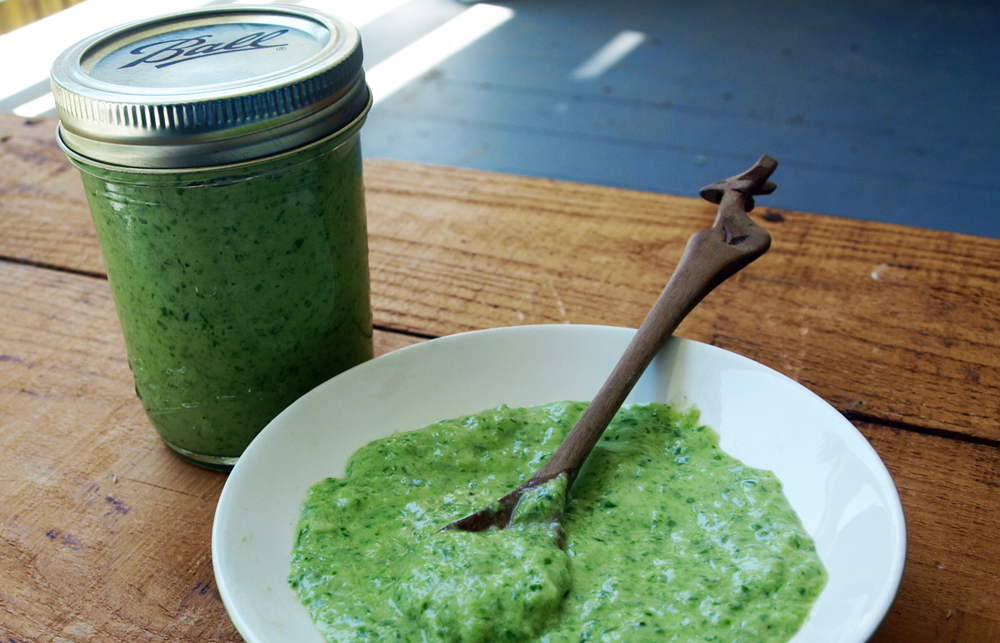
I’ve been using the creamy (and bright!) green garlic dressing below with grain and pasta salads, green salads, and in stirfries this week.  I’ve played with a couple different oils and vinegars and they all turned out tasty. If you don’t have the called-for ingredients, feel free to play around with what you do have on hand!

Green garlic dressingGreen Garlic Dressing
Ingredients
2 stems of green garlic, trim bulbs, include greens
1/4 cup champagne vinegar
1/4 cup sesame oil
1/4 cup water
1 tbs agave honey, plus more to taste
salt and pepper, to taste

Method
Simply add all the ingredients to a food processor or blender and blend until smooth, adding a bit of water if needed. Adjust agave, salt and pepper to taste.

Post sources and recommended links:
What’s New and Beneficial About Garlic, from WHFoods.
Ferroportin on Wikipedia.
Spring Vegetable to Try: Green Garlic, from PopSugar.
Green Garlic: All The Flavor & Nutrients 5 Calories Can Handle from Your Organic Gardening Guide.

Post and photos by Mikaela D. Martin: Blooming Glen CSA member since 2005, board-certified health counselor, and co-founder of Guidance for Growing, an integrative wellness practice in Souderton. Read more about healthy eating and living on her site, http://guidanceforgrowing.com!

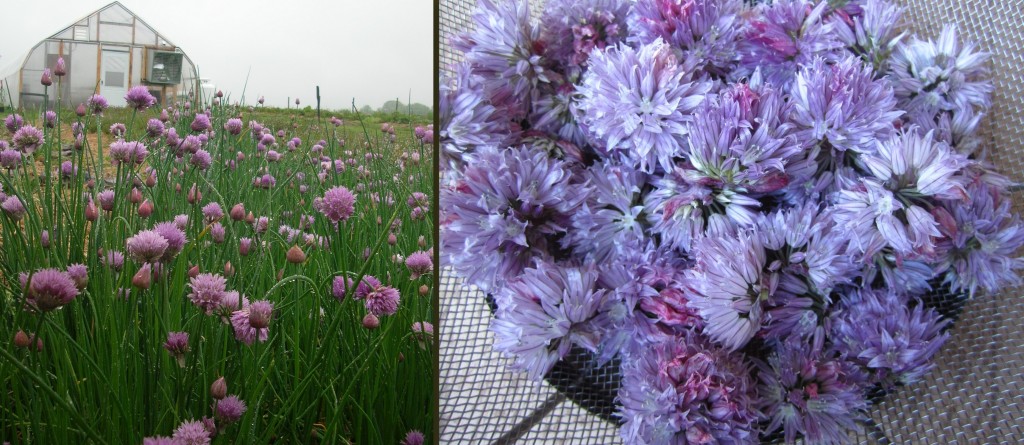
In the Discovery garden at the CSA you’ll find the wonderful edible flowers, chive blossoms. Neighboring farmer friends of ours have been selling chive blossoms for years to chefs, where I imagine the blossoms are sprinkled on soups, garnished on salads and mixed with goat cheese. I was delighted to discover on Marisa McClellan’s Blog, Food in Jars, a very simple home recipe for what to do with these beautiful springtime treats.

Chive Blossom Infused-Vinegar

First harvest or purchase one bunch of the purple chive blossoms. Next, remove the blossoms from the stem, soak in a bowl of cold water to remove any bugs or dirt, and then drain well. You can use a salad spinner to dry them, or leave in strainer for a few hours to air dry.

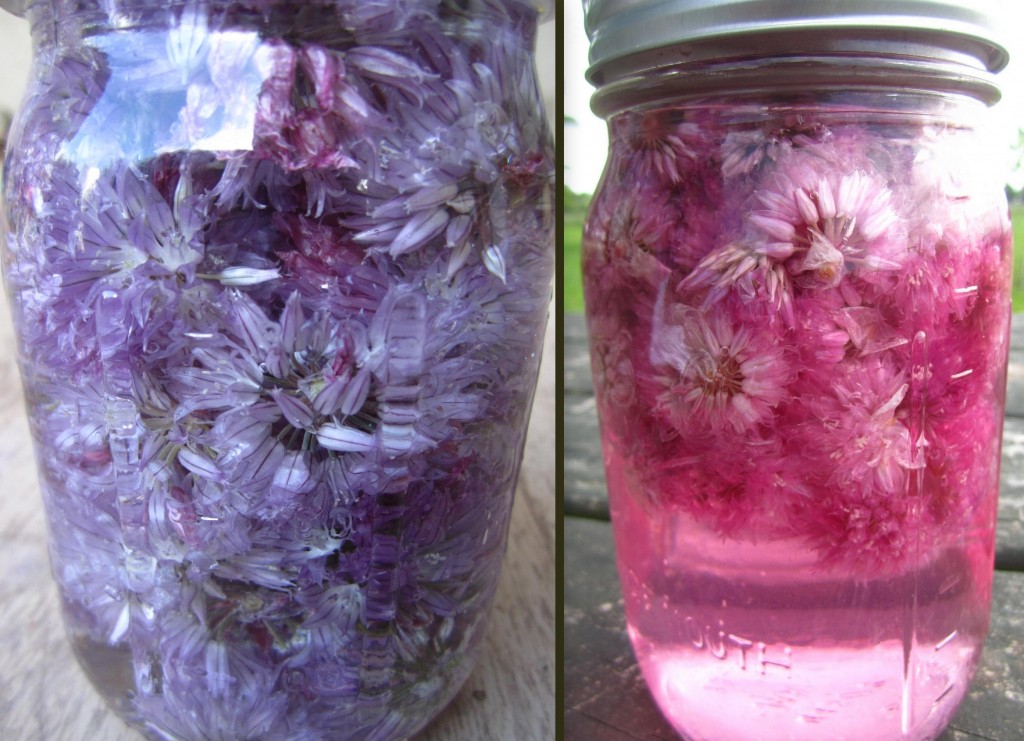
Then pack a mason jar 2/3 full of the blossoms and cover with raw apple cider vinegar or white vinegar (raw apple cider vinegar has more health benefits than the white vinegar, however you won’t get the same colorful results as shown in the photos below)- you can use a pint or quart size jar depending on how many blossoms you have. Leave the vinegar in your pantry in a cool, dark place for 2-3 weeks for a chive flavored vinegar.

Within just a few days the vinegar has turned a gorgeous bright pink and has a wonderful onion aroma. The longer you leave it to infuse, the stronger the chive flavor will be. Strain out the blossoms when ready to use. This vinegar can then be used as a base for salad dressings or marinades. I love to use it in my potato salad, in place of raw onions which Farmer Tom doesn’t love, the chive blossom vinegar gives it a more subtle onion flavor. You can also read a recipe posted on the blog last spring for Escarole Salad with Fennel and Orange that uses chive vinegar.

Photos and text by Tricia Borneman, Blooming Glen farmer and co-owner.

So what’s the deal with pea shoots anyway? Their delicate leaves, curly-cue tendrils and succulent stems are popping up everywhere: at farmers markets, in CSA shares, and at your local health food stores. Pea shoots have long been prominent in Asian cuisine, but there are a few reasons for their newfound popularity.

For one, tender pea shoots tempt us with the promise of Spring, and with it warm weather and spring vegetables harvested from newly awakened soil. Even better, with a kid-friendly delicious flavor, pea shoots taste like fresh-from-the-vine peas, but much younger and sweeter.

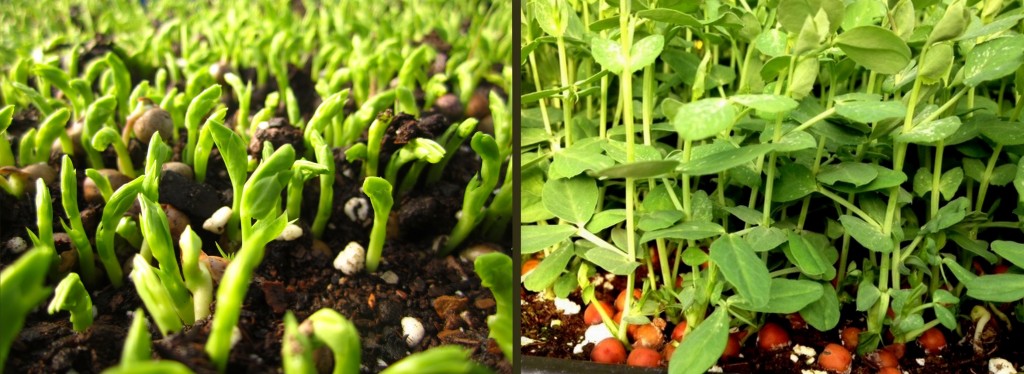
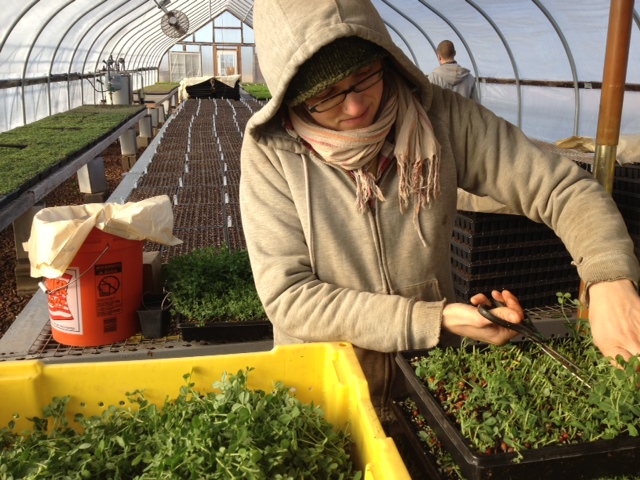
Another reason they’ve become so popular is those crafty farmers of yours are always looking for something they can grow quickly and easily. Pea shoots offer the flavor of a pea, but can be harvested in just 10-21 days, depending on the time of year. At Blooming Glen Farm they are grown in trays of soil, on benches in a heated greenhouse, providing a nutrient dense crop that can be succession grown through the cold winter months.

So how nutritious are these little sprouts?  For just 10 calories and no fat, take a look at the nutrients in 2 cups of raw pea shoots: 35.5% of your recommended daily intake of Vitamin C, 15% of Vitamin A, 8.75% of Vitamin E, 132% of Vitamin K, 10.5% of Folate, 5.75% of Thiamin, 7% of Riboflavin, and 4.75% of Vitamin B-6. Pea shoots are also packed full of carotenes— strong antioxidants that protect cells from damage and help prevent certain diseases.

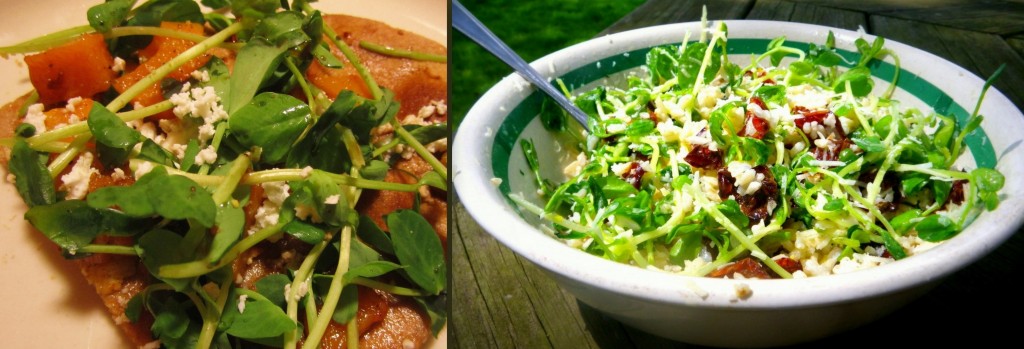
So now that we’ve established that they are both nutritious and delicious, how do you cook with them? Most simply- enjoy raw in a fresh salad; they can take the place of lettuce or simply enhance any mix of greens with the pea shoot’s spring flavor. I love to add toasted walnuts, dried cherries and cranberries, and a warm vinaigrette, or for a quick side, serve a mound of pea shoots with just a squeeze of lemon. You can also easily swap them in for any soft, leafy green in a recipe- they cook very similar to baby spinach. Lightly stir-fry them with sesame oil and garlic or wilt them into any pasta dish or risotto, contributing a bright fresh taste. Another option: add pea shoots to a soup or scrambled eggs near the end of the cooking time. Check out our blog for a recipe for flatbread topped with butternut squash, goat cheese and pea shoots or Ensalata di Roso (Rice salad) with Pea tops.

To prepare and store pea shoots, there are just a few things to know. As a delicate green, it’s best to eat them within just a few days of purchase. They should be stored in the fridge like you would lettuce; and when ready to eat, coarse or yellow stems removed, and the pea shoots rinsed in cold water and drained to let dry.

This time of year, Blooming Glen Farm’s pea shoots can be found at the Easton Farmers Market Winter Mart on Saturdays from 10-1pm at the Nurture Nature Center, and at the Bucks County Foodshed Aliance’s Wrightstown Winter Farmers Market on the fourth Saturday of the month from 10-11am. And thanks to a new Healthy Eating Initiative spearheaded by a committed parent, pea shoots from Blooming Glen Farm made their way to the salad bar last week at Durham Nockamixon Elementary School in Palisades school district. A few new pea shoot converts were made!

Photos and text by Tricia Borneman, Blooming Glen farmer and co-owner. Ensalata di Rosa photograph by Kate Darlington.

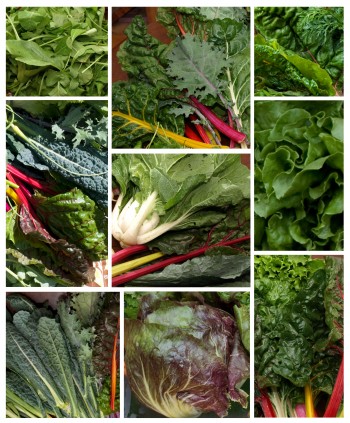
Greens, glorious greens!It’s a gray February and we’re smack in the middle of winter, the colorful and nutritious Blooming Glen Farm bounty providing only a distant memory of warmer and tastier times… sigh. This time of year can be a real downer!  Lucky for us, there’s an easy way to boost our winter wellness while we await the new CSA season: Greens, glorious greens.

We’ve espoused the value of greens here before, and we’re happy to do it again. Simply put, there’s no better or easier way to boost your diet than to add some dark, leafy greens. They provide cancer-fighting vitamins and minerals, the fiber we need for heart and digestive health, and assistance to our body’s detoxification processes. All of which helps us feel lighter, gives us energy, and protects our health, making them an important element to winter wellness.

Of course, nothing beats Blooming Glen Farm greens- they have some limited offerings at the Easton Farmers Market winter mart, but during this coldest time of year, if your farms or markets don’t have any, supermarket offerings will do ;). Common varieties of greens found at the grocery store include collards, kale, mustard greens, arugula, spinach, escarole, and Swiss chard. Here in the blog, you can check out several greens recipes, listed below. There’s also a great “Guide to Leafy Greens” at RealSimple.com, and an informational post on greens (nutrition and variety info, how to select, store and prepare, links to recipes, etc.) on the Guidance for Growing website.  Surf the resources and recipes and commit to adding an extra serving of greens to your diet to help ward of the winter blahs!

Blooming Glen Farm Beet greens recipes:

Post and photos by Mikaela D. Martin: Blooming Glen CSA member since 2005, board-certified health counselor, and co-founder and -owner of Guidance for Growing, an integrative wellness practice in Souderton. Read more about healthy eating and living on her site, http://guidanceforgrowing.com!

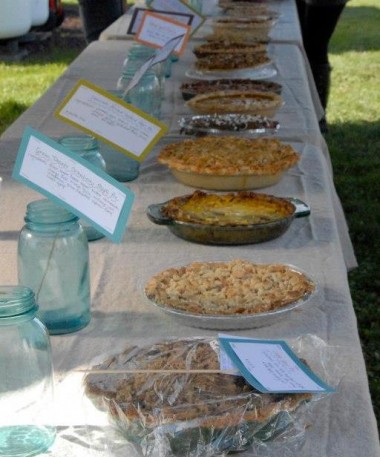
The real winners of Blooming Glen Farm’s third annual pie bake-off contest were all of us tasters who had the chance to sample the 15 mouth-watering pie entries, including “Green Tomato Cranberry Maple”, “Wild Foraged Paw-Paw”, “Asian Pear and Ginger”, “Butternut Squash and Pecan”, “Chocolate Almond Custard Pear” and “Crab Apple”. With almost 100 people tasting and voting, the following three pies were the top winners.

Maple Custard Pie with Candied Bacon, by Michelle Guerriero, First Place and the trophy winner!
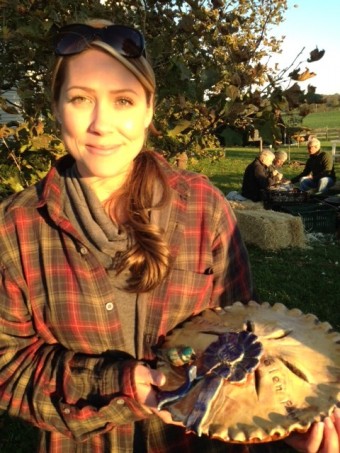
First place winner Michelle with the trophy, to be held for one year and passed on to next year's winner

“I love cooking, but have less of a passion for baking. As I pondered the type of pie I was going to bake for the contest, I decided to join my two favorite flavor profiles in cooking: sweet and savory. Somehow candied bacon came to mind. Slowly, the creation started coming together. I thought, ‘what goes better with bacon than maple?’ Voila: Maple Custard Pie with Candied Bacon was conceived. I didn’t plan to put the whipped cream on, but I had extra heavy cream, so I whipped it up with some maple syrup and nutmeg. I’m glad I did, as I think it made a ‘light’ (not ‘lite!’) element to the pie. I will admit, I played a little dirty including bacon in my pie. I mean, who can lose with bacon?! In any case, I’m glad people liked it. It gives me some motivation to cultivate my baking skills!”- Michelle Guerriero

Pie Crust:
1 1/2 cups organic flour
1/2 cup lard (I used Ledamete Grass Farm’s lard)
pinch of salt
4 tablespoons ice cold water

Add flour and salt in food processor, pulse. Add lard, pulse until blended. Add cold water 1 tablespoon at a time until pearl-size beads form. Dump on lightly floured surface, roll into ball, wrap in plastic and refrigerate for 1 hour. Take out, roll, then mold into pie pan.

Filling (from smittenkitchen.com):
3/4 cup maple syrup (organic)
2 1/4 cup heavy cream (organic)
4 egg yolks (organic)
1 whole egg (organic)
1 teaspoon salt
1 teaspoon freshly grated nutmeg
1 teaspoon vanilla extract (organic)

In a medium saucepan, bring maple syrup to a low boil. Stir in cream and bring to simmer, making small bubbles form on side, but do not bring to a full rolling boil. Remove from heat.

In a standing mixer (or by hand, if you choose), whisk together egg yolks and egg. Add vanilla extract, salt and nutmeg. Keeping the whisk at a medium-high speed, slowly add the cream mixture to the eggs. Strain the mixture through a fine-mesh sieve and pour the hot mixture into your pie crust.

Bake at 325 degrees until firm to touch but jiggles slightly when moved, about 30-45 minutes (depending on the depth of pie it could be longer). Let cool to room temperature.
Whipped cream:
heavy cream (organic)
maple syrup (to taste)
grated nutmeg (to taste)

Whip until soft peaks form.

Candied bacon:
8 pieces of thinly sliced bacon or pancetta (I used all-natural pancetta from Whole Foods)
maple syrup (organic)
brown sugar (organic)

Preheat oven to 350 degrees.

In one bowl, pour about 1 cup maple syrup. In a separate bowl, add approximately 1 cup brown sugar. One at a time, dip the bacon in the maple syrup, removing excess syrup from bacon with your fingers, then dip in the brown sugar to coat. Place on baking sheet with non-stick foil or parchment paper. Repeat with all pieces (doing two batches if there’s not enough room on the pan). Place parchment paper over top of the bacon and top with another cookie sheet. This will help keep the bacon flat while baking.

Place in oven for about 20 minutes. Check under top layer of parchment paper for doneness. They should be golden and done (not fatty). If they still look “fatty,” just give them more time. Remove and place on a separate piece of parchment paper. They will firm up more as they dry and the maple/brown sugar hardens.

To assemble:
When pie is cooled to room temperature, add whipped cream on top in a layer. Then add crumbled bacon over whipped cream (you could even place one piece of bacon per slice for presentation).

Almond Pear Pie with Raspberry Glaze by Bernadette Rodrigo, Second Place.

“I developed this recipe by mixing components from various sources. I chose to use pears because they are a wonderful seasonal fruit and often over shadowed by apples. I wanted to duplicate the rich almond filling found in European pastries and the raspberry glaze gives this pie an extra burst of fruit flavor.”- Bernadette Rodrigo

The pie tasting line.

Pie Crust:
2 1/2 cups flour
1/3 cup sugar
2 sticks chilled butter
3 egg yolks
4 tablespoons ice water

Combine flour and sugar. Chop butter into 1/2-inch squares and add to flour mixture. Using a pastry cutter or your fingers, blend until it resembles course meal. In a small bowl lightly beat egg yolks and water. Add liquid to the flour mixture, tossing with a fork, until evenly distributes. Mixture will be crumbly. Use hands to press the dough into a ball. Turn out onto counter top and kneed a few times, smearing the butter forming the dough into a ball. Flatten into a disc. Wrap and refrigerate.

Poached Pears:
1 cup sugar
4 cups water
1/4 cup raspberry preserves
1 tablespoon orange blossom water
4 pears, peeled, halved and cored

Combine first four ingredients in a large pot. Bring to a boil, then lower to a slow simmer. Add pears and simmer 10 minutes. Turn off heat and allow pears to soak 10 more minutes. Then remove pears from pot and allow them to cool. Reserve poaching liquid.

Filling:
1/2 cup blanched almonds, finely ground
1/3 cup sugar
2 tablespoons flour
1/2 cup heavy cream
2 egg yolks
1 tablespoons dark rum
1 teaspoon vanilla
1 teaspoon almond extract

Mix all ingredient until well combined.

To assemble:
Roll out pastry dough into pie pan. Cover with almond filling. Slice pears and arrange on top. Bake at 400 degrees for 35-40 minutes. Crust and filling will brown. While pie bakes make glaze.

Raspberry Glaze:
3/4 cup raspberry preserves
2 tablespoon poaching liquid

Combine in sauce pan over low heat. Stir to incorporate ingredients. When mixture comes to a boil, remove from heat. Use a pastry brush to gently paint glaze over hot pie. Allow pie to cool completely. Enjoy!

Pecan Pie, by Corbin Williams, Third Place.

A classic, Corbin’s pecan pie comes from his mother’s recipe. It arrived at the contest still warm and gooey from the oven.
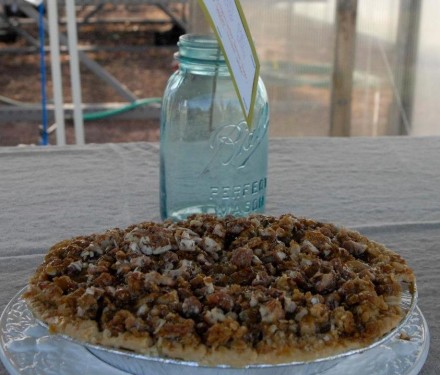
Apple Caramel Pie with Pecans by Meredith Stone

Pastry for one 9-inch pie crust
3 eggs
2/3 cup sugar
1/2 teaspoon salt
1/3 cup butter
1 cup dark or light corn syrup
1 cup pecan halves or broken pecans

Heat oven to 375 degrees. Prepare pastry. Combine eggs, sugar, salt, butter and syrup; beat thoroughly. Stir in nuts. Pour into pastry-lined pie pan. Bake 40-50 minutes or until filling is set and pastry is nicely browned. Cool and enjoy.