Recipes

According to Ayurvedic tradition, every meal should contain all six tastes: sweet, sour, salty, bitter, astringent, and pungent. Leaving one out will leave us unbalanced and under-nourished. Have you ever felt unsatisfied at the end of a meal, even though you are completely full? You were probably missing one of these key tastes.

We obviously don’t have a problem getting in the sweet and salty, but I know I shy away from the bitter. However, bitter foods have tremendous health benefits. They have a drying and cooling effect on our bodies (and what could be better in the recent heat and humidity?). They cleanse and detoxify our immune systems. They also help to manage food cravings.

I have to admit, I’ve been nay saying escarole for a while now – its bitter taste didn’t appeal to me and with so many other vegetables to choose from, it has been easy to leave escarole off the plate. But this week, I was reminded of the Ayurvedic taste-balancing philosophy, and was inspired to face my escarole fears.

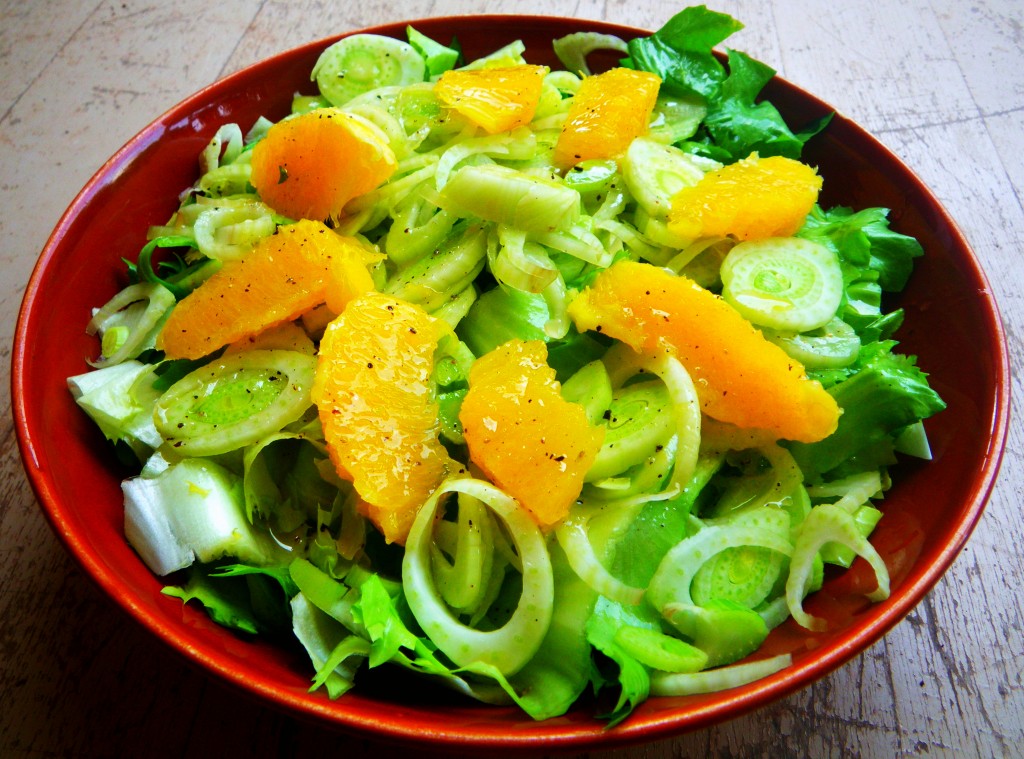
Typically, escarole is eaten cooked, which diminishes its bitterness, but I couldn’t bear the thought of preparing a hot dish in this weather. This salad balances the bitterness of escarole with sweet fennel and oranges, pungent chive blossom vinegar, and rich olive oil.

Escarole Salad with Fennel and Orange

Chop or tear the leaves of one head of escarole, removing any yellowed outer leaves, much like you would a head of lettuce.

Cut off the stalks and bottoms of three bulbs of fennel, thinly slicing the bulbs across their width. To supreme (a fancy chef word for section) two oranges, first peel them with a paring knife, making sure to remove the white pith. Holding an orange over a bowl to catch the juice, slice between the white membranes of each segment, lifting the slice of orange out with the knife.  Save the juice and toss orange segments with the fennel and escarole.

In a small bowl or measuring cup, whisk together reserved orange juice with two tablespoons chive blossom vinegar*, ¼ cup olive oil, one teaspoon salt, ½ teaspoon fresh ground pepper. Pour the vinaigrette over salad and toss.  

*To make this simple infused vinegar, stuff a jar full of cleaned chive blossoms. Pour distilled white vinegar over the blossoms and leave to steep for at least one week. If you don’t have it or can’t make it, replace the vinegar in the salad recipe with white wine vinegar and add a sprinkle of chopped spring onions or whole chive blossoms to the salad.

Text and photography by Kate Darlington – Blooming Glen Farm second year intern, Colorado native, and food lover. 

One of the most frequent questions we get at the CSA pick-ups and farmers markets is what to do with pea tops (also called pea shoots or pea tendrils). The question should really be: what can’t you do?

You can eat them raw in salads and by the handful, throw them in a stir-fry, or put them on top of a flatbread. This recipe for rice salad is another that works great with the fresh and tender pea tops.

Rice salad is a staple summer lunch in Italy. When I was a nanny there, my host mother taught me this great trick for quick, wholesome, and fresh lunches. Make a pot of rice the night before so it has time to cool for lunch the next day. Come lunchtime (or in the morning when you are packing up for work, school, etc), you can throw together a delicious, hearty salad with whatever you’ve got on hand. 

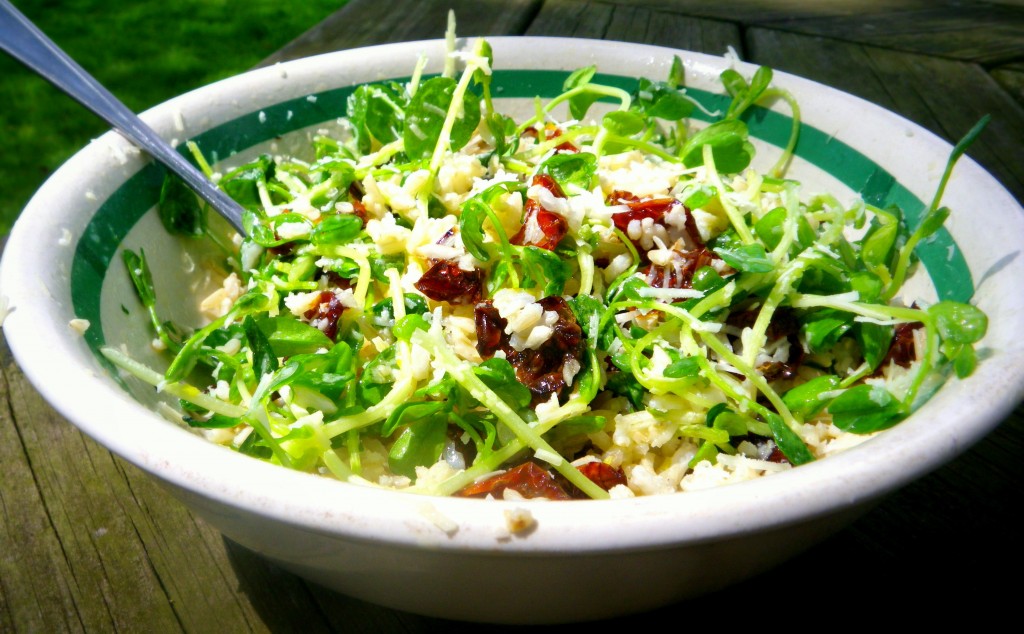
I replace typical white Italian rice with whole-grain brown rice for a more nutritious spin. This incarnation uses some oven-dried cherry tomatoes that I preserved last year, but any “sun-dried” tomato will do. 

Ensalata di Riso (Rice Salad) with Pea Tops

Make a simple dressing by whisking together 1/3 cup olive oil, juice of one lemon, one clove of garlic, and salt to taste.

Toss a ½-pound bag of pea tops, 2 cups cooked brown rice, ½ cup sundried or oven-dried tomatoes, and ¼ cup grated Parmesan cheese with the dressing.

It’s as simple as that!

Text and photography by Kate Darlington – Blooming Glen Farm second year intern, Colorado native, and food lover.

Hooray for the start of the CSA! I can finally start eating my vegetables again. Of course we have all been anxiously waiting for the familiar stand-bys, but one of my favorite things about getting vegetables from the CSA share is the variety of new vegetables that it exposes me to.

This week, we’ve got two veggies you might not be familiar with cooking: Tatsoi and Hakurei Turnips.

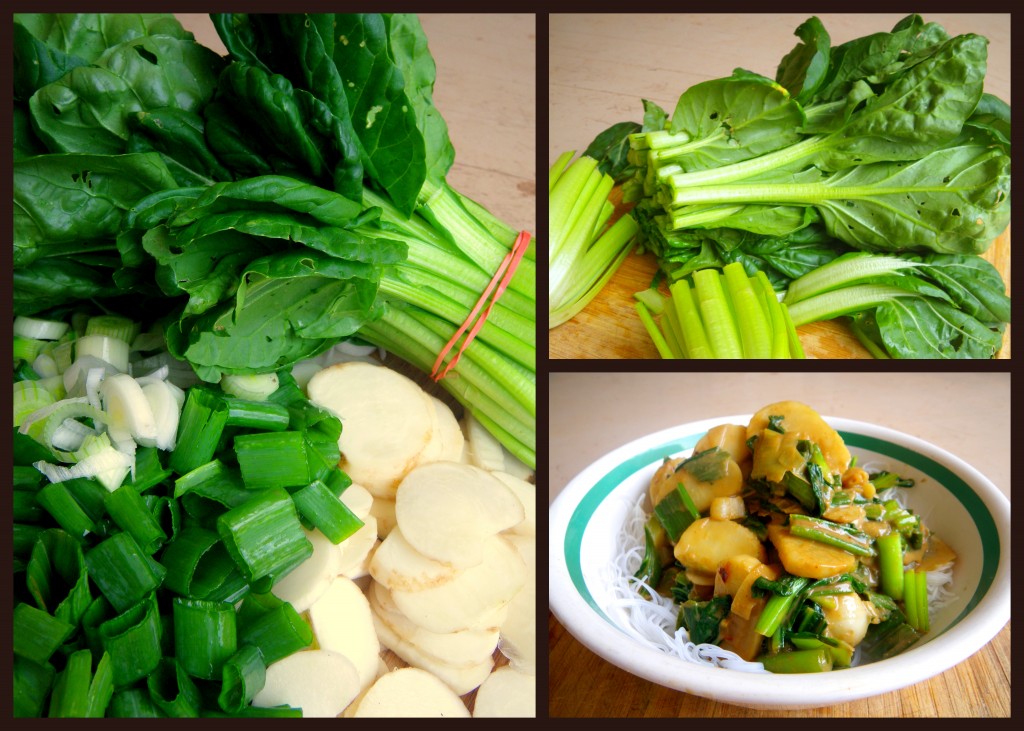
Tatsoi is an Asian cooking green closely related to bok choy. Its nickname is “spinach mustard,” which is appropriate since it has a spinach-like texture, and a mild mustardy flavor. It can be eaten raw in a salad, steamed, stir-fried, or thrown in a soup.

Hakurei (pronounced hawk-ur-eye) turnips are also Asian in origin. Sweet and tender, they are nothing like a big purple-top turnip you may be familiar with. No need to peel or cook, they can be eaten raw if you want. They do have a mild spiciness reminiscent of their cousin the radish. The greens can also be sauteed, but they tend to be on the bitter side.

Spring Stir-fry with Tatsoi and Turnips

To prepare hakurei turnips, trim the greens and the little roots from the bulbs of one bunch of turnips. Slice the turnips thinly.

In a very hot wok or large frying pan, melt one tablespoon coconut oil (or other vegetable oil). Add prepped hakruei turnips and one bunch of spring onions (including the green parts, roughly chopped). Stir-fry until turnips are tender, about 4 minutes.

While turnips and spring onions are cooking, roughly chop leaves and stems of one bunch of tatsoi. Add to hot pan and cook until stems are tender and greens are just wilted, about 2 minutes. Remove from heat.

Toss vegetables in 2 tablespoons peanut butter, 3 tablespoons soy sauce, 1 tablespoon sesame oil, and 2 teaspoons light vinegar (such as rice wine vinegar, apple cider, or white wine vinegar). For the spice lovers out there, try adding a sprinkle of red pepper flakes. Serve over quick-cooking rice noodles or hearty brown rice. For more protein as a main dish, add stir-fried chicken or tofu.

Serves 2 as a main dish, 4 as side dish

Text and photography by Kate Darlington – Blooming Glen Farm second year intern, Colorado native, and food lover.

Radishes are one of the first crops to pop up in the spring—a sign that warm days are coming and heavy winter eating is coming to an end. They’ve got a crisp crunch and bright spice, but somehow still have a root-crop earthiness about them.

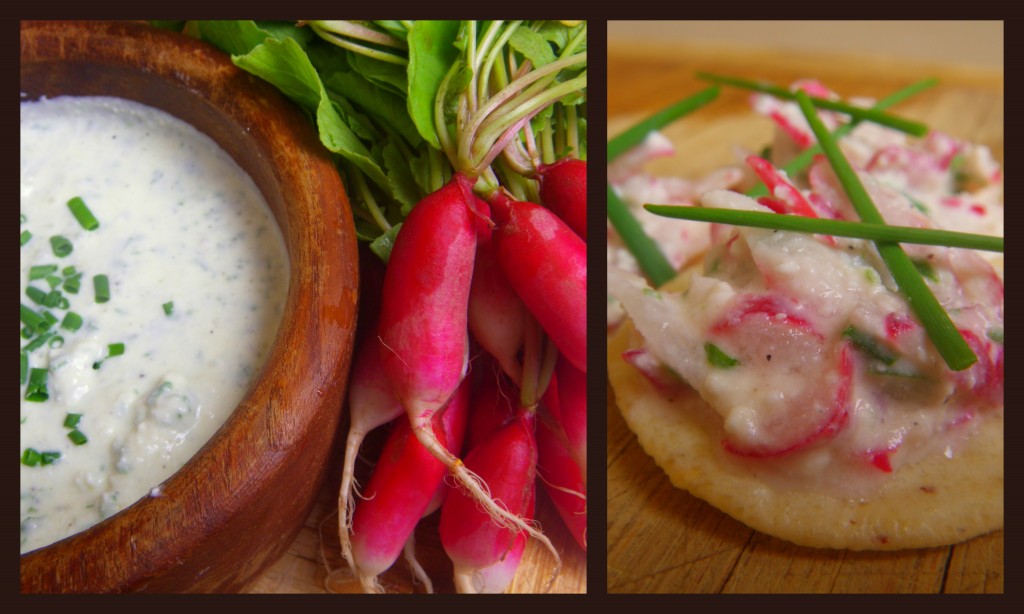
Crudités is just a fancy way of saying raw, bite-sized vegetables served with a dipping sauce. In this recipe, that slightly spicy bite of the French breakfast radish pairs perfectly with creamy and salty feta. 

Radish Crudités with Creamy Feta Dip

– Wash and cut the greens off 1 bunch French Breakfast Radishes. (Reserve greens for another use.)

– In a food processor, combine:
1 cup crumbled feta cheese
1/2 cup plain yogurt
juice of 1 lemon
2 minced garlic cloves (or two stalks green garlic)
a handful of chopped chives (or scallions)
pepper (to taste)

– Pulse ingredients into a creamy consistency.  Serve as a dip for radishes and other raw veggies.

Alternatively, you can make a thicker spread with a pop of color by mixing a ½ bunch of grated radishes into the feta dip. Serve on top of a piece of crusty bread or (in my case) some gluten-free crackers.

Text and photography by Kate Darlington – Blooming Glen Farm second year intern, Colorado native, and food lover.

Friends gather weekly to cook and share the farm bounty. I hope you are inspired as I was by this creative idea from CSA member Judie Much, as well as her wonderful recipe for Roasted Fennel with Parmesan.

When my husband, Dave, and I began thinking about investing in a share at the CSA, we realized that the two of us could not eat all of the food ourselves.  Luckily, we have surrounded ourselves with self-proclaimed “foodie” friends.  At least weekly, this group (can be anywhere from 6-13) gathers for food and fun at one of our houses.  The host usually decides and provides the main part of the entree and the rest of those who attend contribute sides, salad, appetizers, or dessert.  We wondered- would anyone be interested in splitting a CSA share?  Two couples voiced an interest, allowing the share to be divided into thirds. 

In our first year of CSA membership, we divided the share into thirds and our group met as usual on a weekly basis with each of the three of us who had acquired veggies contributing as we saw fit.  But alas, separating our food in this manner really restricted what we could provide for a larger group.  So this past year, the suggestion was made that whoever picked up the share, would plan and create a “CSA Dinner”, generally attended solely by the three couples who owned the share. What a wonderful experience this has been. The food amount is easily sufficient for six, and the items not used are divided between the three couples for the rest of the week (and there was ALWAYS a lot left!).

So what kind of meals did we create?  Space does not permit, nor can I remember all of the wonderful meals we had, but one of our most memorable was early in the season and was hosted and prepared by our friend, Dave.  In our share we found cantaloupe, turnips, zucchini, summer squash, beets, fennel, herbs, and spring onions.

First Course: Dave started the meal with cantaloupe, yogurt, and blueberries. 

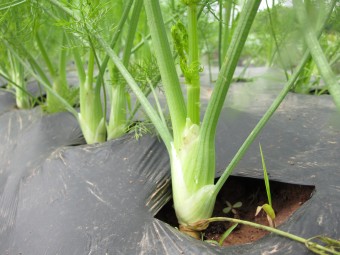
Second Course: Grilled chicken, grilled turnips and beets (who knew you could grill slices of raw turnips and beets and have them cook in a few minutes?).  Dave also made a potato salad which included grilled summer squash and zucchini, as well as the potato!  And did you know that if you slice fennel very thin and roast it with olive oil, kosher salt and parmesan cheese, that people eat it like candy?  It’s true!

Dessert course: Grilled cantaloupe in a hot caramel sauce served with Owowcow vanilla ice cream.   What more could you ask for?  Perhaps a recipe?  Needless to say, we will continue this fine tradition this year.

Roasted Fennel with Parmesan

Recipe courtesy Giada De Laurentiis
Prep Time: 10 min
Cook Time: 45 min
Level: Easy
Serves: 4 to 6

Preheat the oven to 375 degrees F. Lightly oil the bottom of a 13 by 9 by 2-inch glass baking dish.

Take 4 fennel bulbs, and cut horizontally into 1/3-inch thick slices, fronds reserved. Arrange the fennel in the dish. Sprinkle with salt and freshly ground black pepper, then with 1/3 cup freshly shredded Parmesan.  Drizzle with 4 tablespoons olive oil. Bake until the fennel is fork-tender and the top is golden brown, about 45 minutes. Chop enough fennel fronds to equal 2 teaspoons, then sprinkle over the roasted fennel and serve.

Written by Judie Much, a happily retired Oncology Nurse Practitioner who lives in Ferndale, Pa with her husband David. She and David are members of a group of neighbors who love to cook, laughingly called “The Ottsville Eight.”

To make this low-tech lacto-fermented sauerkraut, no special equipment is necessary, just a couple of jars with lids. For the veggies in this recipe, visit Blooming Glen Farm this weekend at the Wrightstown Mini-Market on Saturday, January 14th from 10-11am. They will have available their super sweet greenhouse grown carrots, field cabbage and more!

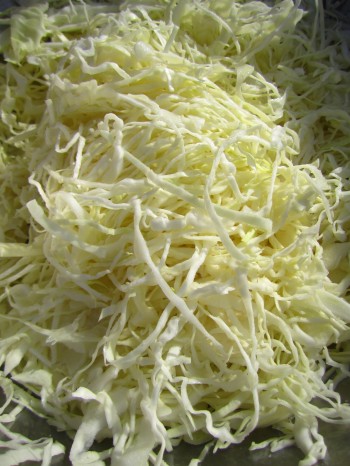
Shredded Cabbage

Chop fine 1 medium-large green cabbage (or equivalent).
Shred one carrot (optional) and mix in with the cabbage in a big bowl.
Sprinkle 1-2 tablespoons of natural, non-iodized sea salt over the veggies and stir it in. Taste a piece of cabbage– it should taste good and salty, like the ocean. If not add more salt.
Add 1/4 teaspoon caraway seeds and a few juniper berries (optional).

With a mallet or potato masher, pound your cabbage in the bowl for several minutes until it is nice and bruised to help water escape. Let rest for a few minutes with a plate and weight on top, go back and pound for a few minutes, and so on. When the mixture is too watery to pound well, you’re ready to jar it.

In 2 or 3 wide-mouth quart jars (or whatever size jars you have), pack in your kraut mixture as firmly as you can. You can do this with clean hands or handy kitchen utensils. Pour the remaining liquid equally into the jars. There should be enough liquid to cover your cabbage– if not, make a little more salty water and pour it in. Be sure to leave a couple of inches of head space at the top of each jar because kraut needs room to expand– otherwise it will fizz cabbage juice all over your counter top or even worse, your jar will explode. When everything is packed in and submerged, screw on your lids. 

Leave the kraut to ferment on your countertop for 3-5 days (or more depending on taste). It will ferment faster in warmer weather. Check on the contents every day or so and mash the cabbage back under the liquid with a spoon. It should smell cabbagy but sweet– an offensive rotting odor means your ferment has gone awry and you’ll need to start over– try more salt or liquid next time, which helps favor the beneficial lactobacilli bacteria that do the fermentation magic.

When the kraut is to your liking store it in the fridge where it can last several months.

Recipe submitted by Grace Rollins.
Grace Rollins, M.S., L.Ac. is a licensed acupuncturist and a candidate for certification as a Nutritional Therapist. She is the owner of Bridge Acupuncture and Natural Health in Doylestown, PA (www.bridgeacupuncture.com), leader of the Bucks County Chapter of the Weston A. Price Foundation (www.westonaprice.org), and an avid cook, athlete and martial artist. She joined her first CSA in 2002.

Roasted Potatoes, Sweet Potatoes & Turnips with ShallotsRoot vegetables are known for their comforting taste and grounding qualities. Nothing quite satisfies like the smell and warmth of home-roasted carrots or mashed potatoes for dinner, right? In addition to being tasty comfort food, root vegetables also have a unique nutrition profile.

Of course, exact nutritional values depend on the variety (you can visit www.nutritiondata.com for specific information), but here is some general nutrition info:

  • One cup of cooked celeriac, radish or turnip has 25-42 calories, while beets, burdock, parsnip or rutabaga has 66-110 calories.
  • All of the common varieties (carrots, potatoes, beets, celeriac, daikon radish, parsnip, rutabaga, and turnip) are all very low in saturated fat and cholesterol.
  • All are a good or very good source of dietary fiber.
  • Beets, radish, rutabaga and turnip have higher sugar contents.

Because root vegetables function as the energy storage organ in a plant, they are nutrient dense. Common nutrients include folate, magnesium, manganese, phosphorus, potassium and vitamins B6 and C.

The recipe below calls for roasting potatoes, sweet potatoes and turnips — simply because I wanted to warm up the house. Root vegetables are also great in soup and as a mash. Try adding diced celeriac to minestrone soup or turnips to potatoes for a mash. Also, most root vegetables are interchangeable, just keep in mind that sweet potatoes cook faster than the others.

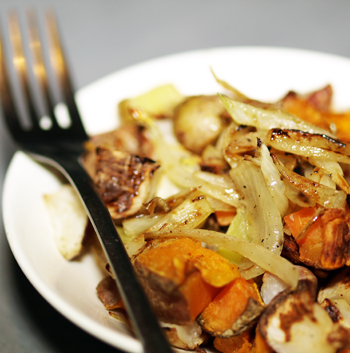
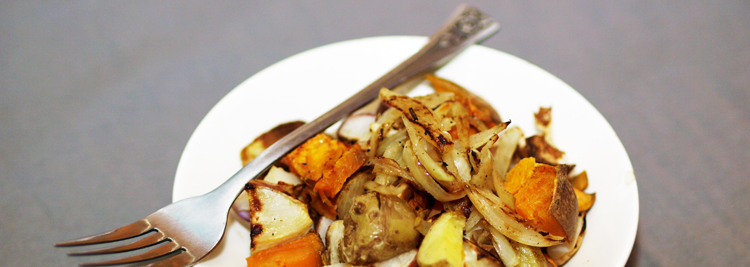
Roasted Potatoes, Sweet Potatoes & Turnips with ShallotsRoasted Potatoes, Sweet Potatoes & Turnips with Shallots

Preheat oven to 400-degrees, and line a cookie sheet with foil. Cut into chunks 1 cup potatoes and 1 cup turnips and toss in a bowl with 1 tablespoon grapeseed oil and then spread onto the cookie sheet. Sprinkle with salt and pepper and roast for 15 minutes.

Add to the bowl 1 cup sweet potatoes, cut into chunks, and toss to coat with remaining oil. Mix the sweet potatoes with the other veggies and roast for an additional 15 minutes, until all vegetables are tender and begin to brown.

Meanwhile, lightly oil a small skillet over medium heat. Add 1/2 cup shallots, sliced very thin, and fry lightly, until they’re translucent and start to crisp. Set aside.

Top veggies with shallots and serve hot.

Post and photo by Mikaela D. Martin: Blooming Glen CSA member since 2005, board-certified health counselor, and co-founder and -owner of Guidance for Growing, an integrative wellness practice in Souderton. Read more about healthy eating and living on her site, http://guidanceforgrowing.com!

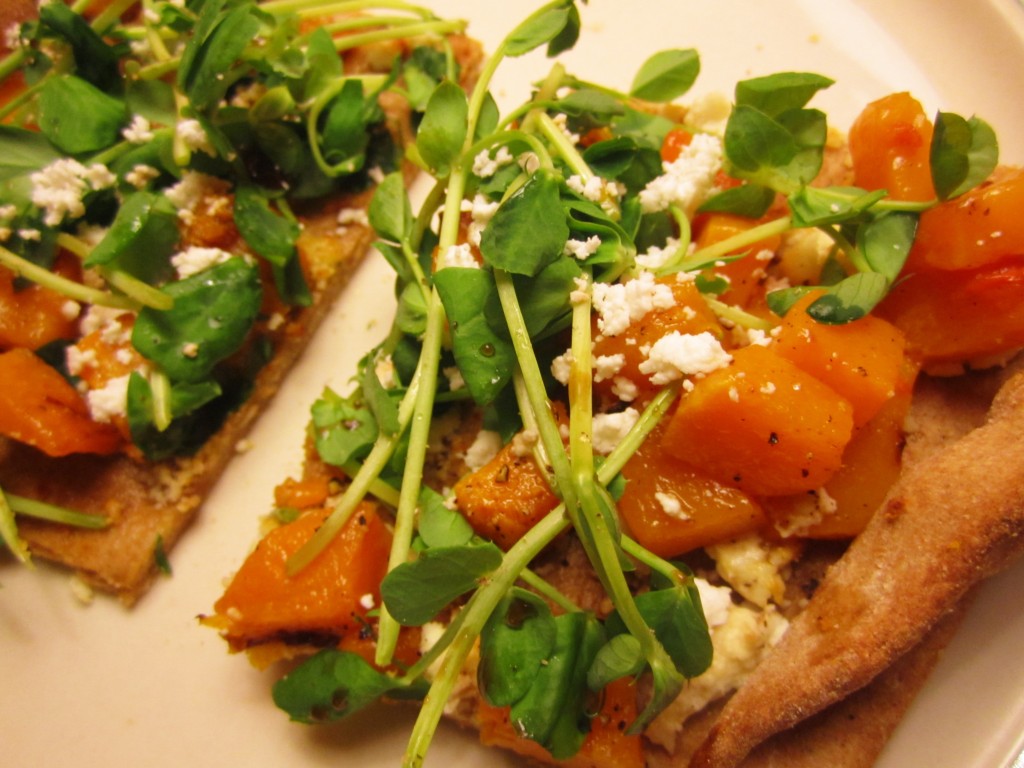
A half pound bag of pea shoots is quite a lot. You can easily enjoy the tender shoots in a delicious raw salad with lettuce and arugula. Looking for more ideas? Garnish your favorite fall soup with the sprouts or partner with fish. With a wonderful vibrant pea flavor, the tiny shoots make a fantastic topping for a homemade white pizza, or a crisp whole wheat flatbread. I love flatbreads because they are endlessly versatile and a cinch to whip up. This one combines the hearty fall flavor of roasted butternut squash with the refreshing pop of the pea shoots–a little taste of spring as we head in to winter.  


Crispy Whole Wheat Flatbread with Butternut Squash, Goat Cheese and Pea Shoots

In a medium sized bowl, mix 1/2 cup warm water with 1 teaspoon active dry yeast. Let sit for 5 minutes.

Stir in 1 1/4 cups whole wheat flour and 1/2 teaspoon salt. Knead until the dough is soft and elastic, about five minutes, adding small amounts of flour if the dough is too sticky. Let rise for about 45 minutes in a warm spot.

While dough is rising, preheat the oven to 425 degrees. Peel and dice 1 butternut squash, coat in 1 tablespoon olive oil, and roast on a baking sheet for about 15 minutes, until squash is tender and starting to caramelize on the edges. Set aside the roasted squash and reuse the baking sheet for the dough. 

When the dough has nearly doubled in size, increase the oven heat to 475 degrees. Sprinkle a cutting board or countertop with additional flour and roll the dough into a 10-12 inch circle. Sprinkle baking sheet with a bit of cornmeal, then place the dough on the sheet. Bake for about 10 minutes, until cooked through and golden brown. 

Top warm flatbread with roasted butternut squash, crumbled goat cheese, a handful of pea shoots, a pinch of salt and pepper, and a sprinkle of balsamic vinegar. Cut into wedges or strips and serve as a light lunch or stunning appetizer. **Not a fan of goat cheese? This recipe can easily be modified to compliment your family’s palette. Try roasted walnuts or pine nuts paired with butternut and a sharp cheese or crumbled tofu.

Recipe contributed by Kate Darlington – Blooming Glen Farm intern, Colorado native, and food lover.

I love putting things in my pancakes! Nuts, chocolate and bananas are some classic add-ins. Things like blueberries, strawberries, peaches are great because you can integrate seasonal fruits. However, you can even take it a step further during fall season by mixing in some veggies like sweet potatoes or winter squash into your morning breakfast regiment. A butternut and cinnamon combo is one of my favorites drizzled with real maple syrup. You can also sub in sweet potatoes for a similar flavor.

Butternut Squash Buttermilk Pancakes

-Prep your squash by peeling 1 small butternut and dice into cubes (about 1 1/2-2 cups. ) Boil in water until tender. Drain and mash with a fork. You want at least 1 cup of mashed squash. I used about 1 1/2.

In a large bowl, mix the dry ingredients:
1 1/2 cups of flour (3/4 cups of each white and wheat flour is nice)
1 teaspoon of baking powder
1 teaspoon of baking soda
1 teaspoon of salt
2 tablespoons of brown sugar
1 teaspoon of cinnamon

-Separate 2 eggs and beat the yolks in a bowl with 1 and 3/4 cups of buttermilk
**If you don’t have buttermilk on-hand you can perform a quick substitution by adding 1 tablespoon of lemon juice to milk or by mixing 1 cup yogurt with 3/4 cup milk.

-Pour egg and buttermilk into the dry ingredients and mix until combined. Pour in 6 tablespoons of melted butter. Mix again.

-Fold in butternut squash mash.

-Heat griddle and brown pancakes on each side. Make sure you don’t rush it and cook the cakes through because they tend to take a little longer than regular pancakes.

-Keep warm in the oven and serve with butter and maple syrup!

Recipe and photos by Jana Smart- Blooming Glen Farm employee and frequent creator of creative recipes using farm fresh seasonal ingredients.

Orangey Sweet & Sour CabbageCabbage is probably one of the most abused vegetables in town. On St. Patrick’s Day, it’s appearance is first upstaged by the potato, and then its nutrition is slow-cooked to near depletion. In picnic season, it’s coated with fatty oils, dressings and cream sauces. Probably worst of all, it’s reputation seems to be forever tarnished, thanks to the tiresome cabbage soup fad diet.

But, the cabbage deserves so much more than this! It’s anti-inflammatory properties are stellar, thanks to the high content of an amino acid called glutamine. In addition to promoting the digestive process and intestinal health, glutamine has been shown to be useful in all sorts of treatments including burns and peptic ulcers. Because cabbage is a member of the cruciferous family, it’s also a great cancer-fighting food. Cruciferous veggies are high in indole-3-carbinol, a chemical shown to block the growth of cancer cells, as well as stimulate DNA repair in cells. Finally, a look at cabbage’s nutritional profile shows it as an excellent source of vitamins K and C, a very good source of fiber, manganese, folate, vitamin B6 potassium and omega-3 fatty acids, and a good source of thiamin (vitamin B1), riboflavin (vitamin B2), calcium, magnesium, vitamin A, and protein.

Clearly, cabbage deserves to shine in all of our diets.  To get the most nutrition, be sure to eat it raw or fast-cooked. Cabbage is delicious steamed and splashed with balsamic vinegar, fits well into just about any stirfry, and makes a perfect wrap:

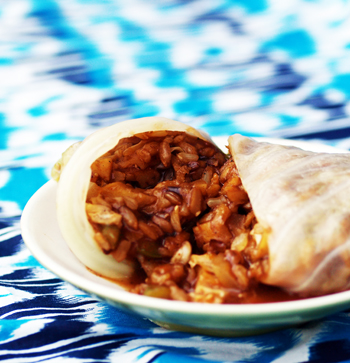
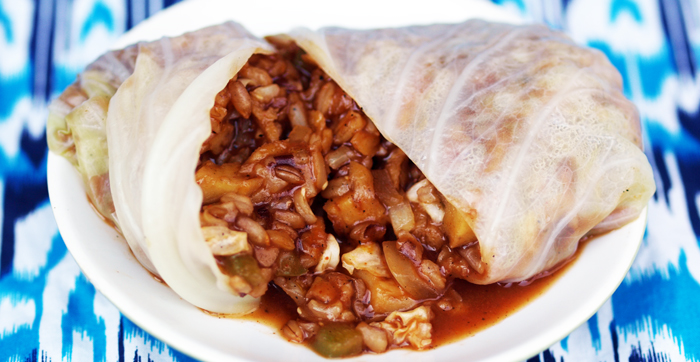
Orangey Sweet & Sour CabbageOrange Sweet & Sour Cabbage Wraps

Steam 12-15 large cabbage leaves until just tender, about 4 minutes, and set aside.

Combine sauce ingredients and set aside:
2/3 cup white vinegar
1/3 cup tamari
1/2 cup ketchup
1/4 cup agave
4 tablespoons fresh orange juice
2 tablespoons arrowroot powder or cornstarch
1 teaspoon ground ginger
1/4 tsp cayenne
zest from 1/2 orange

Heat 1 tablespoon grapeseed oil in a large skillet over medium-high heat. Add 2 cups seitan*, chopped small, and cook until crispy (about 10 minutes), stirring occasionally. *Use crumbled tempeh for a gluten-free version, or if seitan is not available.

Reduce heat to low-medium, stir in 1 1/2 cup bell peppers, chopped small, 1 1/2 cup onion, chopped small and 4 cups cabbage, thinly shredded and cook until tender, but still crisp (about 5 minutes), stirring occasionally; if mixture is sticking to pan, add a little water.

Reduce heat to low, stir in 3 cups cooked brown rice and half of the sauce, mix well and allow to thicken. Add sauce until the filling reaches your desired consistency. Remove filling from heat, scoop onto cabbage leaves and wrap ’em up!

Serve these immediately, two to three as a main dish or one as a side.  Options: Substitute peppers and rice for any veggies that are in season and grains that are on-hand.  Increase cayenne if you want to turn up the heat.  Substitute pineapple juice for orange juice and eliminate the orange zest if you want a more neutral sweet-and-sour flavor.

Post and photo by Mikaela D. Martin: Blooming Glen CSA member since 2005, board-certified health counselor, and co-founder and -owner of Guidance for Growing, an integrative wellness practice in Souderton. Read more about healthy eating and living on her site, http://guidanceforgrowing.com!