gluten free Tag

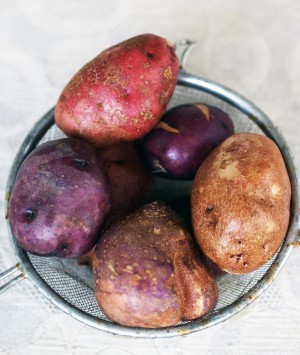
Blooming Glen PotatoesBlooming Glen Farm grows a really wonderful selection of potatoes. We’ve been introduced to a variety of potatoes this season, including Sangre, Purple Sun, Kerrs Pink and Purple Viking, along with classic Yukons. While specific nutrition may differ a bit between varieties, generally speaking, all potatoes have almost half the recommended daily values of vitamins C and B6 and potassium. The recent low-carb craze have given potatoes a bad rap in recent years, but the truth is potatoes are actually a healthy complex carbohydrate. They’re a “good” carb, meaning that they digest slowly, preventing your blood sugar from spiking like simple carbs do. The caveat: We need to eat them with their skin and prepare them as healthily as possible. So, choose the baked potato or simple mashed potatoes over the French fries and potato chips 🙂

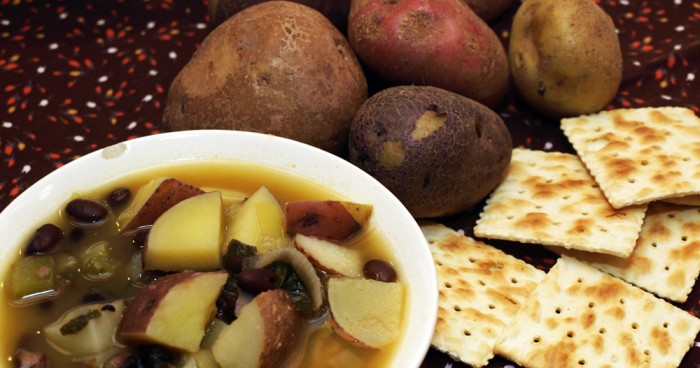
If you’re anything like me, you still have some potatoes from the last few weeks’ shares hanging out in your kitchen, and maybe even a couple different varieties. Feel free to mix and match whatever potatoes you happen to have on hand for the recipe below. This recipe is based on one of my mom’s classic soups. Growing up, we always looked forward to the first batch of her potato soup each fall — it took some of the sting out of the increasing colder weather and darker nights. In this version, I add beans, which provide a healthy boost of fiber and plant-based protein, and makes for a more filling and nutritionally complete meal. The seasonings are kept super simple, allowing the natural flavors of our fresh and local potatoes, leeks and celery to really come through.

Sam’s Potato Soup
Sam's Potato Soup
Serves 12
Ingredients

2 tbs Earth Balance
1 tsp peppercorns
1-1/2 cups leeks, cut into half moons and sliced
1 cup celery stalks and greens, diced
2 cloves garlic, minced
5-6 cups potatoes, scrubbed clean with skin left intact, cut into a large dice
1/2 tsp salt
6-8 cups vegetable or No-Chicken broth
2 cans black beans, drained and rinsed
salt and pepper to taste

Method
Heat butter in a large heavy-bottom pot. Add leeks, celery, garlic, salt, pepper and peppercorns, sprinkle with a bit of salt and stir well. Cook until veggies begin to soften, about 4 minutes. Stir in potatoes and 1/2 teaspoon of salt and mix well. Add a splash of broth and let potatoes heat up, about 3-5 minutes. Add 6 cups of broth and bring to a boil. Let simmer and cook until potatoes begin to get get tender, about 20 minutes. Remove peppercorns. Add beans and, depending on consistency of soup desired, add more broth. Cook for 5-10 minutes more. Salt and pepper to taste. Option: You can blend part of the soup with an immersion blender or in a blender for a creamier soup.

Post and photos by Mikaela D. Martin: Blooming Glen CSA member since 2005, board-certified health counselor, and co-founder of Guidance for Growing, an integrative wellness practice in Souderton. Read more about healthy eating and living on her site, http://guidanceforgrowing.com!

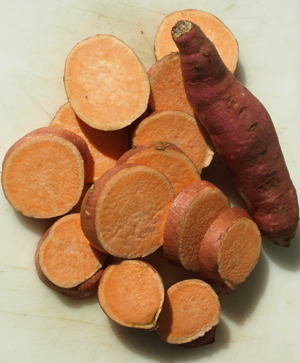
sweet potatoesIt’s hard to find a person who can’t appreciate sweet potatoes. They’re often something I recommend to clients who need to add a little more color into their diets — both literally and figuratively — because their sweet flavor, beautiful color and ease of preparation make them a relatively safe new veggie to try.  I’ve found that sweet potatoes, specifically fresh ones, have the ability to impress even the most fastidious of palates 🙂

Nutritionally speaking, sweet potatoes are most noted for providing beta carotene, which helps increase the cancer-fighting antioxidant, vitamin A in our blood. They also provide a healthy shot of fiber, vitamin C and manganese, in a low calorie, low fat, low cholesterol package.  As is the case with many fruits and vegetables, it’s important to eat the skin since that’s where many of its nutritional benefits are stored.

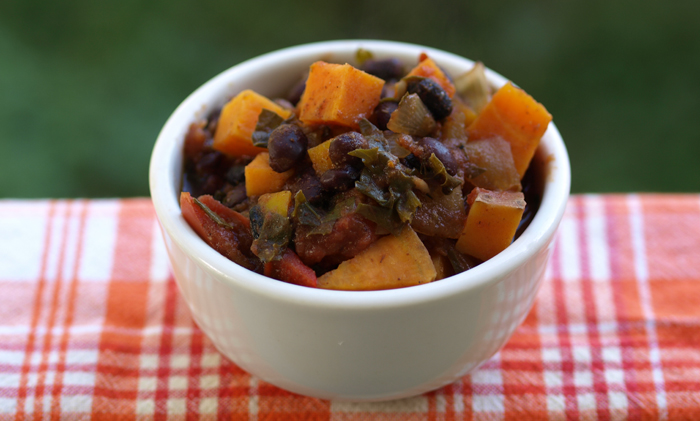
Unfortunately, we have a tendency to add far too many sweeteners in sweet potato recipes — the most classic example being, of course, the marshmallow-topped Thanksgiving sweet potato casserole! There’s nothing wrong with adding a small drizzle of maple syrup to sweet potatoes, but having these potatoes fresh in our CSA shares each week offer a great opportunity to experiment a bit and try them prepared different ways. We can simply bake them and top with a small dollop of butter, or mash them adding a sprinkle orange zest and cinnamon. They also make a good addition to soups and chilis, as seen in the chili recipe below. This chili pairs the sweet potato with savory and smokey spices, and boosts nutrition with heart-healthy black beans and one one of my all-time favorite superfoods, kale. An added bonus: In total, it uses five veggies (potatoes, kale, onion, peppers, tomatoes) from our share!

Sweet Potato Black Bean Chili

sweet potato and black bean chili

Ingredients
2 small onions, diced
3 cloves garlic, minced
1-1/2 tbsp chili powder
1-1/2 tsp cumin
1 tsp oregano
1 tsp smoked paprika
1/2 tsp crushed red pepper
2 cups chopped kale
1 cup sweet peppers, diced
3 – 4 cups sweet potatoes, scrubbed clean and diced.  Leave the skin on, but cut out any gnarly spots.
2 15-ounce cans black beans
1 24-ounce can diced tomatoes or equal amount of fresh diced tomatoes
1 cup vegetable broth
salt and pepper

Method
In a large, heavy-bottomed pot (I used a Dutch oven), sauté onion and garlic with a sprinkle of salt over medium-high heat for a couple minutes until onion begins to soften.  Mix in spices and cook for another minute. Add potato, kale and peppers and a splash of the broth and stir well.  Cover and cook for ~5 minutes until veggies begin to soften.  Add tomatoes, beans and broth, stir well and bring to a boil.  Reduce heat, cover and simmer for 20-25 minutes, stirring occasionally.  Salt and pepper to taste, serve with vegan (or dairy) sour cream and fresh cilantro.

Post sources: Nutrition Data

Post and photos by Mikaela D. Martin: Blooming Glen CSA member since 2005, board-certified health counselor, and co-founder of Guidance for Growing, an integrative wellness practice in Souderton. Read more about healthy eating and living on her site, http://guidanceforgrowing.com!

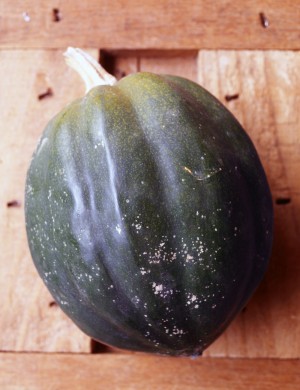
Acorn squashAutumn has arrived at Blooming Glen Farm, as noted most deliciously by the lovely winter squashes making an appearance in our shares over the last couple weeks. Autumn-time squashes, including acorn, kabocha, delicata, butternut, and sweet dumpling, are high in fiber, vitamin C, potassium and manganese (which helps or bodies absorb nutrients). They also provide vitamins A and B6, thiamin and magnesium (good for maintaining healthy blood pressure). All this nutrition is delivered in a sweet-tasting package that is low in calories, carbs and cholesterol!

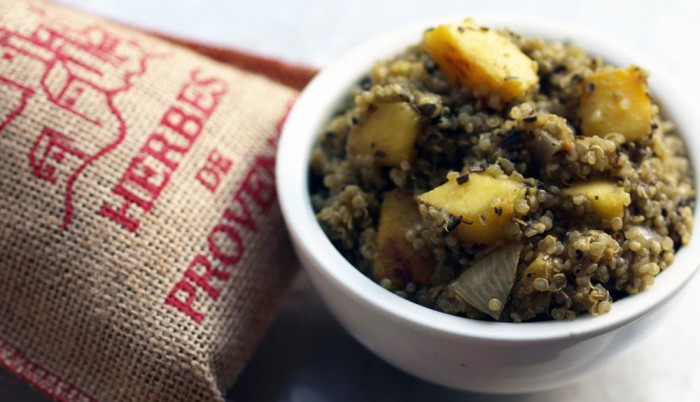
The recipe below uses health-boosting acorn squash along with super grain, quinoa — which isn’t really a grain at all, but a seed. Quinoa is known for its nutrient density; most notably, it offers plant-based, complete protein, meaning that it has all of the essential amino acids the human body needs. Cooked risotto-style with a generous helping of herbs de provence, the dish below makes a savory side, perfect for fall.

Herbed Acorn Squash & Quinoa Risotto

Herbed Acorn Squash & Quinoa Risotto

Ingredients
2 tbs Earth Balance, divided
salt
1 acorn squash
1+ cup chopped onion (I used 2 small onions from the share)
1-1/2 tbs herbs de provence
1 cup uncooked quinoa
4 cups No-Chicken broth (or sub veggie broth)
1/4 cup nutritional yeast, optional (or sub Parmesan cheese)

Method
Cut squash in half, lengthwise, and scoop out seeds and pulp with a spoon. Peel the skin off with a peeler and then cut squash into small cubes. Melt butter in a skillet over medium heat. Add squash in a single layer, sprinkle with salt, and let cook for 5 minutes. Stir squash and cook until tender, about 10 more minutes, stirring occasionally.

Meanwhile, melt remaining butter in a large skillet, and add onions and sauté until tender, about 3 minutes. Stir in herbs and cook for a minute. Stir in quinoa and cook 3 minutes. Turn up heat to medium-high and add 1-1/2 cup of the broth, bring to a simmer, stirring often, until the broth is absorbed. Add broth like this, 1/2-to-1 cup at a time, until the quinoa becomes creamy and the germs have burst. This should take about 20-25 minutes. Stir in nutritional yeast, and then gently stir in squash. Salt and pepper to taste.

Post and photos by Mikaela D. Martin: Blooming Glen CSA member since 2005, board-certified health counselor, and co-founder of Guidance for Growing, an integrative wellness practice in Souderton. Read more about healthy eating and living on her site, http://guidanceforgrowing.com!

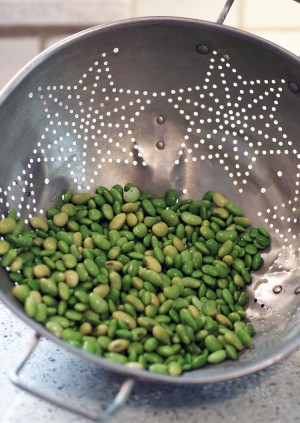
EdamameFresh edamame is one of the unique foods us CSA members are lucky enough to receive each season, but what exactly is it and what the heck should we do with it? Edamame is simply an immature soybean, picked before it hardens on its branch. When it comes to soy foods, consuming them as close to their natural state as possible is a great rule of thumb. Edamame fits that bill perfectly, making it a fantastic addition to our meals.

As far as nutrition, edamame is considered by most as a “superfood,” chock full of health-boosting properties: It’s a good source of fiber, protein, thiamin, iron, magnesium, phosphorus and copper, and a very good source of vitamin K, folate and manganese. Hard to believe all that nutrition is in such a little, baby bean!

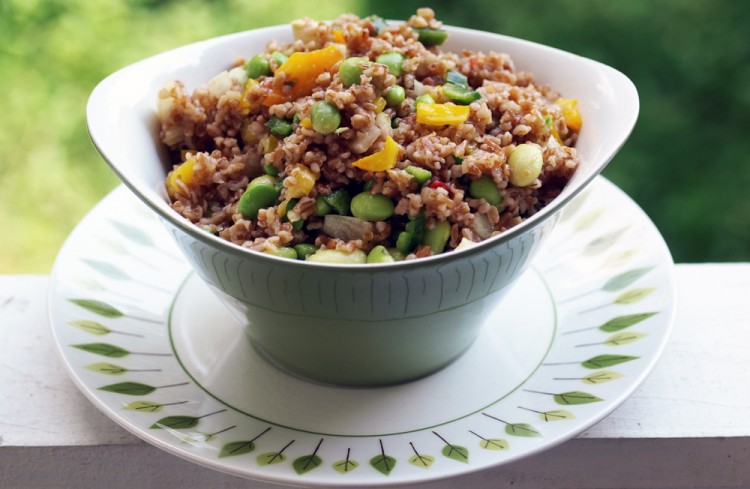
Although edamame has been included for thousands of years in Asian diets, it’s relatively new to the American diet. The recipe below used an Asian-inspired dressing and healthy whole grains along with several CSA ingredients.

Asian Bulgur & Edamame SaladAsian Bulgur & Edamame Salad

Ingredients
1 cup bulgur (use quinoa for gluten-free version)
1 bunch of edamame, shelled* (~1 cup)
1 sweet pepper, small diced (~1/2 cup)
1 poblano pepper, small diced (~1/2 cup)
1/4 cup shallots, minced (scallions would also be good here)

Dressing
1/4 cup rice-wine vinegar
1 tbs tamari
1 tbs sesame oil
1 tsp powdered ginger (or, use fresh if you have it)
2 tbs sweet chili sauce
1 tsp agave (optional)
cilantro for garnish (optional)

* Edamame is much easier to shell after cooking. Add beans to a pot of boiling water and blanch 4-5 minutes. Drain and immediately put pods in ice water. When cool enough to handle, simply squeeze the pod until the beans pop out.

Method
Bring bulgur to boil in 2 cups of water, reduce to simmer, cover and cook 12-15 minutes, until water is absorbed.

Add edamame, peppers and shallots to a large bowl. Add cooked bulgur and stir to combine.

Whisk together dressing ingredients, and pour over the salad mixture, stirring well to combine. Taste and adjust dressing seasonings, adding a bit of sweetener, if needed.

Let cool and serve garnished with cilantro.

Post sources and recommended links:
Edamame‘s nutritional profile on Nutrition Data.
Soy beans on World’s Healthiest Foods.
12 easy edamame recipes on Eating Well.

Post and photos by Mikaela D. Martin: Blooming Glen CSA member since 2005, board-certified health counselor, and co-founder of Guidance for Growing, an integrative wellness practice in Souderton. Read more about healthy eating and living on her site, http://guidanceforgrowing.com!

Just as food effects our nutrition, it also effects our energy.  A classic example of this is how we feel after eating a fast food meal of a burger and fries, versus how we feel after eating a home-cooked meal of, say, baked fish and steamed veggies. Processed foods, high in unhealthy fats and carbs and low in nutrients, not only overwork our bodies, but also provide very little value, leaving us feeling heavy and tired.  They’re like the mooch of the food world — taking a lot of our bodies resources and giving nothing in return.

We can think also apply this food-mood connection to individual foods. Some foods warm us up; onion, ginger, oats.  Some foods ground us; carrots, meats, beets.  And, some foods are cooling, including several of the items in our Blooming Glen share over the past couple weeks.  Funny how mother nature makes available cooling foods right when we need them, right? 🙂

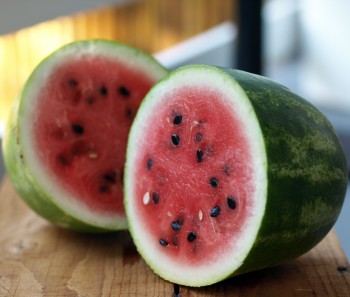
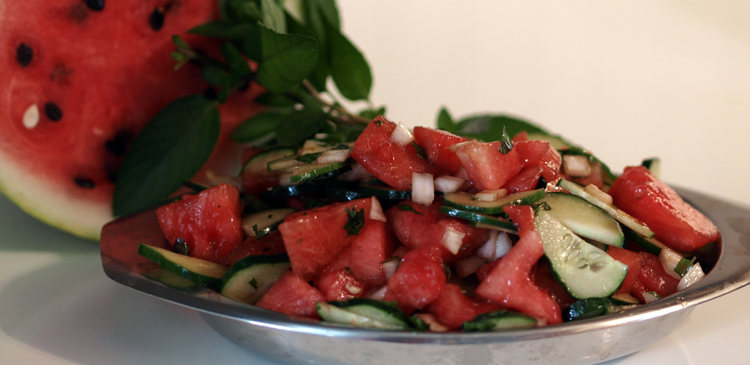
The recipe below uses two cooling ingredients, watermelon and cucumber.  We’ve talked about the nutrition of watermelon in the blog before. Both watermelon and cucumber have been shown to have antioxidant and anti-inflammatory properties, making them a great addition to our bodies’ toolbox for fighting illness and disease.  Plus, as we all know, they taste great! Note, you can also easily substitute cantaloupe, another cooling and refreshing melon, for the watermelon in the recipe.

watermelon cucumber salad

Cooling Watermelon & Cucumber Salad

Ingredients

4 cups cubed watermelon (or cantaloupe)
1 cucumber, cut in half and sliced thin (leave skin on)
1/4 cup shallots or  sweet onion, minced
2 tbs fresh mint, minced (plus extra for garnish, if desired)
1 tbs olive oil
2 tbs balsamic vinegar (or, try 2 tbs lime juice for a gluten-free version)
salt and pepper to taste
Optional: feta cheese

Method
Combine watermelon, cucumber and onion in a bowl. Combine mint, oil, vinegar, and a dash of salt and pepper in a small bowl, stirring with a whisk. Add dressing to the watermelon mixture and toss gently to coat. Garnish with mint and/or feta cheese, if desired. Serve atop raw greens for extra nutrition and substance.

Post and photos by Mikaela D. Martin: Blooming Glen CSA member since 2005, board-certified health counselor, and co-founder of Guidance for Growing, an integrative wellness practice in Souderton. Read more about healthy eating and living on her site, http://guidanceforgrowing.com!
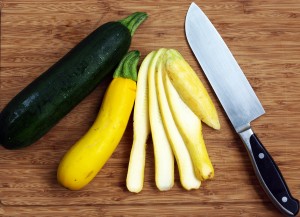
Grilled summer squashOne of my favorite parts of summer is the time we get to spend cooking and eating outside.  Grilling vegetables brings out a depth of flavor that just cannot be matched on the stovetop, and we’ve been taking full advantage of that with this season’s CSA share.  One of the best veggies to grill is summer squash and its partner, zuchinni.

Eating summer squash provides us with cancer-fighting antioxidant nutrients Grilled summer squashvitamin A, vitamin C and manganese. We also get a healthy dose of essential minerals magnesium and potassium, as well as copper. However, because many of these nutrients live in the skin of the squash, we need to make sure we leave it intact. Grilling summer squash allows us to do just that!

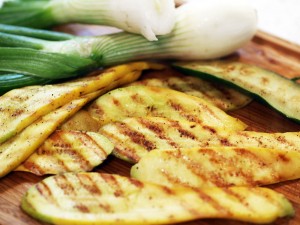
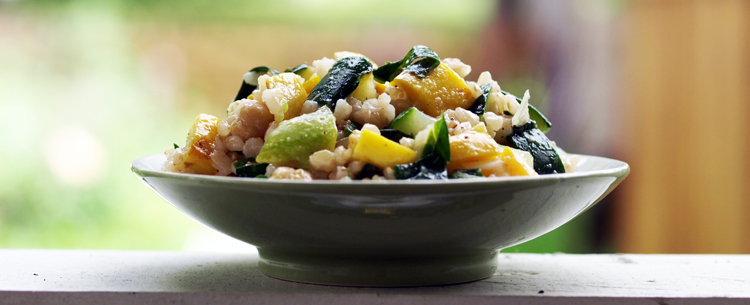
Of course, squash can be cubed or cut into disks for kabobs, but I really like it when its cut into planks and placed right on the grates of a hot grill. The recipe below calls for this method of cooking; give it a try and let us know what you think. I’ve paired the delicious and nutritious summer squashes with superfoods, brown rice and Swiss chard, and healthy plant protein from chickpeas. All that wrapped up into a summery salad suitable for a main dish or a side — that’s tough to beat!

Grilled summer squash

Grilled Summer Squash & Brown Rice Salad

Ingredients

1 cup brown rice
3-4 summer squash and/or zucchini, sliced lengthwise, about 1/4″ thick
5-6 leaves Swiss chard, stems completely removed (slice the stem out from between the two halves of the leaves)
1 can chickpeas, drained and rinsed
1/2 sweet onion and some of its greens, chopped

Dressing
2 tbs olive oil (or other oil of your choice)
1 tsp grated lemon zest plus 2 tbs juice
1/2 teaspoon agave
1/2 teaspoon salt
fresh herbs of your choice (basil works great here), chopped
additional salt and pepper to taste

Method
Cook the rice according to package directions.

Fire up your grill! Lay out the squash slices. Lightly spray each side with grapeseed (or other high-heat) oil, and then sprinkle with salt and pepper. Once the grill is heated, place the squash in one layer, cover and cook for ~3 minutes, until grill marks are apparent. Flip and cook another couple minutes, again until grill marks are apparent. Squash cooks very quickly on the grill and can become soggy (especially the larger ones) if left on too long, so be careful not to overcook. Remove from heat and let cool.

Blanch the Swiss chard in boiling water for 2 minutes, rinse in cold water and chop. Add chard, onion, chickpeas to a serving bowl.

Cut squash into a large dice and add to the bowl; you should have about 2 cups.  Gently stir in rice.

Combine the dressing ingredients in a small bowl. Mix well and then add to salad, stirring to combine everything. Adjust seasonings to taste.  Serve at room temperature, or chill.  This salad also make a great stuffing for tortillas or collard wraps.

Post and photos by Mikaela D. Martin: Blooming Glen CSA member since 2005, board-certified health counselor, and co-founder of Guidance for Growing, an integrative wellness practice in Souderton. Read more about healthy eating and living on her site, http://guidanceforgrowing.com!
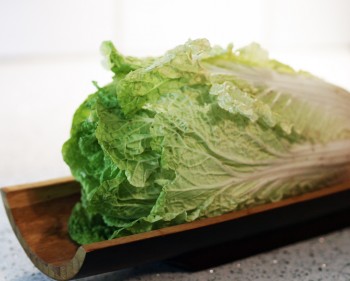
Napa CabbageThe delicate and pretty napa cabbage we found in our CSA shares this week regularly appears in East Asian dishes, from savory stir-fries to spicy Korean kimchi.  Napa is specifically a Chinese cabbage, comparable in flavor to bok choy and, of course, other cabbages.

Napa does have a milder flavor than the standard green and savoy cabbages, but still has all the nutrition those offer:

“[Cabbage’s] anti-inflammatory properties are stellar, thanks to the high content of an amino acid called glutamine. In addition to promoting the digestive process and intestinal health, glutamine has been shown to be useful in all sorts of treatments including burns and peptic ulcers. Because cabbage is a member of the cruciferous family, it’s also a great cancer-fighting food. Cruciferous veggies are high in indole-3-carbinol, a chemical shown to block the growth of cancer cells, as well as stimulate DNA repair in cells. Finally, a look at cabbage’s nutritional profile shows it as an excellent source of vitamins K and C, a very good source of fiber, manganese, folate, vitamin B6 potassium and omega-3 fatty acids, and a good source of thiamin (vitamin B1), riboflavin (vitamin B2), calcium, magnesium, vitamin A, and protein.”

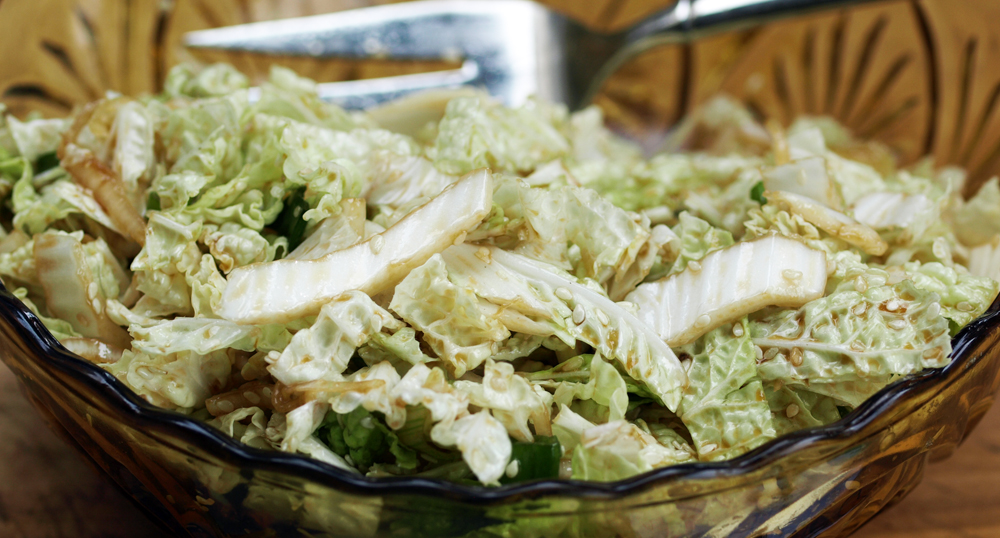
This time of year, when the days are getting hotter and the air is humid, I prefer using napa uncooked, in a refreshing slaw.  There are tons of flavor varieties to play with when it comes to slaws.  Use the recipe below as a base, and try adding other shredded veggies, nuts, seeds, and vinegars.

Sesame Napa Slaw
Sesame Napa Slaw
Ingredients
2 tablespoons sesame seeds
2 tablespoons sesame oil
1 tablespoon rice vinegar
1 tablespoon tamari sauce
1/2 teaspoon agave syrup
1 head napa cabbage, end trimmed, outer leaves removed, and chopped (about 4 cups)
2 green onions, with some of the greens, sliced thin
pepper, to taste

Method
In a bowl, mix the seeds, oil, vinegar, tamari and agave.  Add the cabbage and onion and toss, so that dressing coats the veggies. Pepper to taste and serve.

Post sources and recommended links:
Cabbages, from The Cooks Thesaurus.
8 Things to do with Napa Cabbage from She Knows.
Napa Cabbage: 5 Healthy Uses and Nutrition Facts, from Lunch Box Bunch.

Post and photos by Mikaela D. Martin: Blooming Glen CSA member since 2005, board-certified health counselor, and co-founder of Guidance for Growing, an integrative wellness practice in Souderton. Read more about healthy eating and living on her site, http://guidanceforgrowing.com!
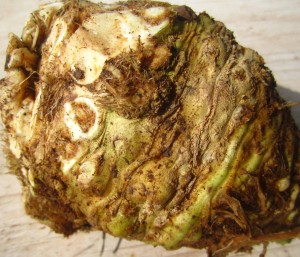
The knobby warty exterior of celeriac, also called celery root, hides a delightful interior. Peel away the rough skin and inside is the smooth ivory flesh, a wonderful aromatic alternative to starchy potatoes. Celeriac is one of those vegetables that can seem intimidating, but after some experimentation it will quickly become a versatile favorite in your kitchen.

Though celeriac will keep for many months in your refrigerator, and up to 6 months in the right root cellar conditions, hopefully you will be inspired to use it sooner. This first idea, because it really is more an idea than a recipe, utilizes celeriac in its raw state. Thanks to nutrition coach Patti Lombardi, who taught a class here at the farm All About Greens, this is quickly on its way to becoming a lunchtime staple in our house!

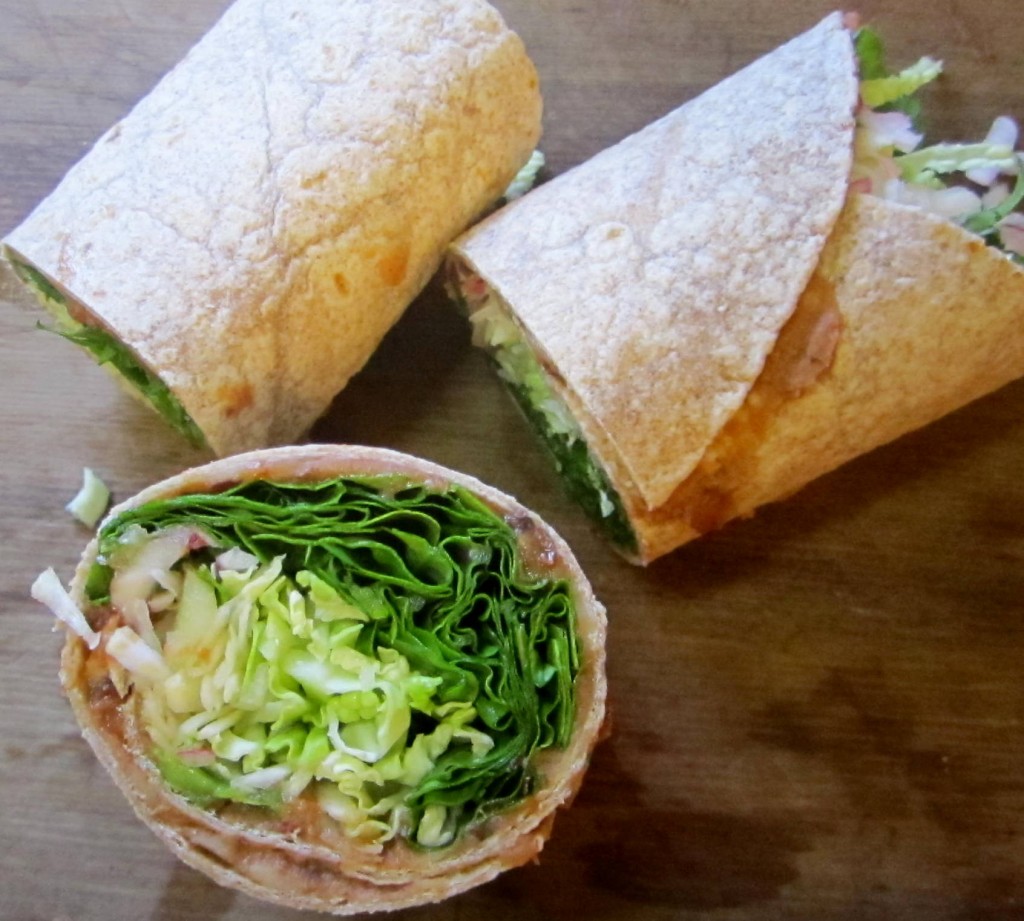
Spicy Green Wraps

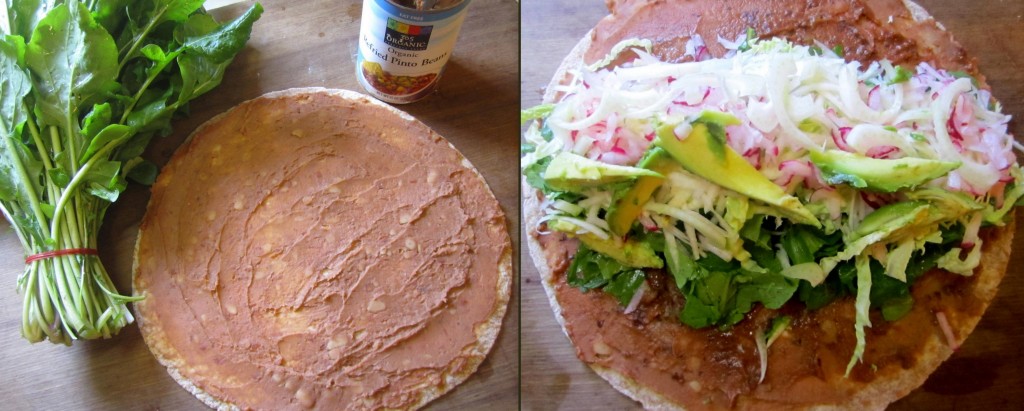
First take one large flour tortilla– I used the biggest ones I could find at Whole Foods- “All Natural Roll-Ups made with whole wheat flour“. Next, decide what you want to use as the “glue”. Patti suggested organic refried pinto beans– spread evenly over the tortilla, and for a little added flavor and spice, a bit of spicy black bean dip (or salsa if you prefer). Hummus would be another idea.

After painting on the “glue”, roughly chop 1/2 a bunch of arugula and pile it down the middle of the tortilla. (You can also experiment with lettuce or kale, always putting the softer greens down first onto the tortilla).

Next comes the crunch- add some finely chopped cabbage. Grate 1/3  of a celeriac, spread on top of the cabbage. Add three grated french breakfast radishes on top of that, and some thinly slivered fennel. I happened to have some ripe avocado, so that went into the mix. Lightly season with sea salt and squeeze a bit of lemon wedge on top.

Then it’s time to wrap it up. Lift the side of the tortilla closest to you (the edge at the bottom of the photo on the top right). Roll away from you into a big tube, using your fingers to press the greens under the wrap and your thumbs to keep the wrap rolling, pressing down tightly as you roll. Don’t worry if you rip it on your first try (I did), but my second one came out perfect. Cut in half (serves 2).

*In the class Patti held here at the farm, her version contained sweet peppers and grated carrot (no radishes), which was a bit sweeter. The great thing about these wraps is you can adjust to your taste, and use whatever happens to be in the share that week. You could also add chicken or turkey if you desire.

Simple Celeriac Saute

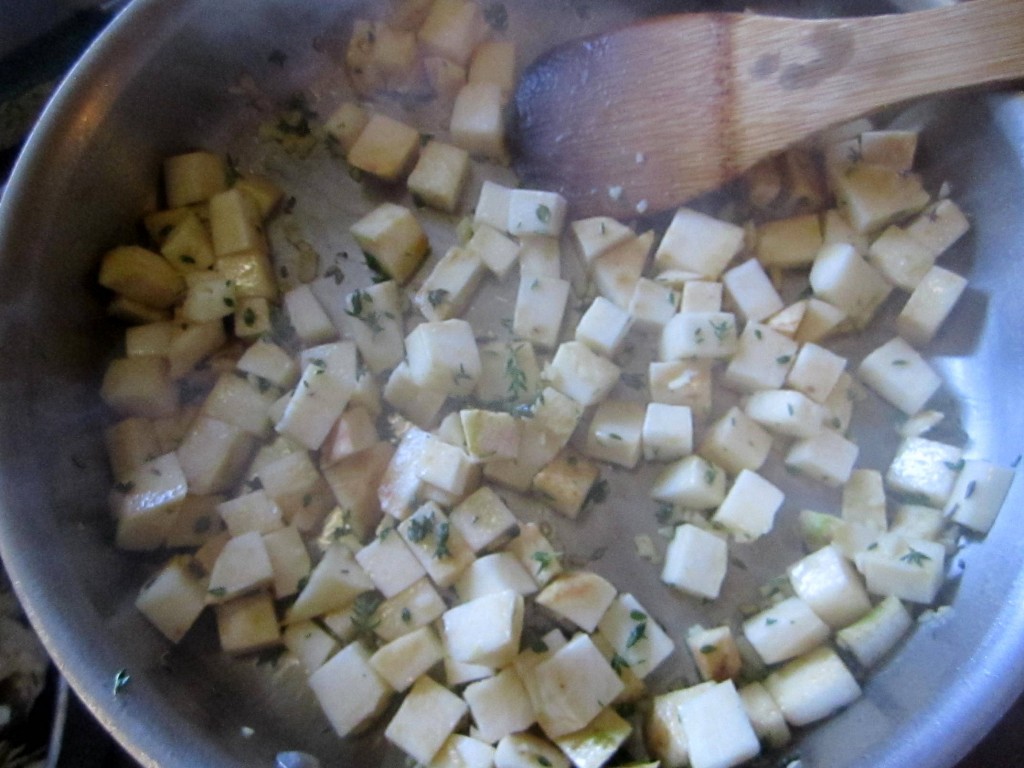
A lot of recipes with celeriac have you partnering it with potatoes in a mash, roasting it with other assorted root vegetables, or adding it to a soup. In this simple stove-top dish, celeriac plays the starring role. Lightly seasoned, the flavor of the celeriac shines through, making for a wonderful side dish. I also imagine it would be great on top of lentils.

Using a paring knife carefully off the rough exterior of one celeriac. Cut into 1/2-inch cubes. Over high heat, put a few tablespoons of olive oil in a large saute pan. Add the cubed celeriac, a handful of thyme leaves, and 2 cloves finely chopped garlic. Season with sea salt and fresh ground pepper. Stir to coat and fry for about 5 minutes. Turn down to a simmer and add 3-4 tablespoons water or stock– I used 3 cubes homemade chicken stock I’d frozen in ice cube trays.  Place a lid on top and cook for around 25 minutes, until tender. You can leave in the celeriac in cubes or smash it a little (somewhere in between a cube and a mash). (*Recipe courtesy of JamieOliver.com)

Celeriac Gratin

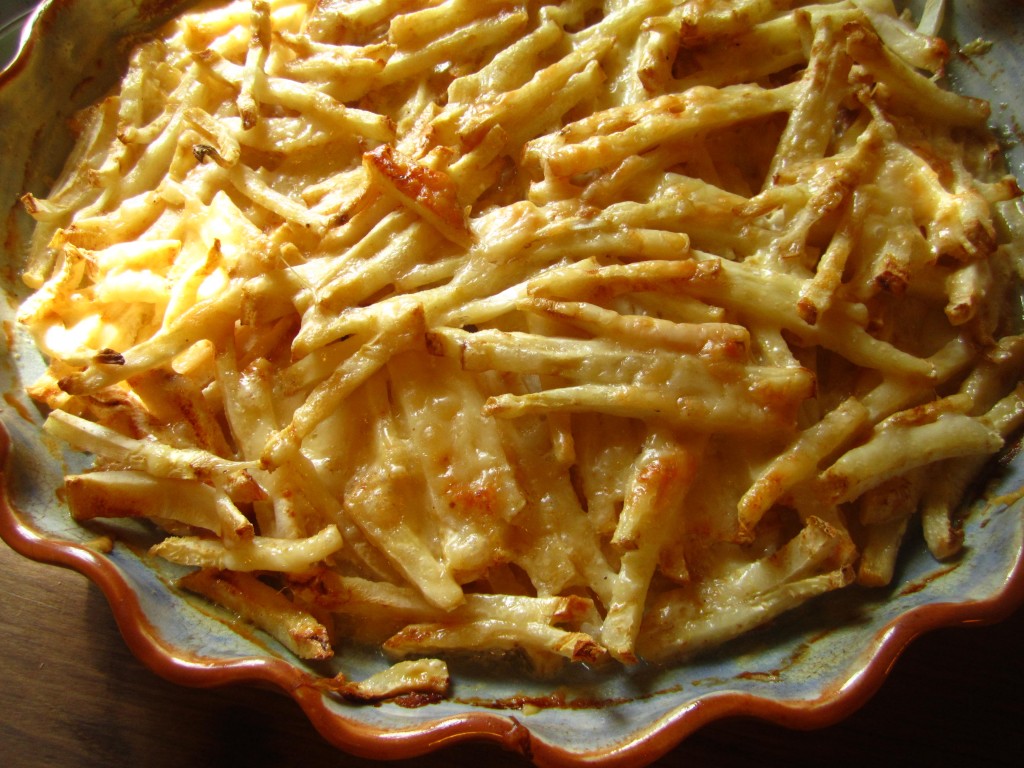
So far we’ve done celeriac raw and a simple seasoned stove-top celeriac saute. Now let’s do an indulgent comfort dish, sure to please any picky eaters in your family.

Pre-heat your oven to 400 degrees. Butter a 1 1/2 quart gratin dish, or large deep dish pie plate. Scatter 4 thinly sliced shallots over the bottom of the dish. Take two large peeled celeriacs, cut in half, then cut each half into 1/4-inch thick slices, and julienne. Arrange evenly in gratin dish. Sprinkle 2 sprigs thyme leaves over celeriac.

In a small bowl, whisk together 1 cup heavy cream, 1 tablespoon Dijon mustard, dash of nutmeg, and salt and pepper. Pour over celeriac. Sprinkle on top 3/4 cup grated Gruyere cheese and 1/4 cup freshly grated Parmesan cheese. Cover with foil and bake 20 minutes. Remove foil and continue baking until top is brown and bubbly and cream is thickened and reduced, about 20-30 more minutes. Let cool 10 minutes and serve. (*Recipe from MarthaStewart.com)

Photos and text by Tricia Borneman, Blooming Glen farmer and co-owner.

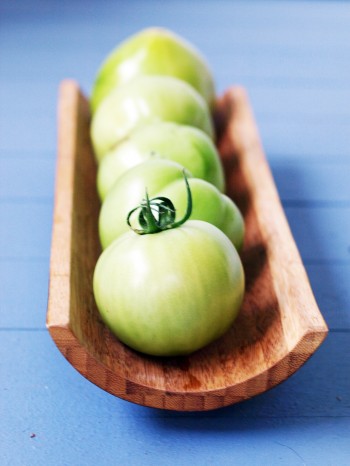
I always consider green tomatoes a bonus veggie: An unexpected and tasty gift us CSA members get during the summer-fall transition of share season. For the most part, green tomatoes carry much of the same nutritional value as their red counterparts.  They’re both very good sources of vitamins A, C, and K, manganese, and potassium, and both deliver health-boosting fiber.  Green tomatoes, however, have the added nutritional benefit of being a very good source of the B5 vitamin, pantothenic acid, which is essential in aiding in the metabolizing of carbohydrates, fat, and protein.

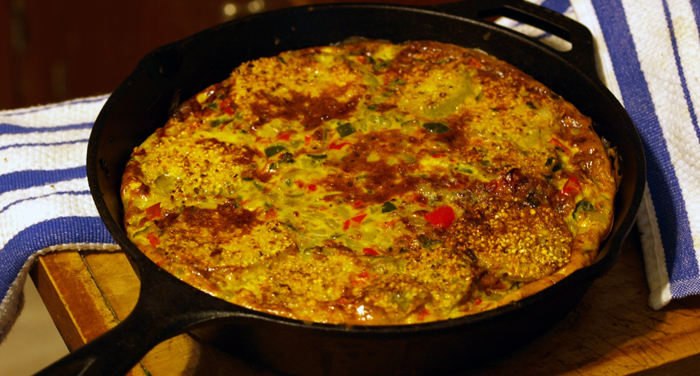
Green tomatoes are firmer than their red buddies, so they hold up nice to pickling, cooking, and baking without turning to mush. They have a tart flavor when eaten raw, which some people don’t prefer, but pairing them with a sweeter veggie like red tomatoes, corn, and/or onion, creates a great sweet-and-sour balance.  Green tomatoes bring a brightness to soups, sauces, and salsas, where they also pair well with hot peppers and spices.  Of course, fried green tomatoes is probably the dish we’re most familiar with, but green tomatoes actually do really well baked — either as baked green tomatoes or in savory breads and biscuits.  The recipe below is probably my favorite green tomato recipe; it’s a frittata suitable for a quick breakfast, lunch, or dinner.  Check out the links below for more green tomato nutritional info and links to other yummy recipes!

References and recommended links:

Green Tomato Frittata

Ingredients
1-1/2 green tomatoes, sliced about 1/4″-1/2″ inch thick, lightly sprinkled with salt and pepper
1/2 green tomato, chopped fine (about 1/2 cup)
1 frying pepper, chopped fine (about 1/2 cup)
1 poblano pepper, chopped fine (about 1/2 cup)
1 small onion, chopped fine
1/2 cup cornmeal for dredging
3 garlic cloves, minced
2-3 tablespoons fresh herbs (basil, parsley, chives, and/or thyme are all good here)
10 large eggs
Salt and pepper to taste
Cooking spray

Method
Preheat oven to 400-degrees.

Dredge tomato slices in cornmeal. Coat a large oven-safe skillet (cast iron works great) with cooking spray and fry each tomato slice for 2 minutes. Spray tomato again, and flip, frying again for 2-3 minutes. Set slices aside, and wipe pan clean.  Spray skillet again with cooking spray, add onion, and cook until translucent and soft, about 3 minutes.  Add pinch or two of salt and garlic and mix well. Stir in the chopped tomatoes and peppers, and mix until combined well.  Season to taste with salt and pepper, and cook, stirring often, until all veggies are softened, about 10 minutes. Stir in fresh herbs.

Meanwhile, beat eggs and season with salt and pepper.

Add egg mixture to skillet, turn heat up to medium-high, and lightly combine the ingredients, allowing the egg to distribute evenly throughout the filling, and making sure there is an egg coating on the bottom of the pan.  Place the fried sliced green tomatoes on the top of the frittata. Turn heat down to medium, and cook until edges begin to set, about 3-4 minutes. Place frittata in oven and cook until the center is firmly set, about 12 minutes.

Finish frittata under the broiler until it’s lightly browned, about 3 minutes. Remove from the heat, and allow to cool and set for 10-15 minutes. Loosen the edges with spatula and slice for serving.

Post and photos by Mikaela D. Martin: Blooming Glen CSA member since 2005, board-certified health counselor, and co-founder and -owner of Guidance for Growing, an integrative wellness practice in Souderton. Read more about healthy eating and living on her site, http://guidanceforgrowing.com!
Wet weather aside, I’m welcoming the cooler temperatures of late because they have allowed me to reacquaint myself with my kitchen. It seems like I’ve taken a hiatus recently from actually cooking. Instead of cooking meals, I’ve been favoring anything fresh I can throw into the same bowl. Now that it’s not 100 degrees in my kitchen, I’m a bit more excited to prepare a real dinner.

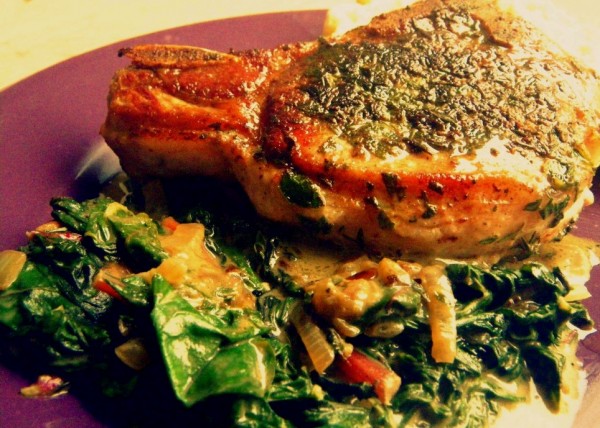
And what better way to celebrate my reintroduction to cooking than with juicy pork chops, fragrant herbs, and creamy swiss chard? This meal is easy, quick, and heavenly. It’s got all the advantages of a one-pot meal, but all the elegance of a steak house entree. The perfect end to a day spent working in the rain. (I could barely manage to squeeze in the photo shoot before scarfing it down).

Herbed Pork Chops with Dijon Swiss Chard

Rub both sides of 2 pork chops with salt, pepper, and 2 tablespoons of fresh chopped sage and thyme (both can be found in the Discovery Garden during your CSA pick-up, or at our farmstand at market).

Heat 1 tablespoon butter and 1 tablespoon olive oil in a heavy skillet over medium-high heat. When butter is melted, add pork chops. Sear chops, about 4 minutes per side, until there is a nice crust of fried herbs and meat is just cooked through. Remove from pan and cover with foil to keep warm.

Using the same pan, reduce heat to medium and add  1/2 yellow onion, chopped. Cook until translucent. Add 3/4 pound swiss chard, stems removed and leaves roughly chopped. When chard has partially wilted, stir in 3 tablespoons dijon mustard and 1/4 cup half-and-half or whole milk. Continue cooking the chard until it is fully wilted and the sauce has thickened a bit.

Top a mound of chard with a pork chop and drizzle any remaining sauce from the pan on top. Fluffy homemade biscuits drizzled in local honey make a divine addition to the meal, but it would go equally well with some crusty bread or steamed rice. (Serves 2)

Text and photography by Kate Darlington – Blooming Glen Farm second year intern, fresh food enthusiast, and budding food blogger. She also writes for the Digging Deep Campaign as well as for her personal blog, Growing Things.