hot peppers Tag

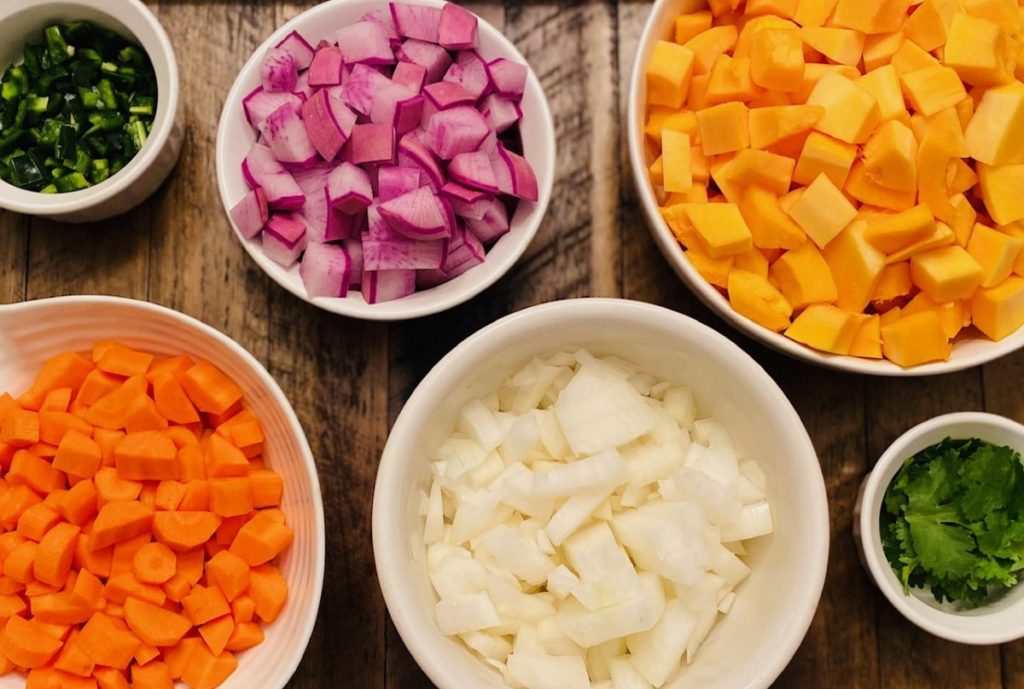
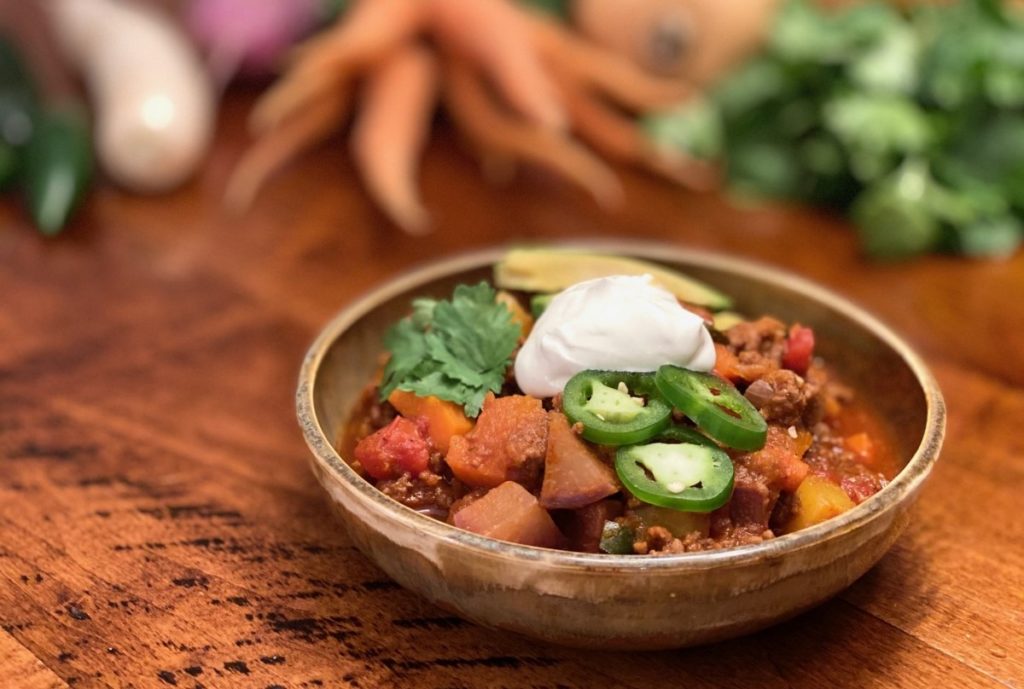
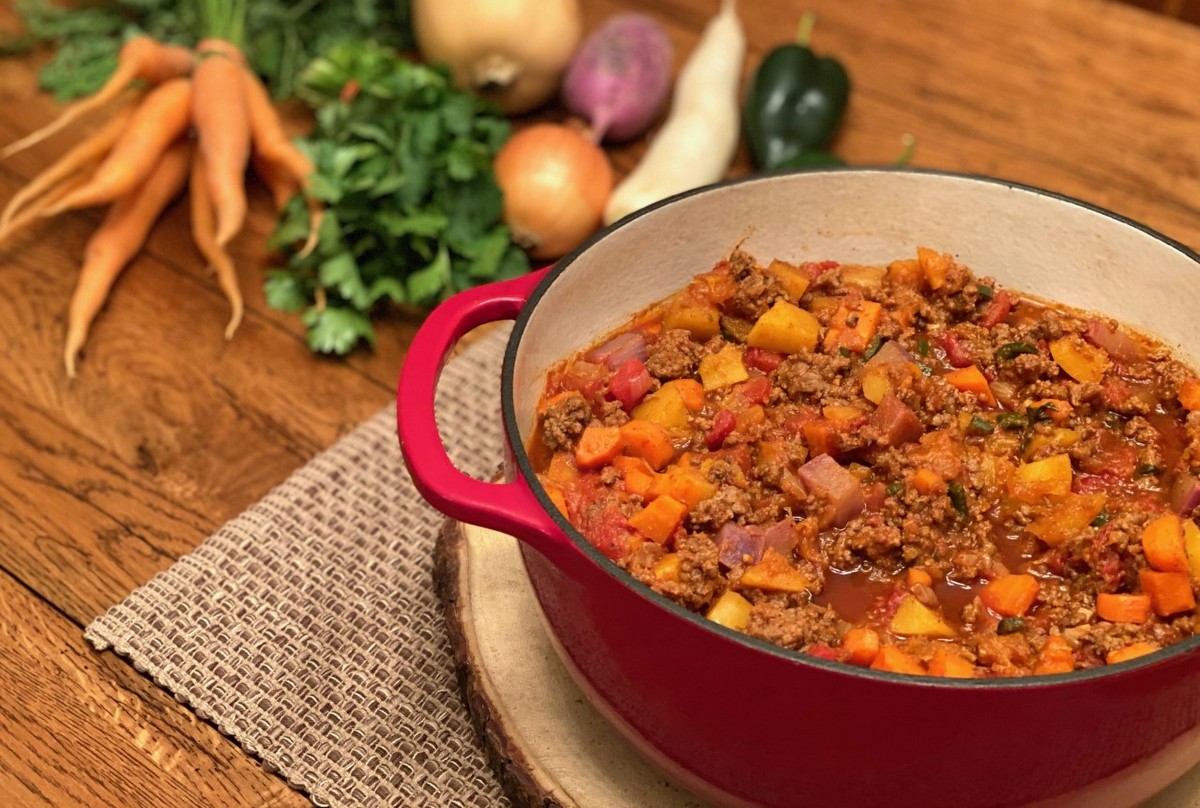
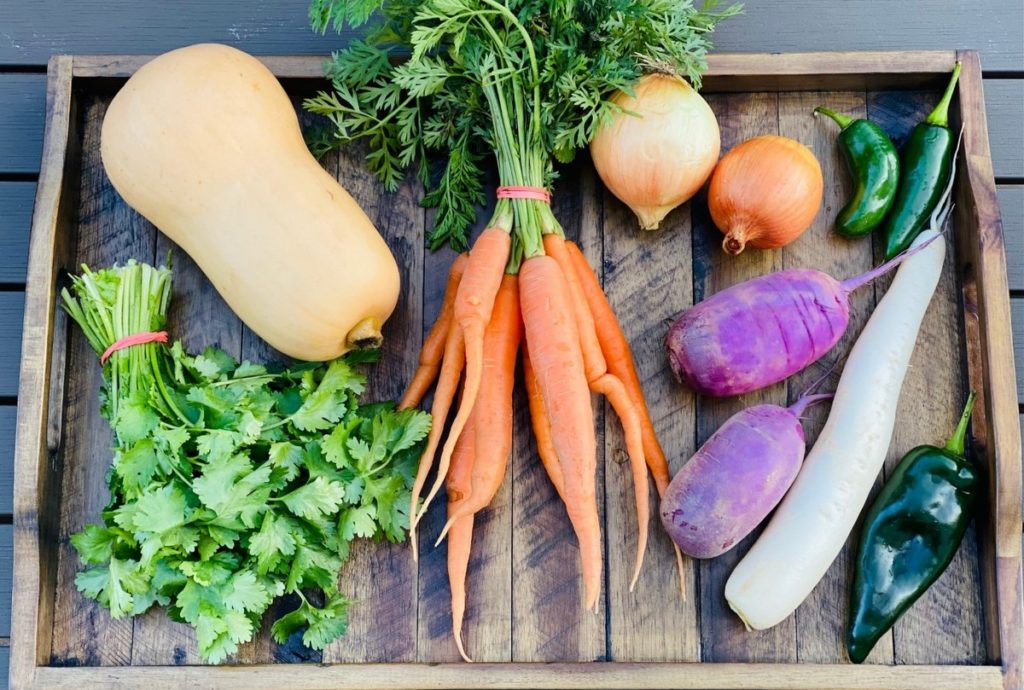
Fall is definitely in full swing as we begin the month of November.  The temperatures have dropped, the air is crisp, and the colorful leaves are blanketing the ground.  This week’s share is full of amazing autumn vegetables that can be combined to create a delicious fall-themed chili.   This chili blends the flavors of butternut squash, carrots, onions, radishes, cilantro, and hot peppers from our shares.

Ingredients:
2 Tbsp olive oil or avocado oil
1 medium yellow onion, chopped
2 cloves garlic, finely chopped
1 lb ground beef
1 cup carrots, diced
2 cups butternut squash, diced
½ poblano pepper, seeds removed and finely chopped*
1 cup daikon radish (white or purple), diced
1 Tbsp fresh cilantro, finely chopped
15 oz diced tomatoes
8 oz tomato sauce
½ tsp sea salt
¼ tsp black pepper
1 tsp cumin
1 Tbsp chili powder

  • Heat oil in Dutch oven or large saucepan.
  • Add onions and cook for 5 minutes on medium heat. Stir frequently.
  • Add garlic and ground beef. Cook for 7-8 minutes or until beef is cooked through.  Stir well throughout cooking time, breaking up the beef as it cooks.
  • Add carrots, butternut squash, poblano pepper, radishes, cilantro, diced tomatoes, tomato sauce, and spices. Cover and cook for 20 minutes, stirring occasionally.
  • Serve with shredded cheese, sour cream, sliced jalapenos (pickled or fresh), fresh cilantro, or sliced avocado.
  • Enjoy!

*Feel free to use other hot peppers instead of the poblanos, but it will affect the spiciness of the chili.

**This recipe freezes well.  I like to double it, serve half and freeze the other half for a future meal.

Recipe and photos by Stephanie Borzio.  Stephanie is a mom of three active boys and is an autoimmune warrior.  After battling her own health for several years, Stephanie found healing through food and lifestyle changes, including joining Blooming Glen Farm CSA of which she is a long time member.  She is a Board Certified Integrative Nutrition Health Coach who is passionate about sharing healthy living tips and real food recipes.  Instagram and Facebook: Tru You Essentials; Website: www.truyouessentials.com

As a farmer I consider myself food rich- my currency is not in dollars, but in the bounty and flavors of the season. As the stream of veggies flows by my front door from field to market, I can often get overwhelmed with the impermanence of it all. On those occasions the only thing that helps soothe my nagging thoughts is to put some of that food in jars. Seeing the freezer stocked and some preserves on the shelves brings a satisfaction like no other. I admit, my canning is limited to what I can do with a water bath canner, but that’s okay- there is so much in that realm, and every year I discover a new favorite. I hope to take a class and master the pressure canner someday, but for now I stick to jams, pickles and tomatoes, low in risk and high in satisfaction.
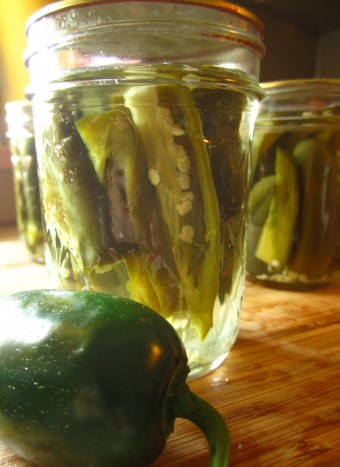
This week, for Farmer Tom, I decided to put up some pickled jalapenos, and for myself, some cantaloupe preserves. (We don’t grow tree fruit on our farm, but thanks to a gift of a box of peaches from our neighbors at Easton farmers market, Scholl Orchards, I also discovered the joy of homemade peach jam! I won’t go into that in this post, but I encourage you to make some- it was amazing! (I used the recipe in Put ’em Up, by Sherri Brooks Vinton.)

I have been canning on and off for the 12 years since we started farming. But I had a eureka moment after attending a class by blogger and cookbook author Marisa McClellan of Food in Jars fame. I had the mentality that canning needed to be an all day production involving crates of vegetables, cases of jars, a hot kitchen and my big black enamelware canning pot. Low and behold, Marisa talked about small batch canning, 3 pints or even better, 6 half pint jars of jam at a time. And, here comes the clincher: using your staple stock pot, not the big black canning pot that takes an hour to get the water to boil.

I ordered a cheap flexible flower-shaped trivet for sitting the jars on in the bottom of my pot and voila, my basic 12-quart stainless-steel stock pot was turned into a maneageable canning pot.  As long as your jars can be covered by an inch or two of boiling water, you can use any size pot you’ve got.

Now don’t get me wrong, there is a place for the big canning pot: salsa, and canned whole tomatoes, and my grandmothers sweet and sour relish, those I like to spend part of a day on and do in big batches. But pickled okra, pickled garlic scapes, pickled jalapeno, bread and butter pickles, and fruit jams with various herbs- now those can be done in smaller amounts in an hour or so. Smaller batches takes some of the pressure off to produce larger quantities and puts the fun back into exploring new flavor combinations. From past experience I’ve learned that you may can a lot of something, but if it’s not a hit, it will sit for a year in your pantry collecting dust. So making smaller batches is a great way to find your family’s favorite preserves, and to focus your precious time on canning what you really can’t make it through winter without!

Pickled Jalapenos

*This basic recipe is from Food in Jars. It makes approx. 5 half pint jars.

Prepare a boiling water bath and boil your empty jars while preparing the other ingredients. Place the lids in a small saucepan and simmer over very low heat.

Combine 2 cups distilled white vinegar, 2 cups water and 2 tablespoons pickling salt in a pot over high heat and bring the brine to a boil.

Meanwhile prepare 1 pound jalapeno peppers (about 1 quart). Wearing rubber gloves (very important!!), slice the jalapenos in half lengthwise, but leave on the seeds and guts- this is where the heat is.
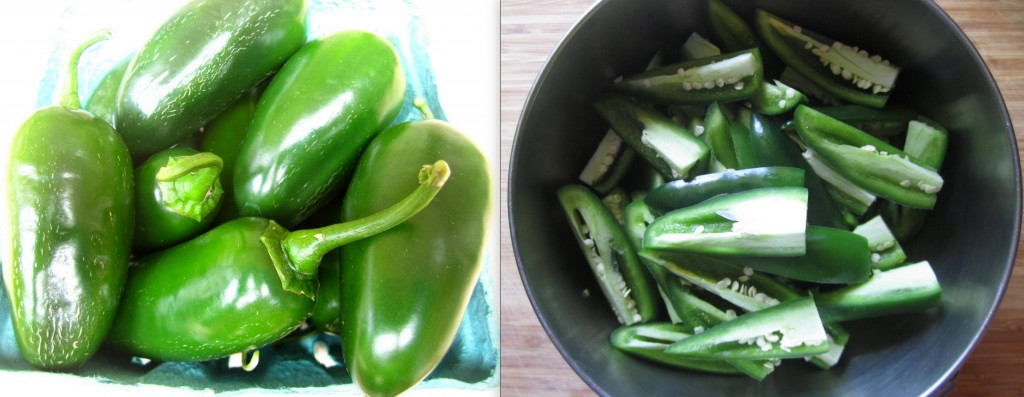
Pack the peppers tightly into the jars. Pour in the hot brine, leaving a 1/2 inch headspace. Gently tap the jars on a towel lined surface to release any air bubbles before using a wooden chopstick to dislodge any more bubbles. Check the headspace and add any more brine if necessary.

Wipe the rims, apply the lids and rings, and process in a boling water bath for 10 minutes.

Let these pickles cure for at least one week before eating. Tom loves these in burritos, on hot dogs or nachos, on scrambled eggs with tomatoes- anywhere you want a little extra heat.

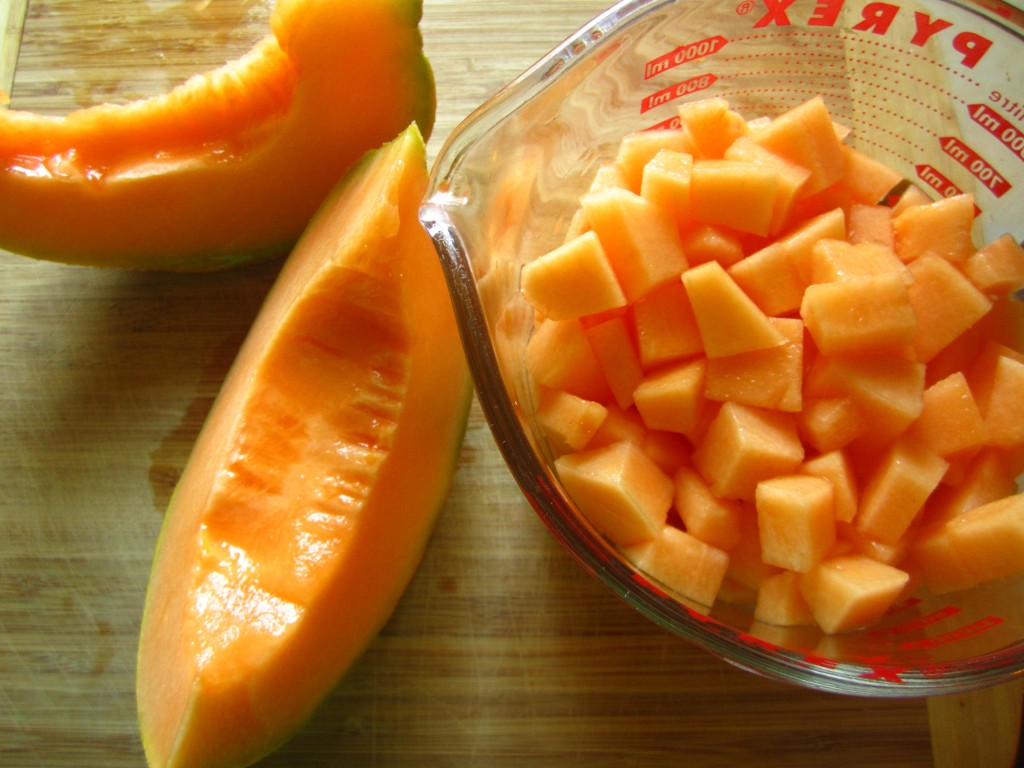
The cantaloupe we are growing at the farm is a new variety this season with a wonderful aromatic sweet flavor. They don’t have the best shelf life, however, so I rescued one that was a bit soft and headed for the compost heap. It made the best small batch of cantaloupe jam. And I figured since cantaloupes have been in the share for the past few weeks, you too might want something new to do with them. The cantaloupe I used was on the larger end, so I even had a few slices left to eat.
Cantaloupe Preserves

*This recipe is from Put ’em Up!

Cut one cantaloupe into 1-inch chunks; you should have about 4 cups. Combine the melon with 1/2 cup water in a large pot and bring to a boil. Stir together 1 cup sugar and 2 teaspoons Pomona’s Universal Pectin powder. Add the mixture to the boiling fruit and stir some more. When the mixture returns to a boil, stir in 2 teaspoons calcium water (included in the Pomona box, with instructions), 1/2 cup bottled lemon juice, and 1 teaspoon cinnamon. Remove from the heat and let rest for 5 minutes, stirring occasionally to enable air bubbles to settle out. Skim off any foam (and enjoy a taste!).

You can refrigerate for up to 3 weeks, or can it using the boiling-water method. Process for 10 minutes- it should fill about 4 half pint jars.

Photos and text by Tricia Borneman, Blooming Glen farmer and co-owner.
With beautiful tomatoes, spicy peppers, pungent onions, and zesty cilantro all in one share, a batch of fresh salsa was calling my name last night.

There are several hot peppers to choose from this week. I used a serrano pepper, a variety of chili that originated in the mountainous regions of Mexico. It is the pepper traditionally used in making pico de gallo and salsa. It is hotter than a jalapeno and has a nice bright flavor for use in raw recipes.

This recipe makes a “medium” salsa, but can be adapted to be as spicy or mild as you like. Omit the hot pepper all together if you’ve got a sensitive mouth, or kick it up a notch by including the seeds or more than one hot pepper.

Salsa Fresca

In a food processor, pulse together: 1 pound red tomatoes (about 2 medium-sized tomatoes), cored and chopped; 1 torpedo onion, greens cut off and bulb chopped; 1 serrano pepper, stem and seeds removed; 1 handful cilantro; 1 garlic clove; juice of one lime; and a pinch of salt, to taste.

Voila! You’ve got salsa!

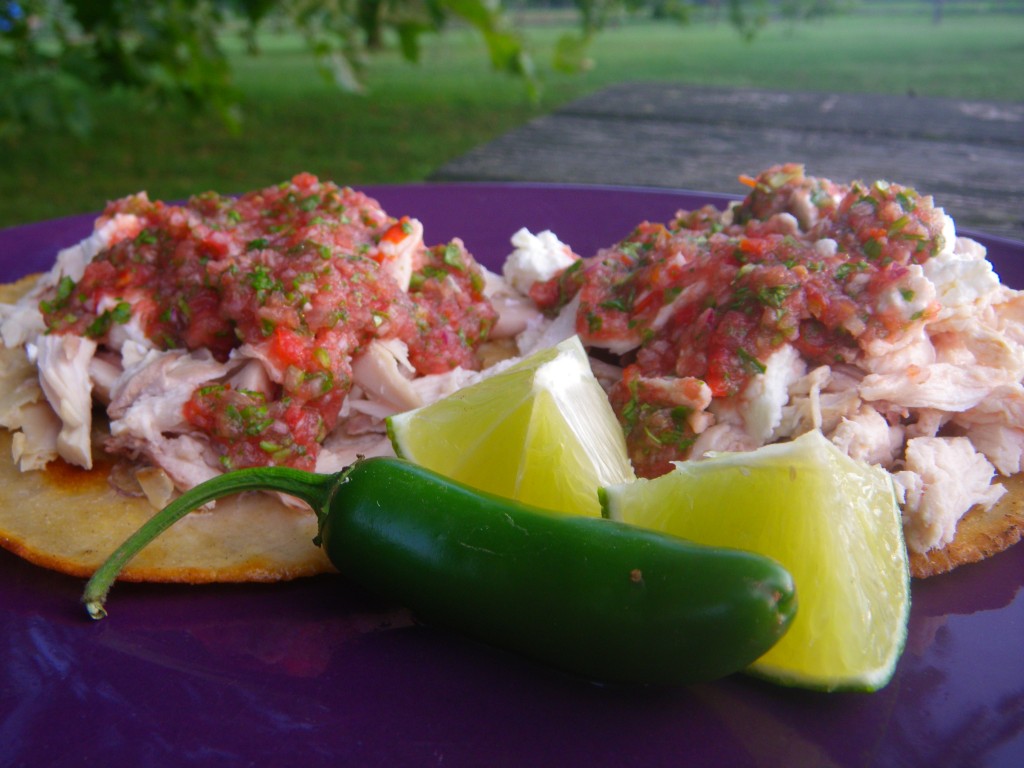
Now you can top these ultra-simple tostadas with a dollop of the salsa for a quick and fresh dinner. They are a great way to use up leftovers from a roasted Ledamete Grass chicken, and perfect for a summer night when the last thing you want to do is slave away over a hot stove.

Chicken Tostadas

Heat 2 tablespoons vegetable oil in a cast iron or non-stick pan. When the oil is sizzling hot, lightly fry 4 corn tortillas (one at a time) in the oil–about 50 seconds per side, until just golden brown and starting to puff up. Place fried tortillas on a paper towel or newspapers to absorb extra oil.

Top fried tortillas with 2 cups shredded cooked chicken, shredded or crumbled cheese (I like cotija, a mild Mexican cheese, but cheddar, jack, or chevre also work well), a big dollop of your salsa, and a squeeze of lime.

Text and photography by Kate Darlington – Blooming Glen Farm second year intern, fresh food enthusiast, and budding food blogger. She also writes for the Digging Deep Campaign, as well as for her personal blog, Growing Things.


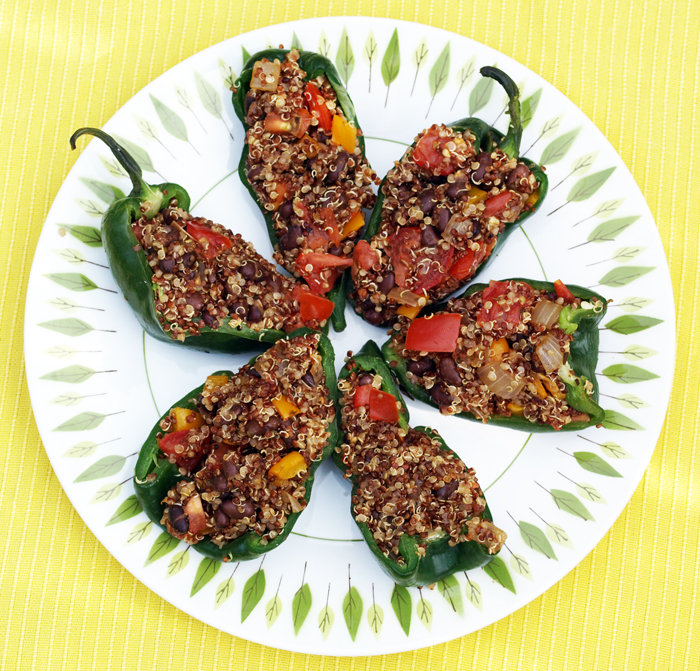
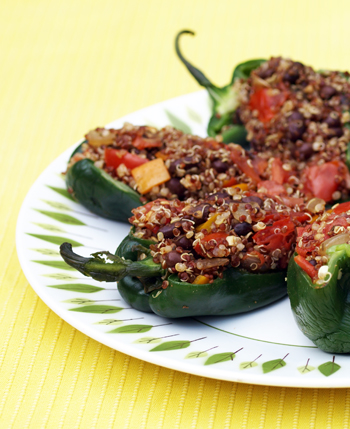
Swimming in poblanos? Try these little poblano boats to deliciously deliver one of nature’s greatest superfoods, quinoa, to your awaiting taste buds and belly! Quinoa (pronounced KEEN-wah) easily incorporates the seasonings and spices with which it’s cooked without losing its own taste and texture, making it a great companion to the robustly flavorful poblano.

Poblanos & Quinoa

Technically a seed, though often grouped with whole grains, quinoa is tightly packed with essential micronutrients magnesium and mangnese and delivers a healthy dose of fiber. Quinoa also contains all nine essential amino acids, making it a source of complete protein — in fact, it’s considered to have the most complete amino acid profile of all grains.  Start reaping quinoa’s benefits today with the stuffed pepper recipe below.  Two or three pepper halves work as a main course, or serve just one as an appetizer or side.

Stuffed Peppers: Poblanos & Mexican-style Quinoa

BPoblanos & Quinoaoil 1 cup of water and 1/2 cup your favorite quinoa (a mix of red and yellow is pictured), cover pot and lower to a simmer until quinoa is cooked through, about 12 minutes.

Slice 3-4 poblano peppers in half lengthwise and remove seeds.  Steam pepper halves in a steamer basket until tender-crisp, about 3 minutes. Set aside on a plate.

In small a frying pan, sauté until just soft (about 5 minutes):
1/4 onion
1/4 cup sweet frying peppers
2 cloves minced garlic
1 teaspoon ground cumin
1 teaspoon oregano
1/2 teaspoon smoked paprika

Stir in 1/2 cup cooked black beans and 1/4 cup chopped tomato and heat through.  Keep mixture warm until quinoa is done cooking.

Combine quinoa and vegetable-bean mixture, stirring well. Stuff pepper halves with mix, and enjoy hot or at room temperature. Serve with salsa, guacamole or avocado, cheese, sour cream, cilantro and/or lime wedges.

Post and photo by Mikaela D. Martin: Blooming Glen CSA member since 2005, board-certified health counselor, and co-founder and -owner of Guidance for Growing, an integrative wellness practice in Souderton. Read more about healthy eating and living on her site, http://guidanceforgrowing.com!

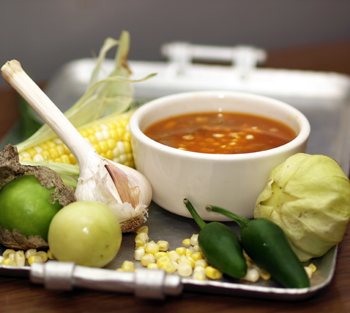
Tomatillos, a staple of Mexican cuisine, have been becoming more and more popular. Known for their unique husk, fresh colors and tart, citrusy flavor, tomatillos are high in the fiber that’s essential for weight, cholesterol and blood sugar management as well as digestive health; vitamin C, which aids everything from our immune system to cancer preventions; and vitamin K, a bone- and blood-supporting vitamin normally found in dark, leafy greens. Their versatile and simple preparation options make getting this nutrition into our diets pretty easy!

Use tomatillos raw for classic Latin American salsas and sauces such as salsa verde and guacamole, chopped and sautéed in stir-fry, or cooked up for soups. The soup below pairs tomatillos with several other players in the Blooming Glen CSA share: flavorful and robust garlic and onion, jalapeño peppers that compliment the citrus flavor of the tomatillo, sweet peppers and corn that temper the tartness of the tomatillos, and potatoes that lighten the spice of the jalapeños.

Tomatillo Jalapeño Soup with Sweet Corn

Sauté 1 large onion, 7 cloves of chopped garlic, 4-6 thinly sliced jalapeños (use seeds for more spice), 1 cup chopped sweet pepper, 1 teaspoon sea salt, 1 1/2 teaspoon cumin and 1 tablespoon chile powder in grapeseed oil in a large, heavy-bottom pot until onion is soft and translucent.

Add 2 cups of chopped tomatillos (to prepare your tomatillos, peel off the husk and then wash the fruit to remove any sticky residue), 1 large diced potato, 4 cups of broth and 1 cup of water to the pot, heat to boiling, and then reduce heat to low. Cover and simmer for 15 minutes.

Stir in a 15-ounce can of cannellini beans, kernels from 3 small ears of sweet corn and 2 tablespoons lime juice. Serve with fresh bread (Bakers on Broad has excellent options, including gluten-free) and toppings such as cilantro, green onion, chives, plain yogurt, sour cream, broken baked tortilla chips and corn kernels.

Post and photo by Mikaela D. Martin: Blooming Glen CSA member since 2005, board-certified health counselor, and co-founder and -owner of Guidance for Growing, an integrative wellness practice in Souderton. Read more about healthy eating and living on her site, http://guidanceforgrowing.com!

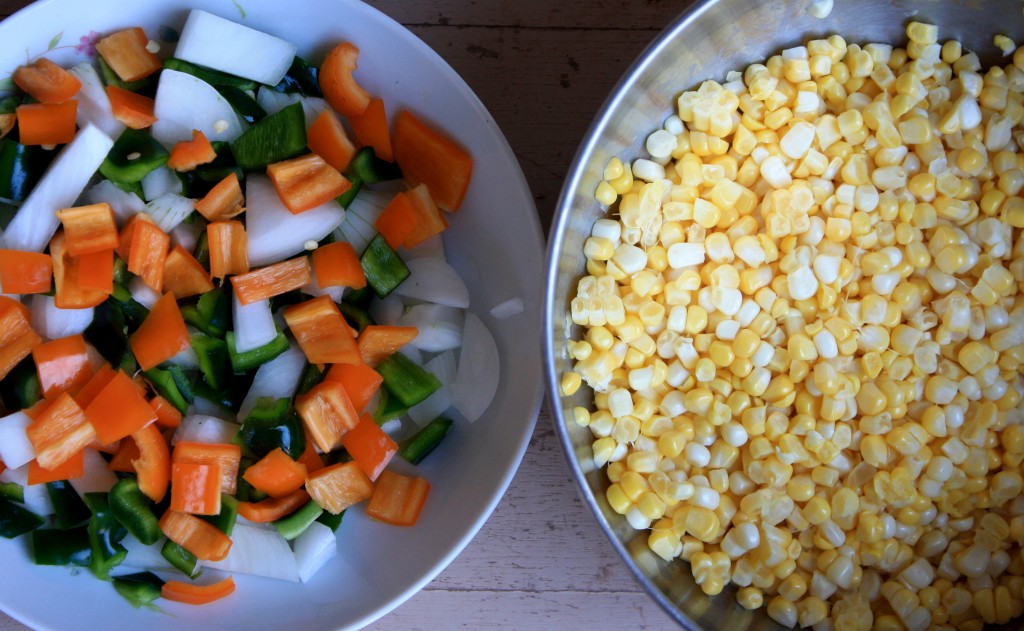
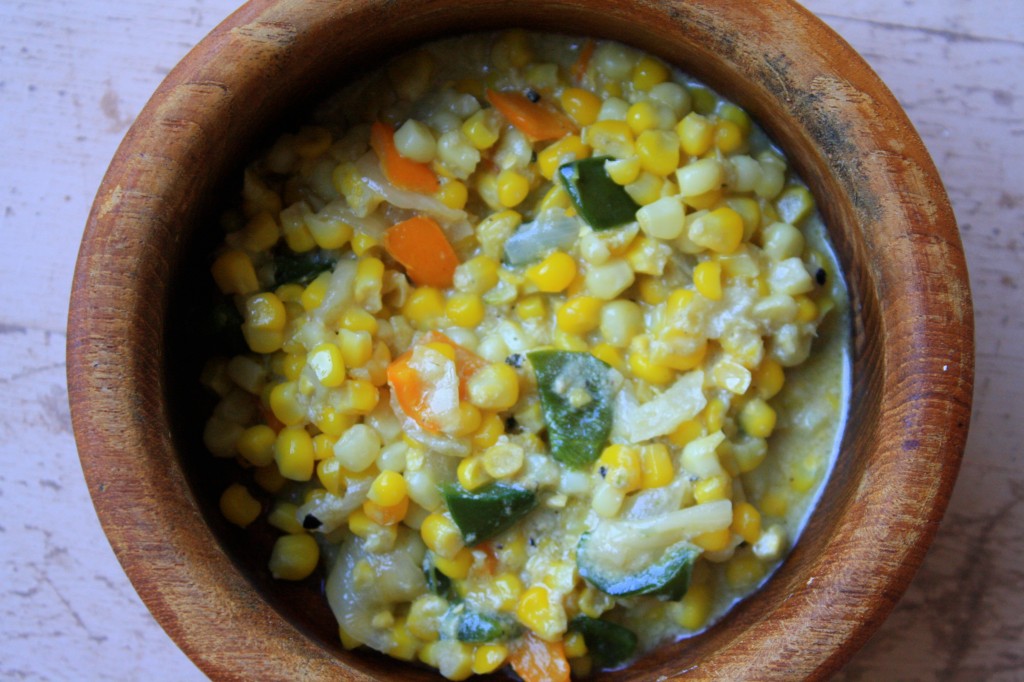
If you can resist the urge to eat all of your sweet corn right off the cob this week, try this deliciously and mildly spicy version of creamed corn with poblano and sweet peppers. It makes a great side dish, but could also be a lovely topping to a taco or simply eaten with corn chips as an appetizer. Serves 4.

Creamed Sweet Corn with Poblanos

-Shuck 6 ears of sweet corn and, with a sharp knife, remove the kernels and set aside in a small bowl

-Melt 2 tablespoons of butter in a pan over medium heat and add:

1 white or red onion, diced
1 poblano pepper, diced with seeds removed
1 sweet pepper, diced with seeds removed
1 clove of garlic, finely minced

-Cook until peppers are tender and onions are translucent

-Toss in corn kernels and salt and pepper generously

-Pour in 1/2 cup of heavy cream and 1/2 cup of chicken or veggie stock and simmer on medium-low heat until thickened (about 15 minutes).

-Let cool slightly and enjoy as a side to mashed potatoes (what I did! : ) ) with tacos, or with your favorite corn chip!

Recipe and photos by Jana Smart- Blooming Glen Farm employee and frequent creator of creative recipes using farm fresh seasonal ingredients. Check out more of her recipes on her food blog http://www.agrarianeats.blogspot.com/

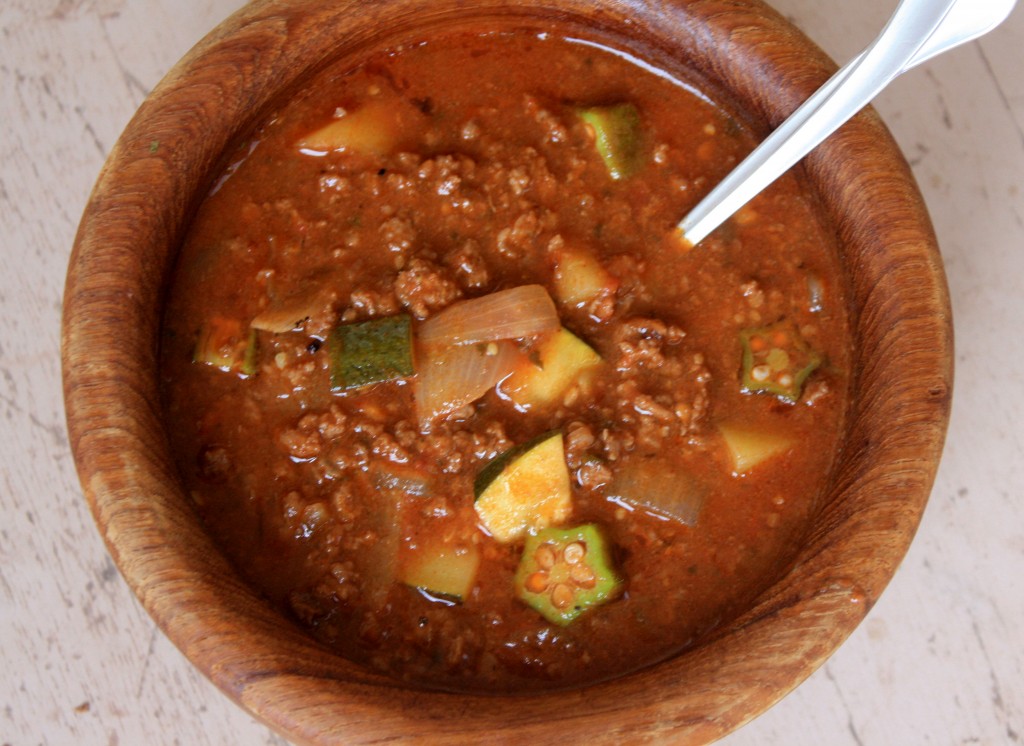
This flavorful chili is a very light and healthy recipe that utilizes a lot of this week’s share–onions, tomatoes, tomatillos, hot peppers, summer squash, and okra. This is a great way to use up some of those items you may not know what to do with. Tomatillos give this chili some sweetness and depth of flavor, while the okra gives it some good texture and acts as a thickener.

Summertime Chili

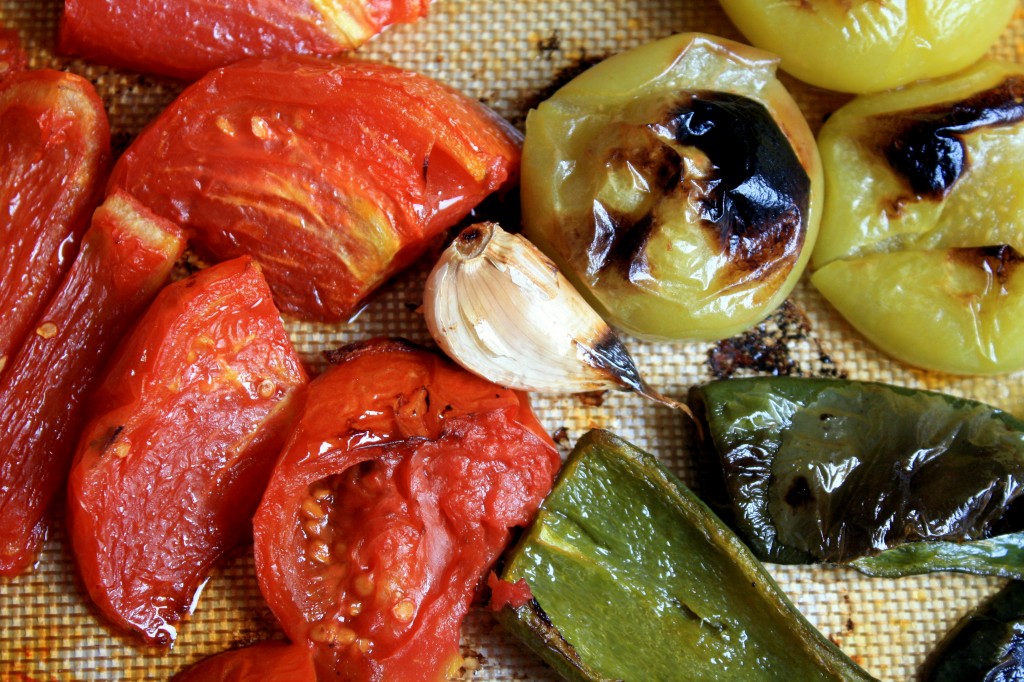
Cut up 2 pounds of tomatoes into quarters and put on baking sheet with:

2 poblano peppers, stem removed and seeded
1 jalapeno, stem removed and seeded (you might want to wear gloves for this step!)
1 pound of tomatillos, husks removed
2 cloves of garlic

-Drizzle all veggies with a little olive oil and place in a 400 degree oven for 20 minutes or until they start to get tender and brown slightly. [**The last 5 minutes I set my oven to BROIL to char the veggies a little bit, but feel free to simply roast if you don’t like that flavor] Set aside to cool.

-Meanwhile, in a large stockpot, saute 1 white onion and 2 cloves of garlic in a few tablespoons of olive oil over medium heat. Cook until translucent and add 2 heaping tablespoons of tomato paste. Mix well.

– Add in with the onions 2 pounds of ground beef (Tussock Sedge Farm is both local and grass-fed) and brown until fully cooked. Salt and pepper generously.

-Place all of the roasted veggies in a food processor with 1 teaspoon of salt, 2-3 tablespoons of chili powder and 1 teaspoon of cumin. Pulse until pureed.

-Add pureed mixture in with the cooked beef and onions along with 2 medium sized summer squash, cut into small pieces, and 1 1/2 cups of chicken or veggie stock

-Bring chili to a boil and then turn down to a low setting and simmer for 45 minutes to an hour, stirring occasionally.

-In the last 15 minutes of cooking, chop up a handful of okra and toss in. This will help thicken the chili and give some additional texture and flavor.

-Let cool a bit and serve alongside some cornbread and maybe a cold beer. ENJOY!

Recipe and photos by Jana Smart- Blooming Glen Farm employee and frequent creator of creative recipes using farm fresh seasonal ingredients. Check out more of her recipes on her food blog http://www.agrarianeats.blogspot.com/